elite pressure cooker manual

Welcome to the Elite Pressure Cooker Manual, your comprehensive guide for models like the Zavor Elite and Elite Platinum. This manual covers setup, safety, features, and troubleshooting to ensure optimal performance and delicious meals.

Overview of the Elite Pressure Cooker Models

The Elite Pressure Cooker lineup includes models like the Zavor Elite (4.2Qt, 6.3Qt, 10Qt), Elite Platinum EPC-807, EPC-808, and EPC-202. These models offer varying capacities and features, catering to different cooking needs. The Elite Platinum series is known for its multi-functional design, while the Zavor Elite models provide large family-sized options. Each model includes digital controls, preset programs, and safety features, ensuring versatility and ease of use. Refer to the specific manual for your model to explore its unique capabilities and settings.

Importance of Reading the Manual

Reading the Elite Pressure Cooker manual is essential for safe and effective operation. It provides critical safety precautions, detailed instructions for model-specific features, and troubleshooting guides. Understanding the components, settings, and proper usage ensures optimal performance and prevents accidents. The manual also helps you unlock the full potential of your cooker, from basic functions to advanced features like pressure canning and preset programs. Refer to it regularly to maintain your appliance and achieve the best cooking results.

Key Features and Benefits of the Elite Pressure Cooker

Experience the Elite Pressure Cooker’s multi-functional cooking, advanced safety features, and energy efficiency. It seals in steam for faster cooking, retains nutrients, and ensures healthier meals effortlessly.

Multi-Functional Cooking Options

The Elite Pressure Cooker offers versatile cooking modes, including pressure cooking, sautéing, steaming, and slow cooking. It allows for effortless preparation of various dishes, from hearty stews to tender meats. With programmable settings, you can customize cooking times and pressures for perfect results every time. Its advanced digital interface ensures easy navigation, making it suitable for both novice and experienced cooks. This multi-functionality enhances culinary creativity and efficiency in the kitchen.

Advanced Safety Features

The Elite Pressure Cooker is equipped with cutting-edge safety features to ensure secure and worry-free cooking. It includes multiple safety sensors, automatic pressure control, and a locking lid that prevents accidental opening. The cooker also features overheating protection and a pressure-release mechanism to avoid excessive build-up. These advanced safety features provide peace of mind while cooking, making it a reliable and safe addition to any kitchen.

Energy Efficiency and Nutrient Retention

The Elite Pressure Cooker excels in energy efficiency, cooking up to 70% faster than traditional methods while using less water. This reduces energy consumption and retains vital nutrients in food. The cooker’s sealed design locks in steam, preserving vitamins and minerals that are often lost in boiling. Its advanced insulation ensures even heat distribution, making it an eco-friendly and healthy choice for preparing nutritious meals without compromising on flavor or texture.

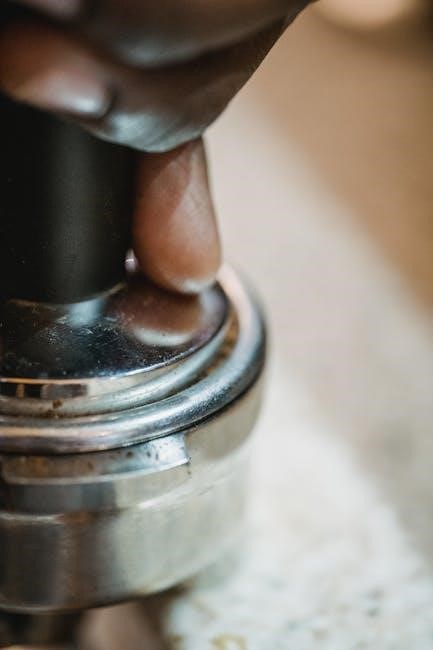
Understanding the Components of the Elite Pressure Cooker

The Elite Pressure Cooker features a durable inner pot, lid with sealing gasket, steam release valve, control panel, and accessories like a steamer basket for versatile cooking.

Identifying the Parts and Accessories

The Elite Pressure Cooker includes essential components like the inner pot, lid with a sealing gasket, steam release valve, and control panel. Accessories such as a steamer basket and trivet are also provided. Each part serves a specific function, ensuring safe and efficient cooking. The manual details each component, helping users identify and understand their roles. Refer to the manual for a visual guide and descriptions to ensure proper assembly and operation of your Elite Pressure Cooker.

Control Panel and Button Functions

The Elite Pressure Cooker’s control panel features intuitive buttons for selecting cooking modes, setting timers, and adjusting pressure levels. Key buttons include the “Meat & Chicken” program, manual pressure control, and the start/stop function. The panel also displays cooking progress and error codes. Refer to the manual for a detailed breakdown of each button’s function, ensuring you maximize the cooker’s versatility and efficiency for various recipes and cooking needs.

Safety Precautions and Guidelines

Always read the manual before use. Avoid touching hot surfaces, keep children away, and ensure proper ventilation. Never operate unattended or immerse the cooker in water.

Basic Safety Rules for Operation

Always read the manual before first use and understand all components. Never operate the cooker unattended or allow children near it. Avoid touching hot surfaces and ensure proper ventilation. Regularly inspect the seal and lid for damage. Do not submerge the cooker in water or use it for non-intended purposes. Keep the area clear of flammable materials and follow pressure release guidelines carefully to avoid accidents. Proper maintenance ensures safety and optimal performance.

Handling Hot Surfaces and Avoiding Accidents

Always handle the pressure cooker’s lid, handles, and base with care, as they may be extremely hot during and after cooking. Use oven mitts or tongs to avoid direct contact with hot surfaces. Keep children away from the cooker while it’s in operation. Never leave the appliance unattended, and ensure the cooking area is clear of flammable materials. Avoid sudden movements that could cause spills or accidents. Follow the manual’s guidelines to prevent burns and ensure safe operation.

Step-by-Step Guide to Using the Elite Pressure Cooker

Prepare ingredients and add them to the pot with the recommended water level.
Close and lock the lid, ensuring it is properly sealed.
Choose the appropriate pressure setting (high or low) based on the food type.
Set the cooking time using the control panel and press start.
After cooking, release pressure either naturally or quickly.
Open the lid carefully and check if the food is cooked to your liking.
Clean all parts thoroughly after use. Follow the manual for specific guidance.

Initial Setup and Preparation

Unpack your Elite Pressure Cooker and inspect for damage. Wash the inner pot, lid, and accessories with warm soapy water. Dry thoroughly before first use. Place the cooker on a stable, heat-resistant surface. Plug in the power cord and ensure all parts are securely assembled. Add water to the inner pot for a test run to ensure proper function. Familiarize yourself with the control panel and buttons. Read the manual carefully to understand all features and settings before cooking.

Programming the Pressure Cooker

Locate the control panel and press the desired program button, such as MEAT & CHICKEN or MANUAL. Use the “+” or “-” buttons to adjust cooking time and pressure level. For manual mode, select the cooking time (e.g., 17 minutes) and pressure setting. Ensure the lid is locked securely before starting. Press “START” to begin the cycle. Allow the cooker to pressurize naturally or use the quick-release valve as needed. Do not leave the cooker unattended during operation.

Monitoring and Adjusting Cooking Settings

Monitor the cooking process through the control panel, which displays time, pressure, and program status. Adjust settings using the “+” or “-” buttons to increase or decrease cooking time. For manual mode, press the MANUAL button and set the desired time and pressure level. Ensure the lid is securely locked before starting. Once cooking begins, avoid opening the lid until the pressure naturally releases or use the quick-release valve carefully. Always monitor progress to achieve optimal results.

Cooking Techniques and Time Guidelines

Master various techniques like pressure cooking, simmering, and sautéing. Refer to guidelines for specific foods, ensuring optimal cooking times and nutrient retention with multi-functional capabilities.

Pressure Cooking Times for Common Foods

Discover ideal cooking times for popular ingredients using your Elite Pressure Cooker. Eggs cook to perfection in 5 minutes, while chicken breasts and thighs require 8-12 minutes. Ground meats like beef or turkey take 5-7 minutes, and vegetables such as carrots or green beans need 3-5 minutes. Adjust times based on portion size and desired texture for consistent results. Refer to the manual for detailed charts and guidelines tailored to your model.

Using the Meat & Chicken Program

The Meat & Chicken program simplifies cooking poultry and meats to perfection. Press the dedicated button or manually set the timer for 17 minutes, ideal for chicken breasts or thighs. This program ensures even cooking and locks in flavors. For ground meats or stews, adjust the timer based on thickness or quantity. The Elite Pressure Cooker’s advanced sensors maintain optimal pressure, delivering tender and juicy results every time. Follow manual guidelines for precise cooking times tailored to your recipe.

Troubleshooting Common Issues

Identify and resolve error codes, leaks, or pressure issues by consulting the manual. Regular maintenance and proper handling prevent malfunctions, ensuring optimal performance and safety.

Resolving Error Codes and Malfunctions

Refer to your Elite Pressure Cooker manual for specific error codes and solutions. Common issues include faulty sensors or clogged valves. Power cycle the device, clean components, and ensure proper sealing. If error persists, consult the troubleshooting section or contact customer support for assistance. Regular maintenance can prevent malfunctions, ensuring safe and efficient operation. Always follow the manual’s guidelines for resolving specific error codes and addressing mechanical issues promptly.

Addressing Leaks or Pressure Issues

If you notice leaks or pressure issues, ensure the lid is properly sealed and aligned. Check the gasket for cleanliness and damage, replacing it if necessary. Verify that the valve is clean and functioning correctly. If pressure remains uneven, reset the cooker and consult the manual for specific troubleshooting steps. Persistent issues may require professional assistance to ensure safe and efficient operation. Regular maintenance helps prevent such problems.

Maintenance and Cleaning Tips

Regular cleaning ensures optimal performance. Wash parts after use, check for blockages, and store properly. Deep clean monthly to maintain efficiency and longevity.

Regular Cleaning and Maintenance

Regular cleaning is essential for maintaining your Elite Pressure Cooker’s performance. Wash the lid, gasket, and pot with warm soapy water after each use. Check the steam vent and valve for blockages and clean thoroughly. Dry all parts to prevent rust. For tougher stains, soak components before scrubbing. Refer to the manual for specific cleaning instructions tailored to your model to ensure longevity and safety.

Storing the Pressure Cooker Properly

Store your Elite Pressure Cooker in a cool, dry place to prevent rust and damage. Ensure all parts are completely dry after cleaning to avoid moisture buildup. Keep the lid, gasket, and accessories separate to maintain shape and functionality. Avoid stacking heavy objects on the cooker. Store out of children’s reach for safety. Regularly inspect stored components for signs of wear or damage before reuse.

Downloading and Navigating the Manual

Visit the official Elite website or click the provided link to download the PDF manual for models like Zavor Elite or Elite Platinum. Ensure compatibility with your cooker model for accurate guidance.

Navigate the manual using the table of contents or search function for specific topics. Save the document for easy access and future reference while cooking or troubleshooting.

Accessing the PDF Manual Online

To access the Elite Pressure Cooker manual, visit the official Elite website or click the provided link. Models like Zavor Elite and Elite Platinum are available for download. Ensure you select the correct model (e.g., ZCWEL01, ZCWEL02, or ZCWEL03) for accurate instructions. The manual is available in English and PDF format, offering detailed guidance for setup, operation, and troubleshooting. Save the document for easy reference to optimize your cooking experience and maintain your appliance effectively.

Understanding the Manual Structure

The Elite Pressure Cooker manual is structured to guide users through safe and effective operation. It begins with an introduction, followed by key features, safety guidelines, and step-by-step usage instructions. The manual also includes sections on cooking techniques, troubleshooting, and maintenance. FAQs and detailed diagrams are provided for clarity. Each section is logically organized to ensure easy navigation, making it a valuable resource for both new and experienced users. The manual is available in English and formatted as a PDF for convenient access.

Frequently Asked Questions (FAQs)

Common queries include resolving error codes, addressing leaks, and understanding cooking times. The manual provides detailed solutions and guides for optimal usage and troubleshooting.

Common Queries About the Elite Pressure Cooker

Users often ask about error codes, pressure issues, and cooking times. The manual addresses these with troubleshooting guides and step-by-step solutions for optimal performance and safety. It also covers basics like initial setup, programming, and maintenance, ensuring users can resolve common issues efficiently and enjoy their cooking experience with the Elite Pressure Cooker.

hayward power flo lx pump manual

The Hayward PowerFlo LX pump is a high-performance, energy-efficient solution designed for above-ground and on-ground pools․ Its durable construction and advanced features ensure reliable operation, making it ideal for pool owners seeking a quiet and powerful pumping system․ Compatible with Hayward’s wide range of accessories, this pump offers flexibility and superior performance for optimal pool maintenance․

Safety Precautions

Always follow safety guidelines when handling the Hayward PowerFlo LX pump․ Use genuine Hayward replacement parts and ensure proper installation to avoid hazards․ Keep electrical connections secure, and never operate the pump without water to prevent damage or injury․

2․1 General Safety

Always follow safety guidelines when handling the Hayward PowerFlo LX pump․ Use genuine Hayward replacement parts to ensure proper function and safety․ Install the pump below the pool water line for optimal performance and to prevent damage․ Keep electrical connections secure and avoid overloading circuits․ Never operate the pump without water, as this can cause overheating and damage․ Regularly inspect the pump and surrounding area for wear or damage․ Follow all local codes and regulations during installation and operation․ Protect the pump from freezing temperatures to maintain longevity and performance․

2․2 Electrical Safety

Ensure all electrical connections for the Hayward PowerFlo LX pump comply with local codes and regulations․ Use a dedicated GFCI-protected circuit to prevent electrical hazards․ Never submerge the pump in water or expose it to moisture during installation or operation․ Avoid overloading circuits, as this can cause tripping or damage․ Regularly check the power cord and connections for wear or damage․ If a power outage occurs, inspect the GFCI and ensure it hasn’t tripped before restarting the pump․ Always disconnect the pump from power before performing maintenance or repairs to ensure safety and prevent electrical shock․

Installation

The Hayward PowerFlo LX pump must be installed below the pool water line on a firm, level base, following all local and national codes․ Ensure proper electrical connections by qualified personnel for safe operation․

3․1 General Instructions

Installation of the Hayward PowerFlo LX pump requires careful planning to ensure proper function and safety․ The pump must be located below the pool water line on a firm, level surface, following local and national codes․ Use only Hayward genuine replacement parts to maintain performance and warranty validity․ Ensure the pump is positioned to allow easy access for maintenance․ Proper electrical connections must be made by qualified personnel, adhering to all safety standards․ Follow the manufacturer’s guidelines for priming and initial start-up to prevent damage and ensure efficient operation․

3․2 Pump Location and Positioning

Position the Hayward PowerFlo LX pump below the pool water line to ensure proper priming and prevent air leaks․ For self-priming models, installation up to four feet above the water line is permissible․ Place the pump on a level, firm base to avoid vibration and noise․ Ensure the strainer housing is accessible for routine maintenance․ The pump should be located away from direct sunlight and protected from freezing temperatures․ Proper positioning ensures efficient operation, reduces wear, and extends the lifespan of the pump․

3․3 Electrical Connections

Ensure the Hayward PowerFlo LX pump is installed by a qualified electrician, following local codes and regulations․ Use a Ground Fault Circuit Interrupter (GFCI) to protect against electrical hazards․ Connect the pump using a twist-lock cord, ensuring all connections are watertight to prevent damage․ Avoid modifying the pump’s electrical system, as this can void the warranty․ Ensure the pump is properly grounded and connected to a dedicated circuit that matches the pump’s power requirements, as specified in the manual․ Test the GFCI after installation to ensure proper function and safety․

Operation

The Hayward PowerFlo LX pump operates efficiently, providing high flow rates for clean pool water․ Its insulated motor ensures quiet operation, while the twist-lock cord offers easy connection․ Designed for above-ground pools, it delivers consistent performance with minimal noise, making it ideal for daily use․ Follow the manual’s guidelines for optimal operation and maintenance to ensure longevity and reliability․

4․1 Start-Up Guide

Before starting the Hayward PowerFlo LX pump, ensure all connections are secure and the strainer is filled with water to prevent air leaks․ Prime the pump by filling the strainer housing with water to the suction pipe level․ Connect the power cord to a GFCI-protected outlet, ensuring the circuit matches the pump’s requirements․ Turn on the power and check for proper operation․ Verify that water flows freely and there are no leaks․ Once operational, set the timer according to your preferred schedule․ Always refer to the manual for specific start-up procedures to ensure safe and efficient operation․

4․2 Flow Control and Adjustments

Adjust the Hayward PowerFlo LX pump’s flow rate by modifying the valve settings on the pool and return lines․ Ensure the filter system is clean to maintain optimal flow․ Monitor the pump’s pressure gauge and adjust as needed to prevent overloading․ Regularly inspect and clean the strainer basket to avoid restrictions․ For variable-speed models, use the control interface to set desired speeds․ Always follow the manufacturer’s guidelines for flow adjustments to ensure efficient and safe operation․ Proper flow control helps maintain clean water and prolongs equipment life․

4․3 Regular Operation

Ensure the Hayward PowerFlo LX pump operates within recommended settings for optimal performance․ Maintain proper water levels in the pool and check for blockages in suction or return lines․ Regularly clean the strainer basket to prevent debris buildup․ Monitor the pump’s pressure gauge and adjust flow valves as needed․ For continuous operation, ensure the pump runs during the recommended daily cycle․ Address any unusual noises or vibrations promptly to avoid damage․ Proper maintenance ensures efficiency, extends equipment life, and keeps your pool water clean and clear․

Maintenance

Regular maintenance of the Hayward PowerFlo LX pump ensures efficient operation․ Clean the strainer basket frequently and inspect the impeller for debris․ Lubricate mechanical seals annually and check for worn-out parts․ Replace the shaft seal if leaks occur․ Store the pump in a dry place during winter to prevent freezing․ Always use genuine Hayward replacement parts for longevity and performance․

5․1 Routine Maintenance

Regular maintenance ensures optimal performance of the Hayward PowerFlo LX pump․ Clean the strainer basket weekly and after heavy use to prevent clogging․ Inspect the impeller for debris and ensure it is free of obstructions․ Lubricate the mechanical seal every six months to maintain efficiency․ Check the pump housing and motor for any signs of wear or damage․ Replace worn-out parts promptly using genuine Hayward replacement parts․ Regularly inspect electrical connections for tightness and signs of wear․ Maintain proper water levels and ensure the pump operates within recommended pressure ranges․ Store the pump in a dry, protected area during the off-season to prevent damage․

5․2 Winterizing the Pump

To winterize the Hayward PowerFlo LX pump, start by draining the pump and connected lines․ Disconnect the electrical connections and ensure the pump is free from water to prevent freezing damage․ Inspect the pump and motor for any signs of wear or damage, and repair or replace parts as needed․ Apply a rust-inhibiting lubricant to moving parts and store the pump in a dry, protected area․ Ensure all electrical components are secure and protected from moisture․ Follow local winterizing guidelines and consult the manual for specific instructions to ensure proper protection during the off-season․

Troubleshooting

Common issues include low flow, pump not starting, or unusual noise․ Check for clogged filters, blocked suction lines, or electrical faults․ Refer to the manual for diagnostic steps and solutions to address specific problems effectively․

6․1 Common Issues and Solutions

Common issues with the Hayward PowerFlo LX pump include low flow, pump not starting, or unusual noise․ Check for clogged filters or blocked suction lines, which can restrict water flow․ Ensure all electrical connections are secure and verify that the GFCI has not tripped․ For noise issues, inspect the impeller for debris or misalignment․ If the pump fails to start, check the circuit breaker or fuses․ Regularly cleaning the strainer and ensuring proper water levels can prevent many issues․ Refer to the manual for detailed troubleshooting steps․

6;2 Diagnostic Techniques

Diagnosing issues with the Hayward PowerFlo LX pump involves checking the strainer, suction lines, and electrical connections․ Ensure the strainer is clean and free of debris․ Verify that all suction lines are clear and properly connected․ For electrical issues, check the circuit breaker and GFCI․ Monitor the pump’s operation for unusual noises or vibrations, which may indicate misalignment or blockages․ Perform a vacuum test to ensure the pump develops proper suction․ If the pump fails to prime, inspect for air leaks or insufficient water levels․ Regular inspection of the motor and impeller can help identify potential issues early․

Parts and Accessories

The Hayward PowerFlo LX pump is supported by a range of genuine replacement parts, including impellers, housing nuts, and motor components․ Using only Hayward-approved parts ensures optimal performance and longevity․ Key accessories include the strainer housing, suction and discharge pipes, and electrical connectors․ Regularly inspect and replace worn or damaged parts to maintain efficiency․ For detailed part numbers and diagrams, refer to the official Hayward parts catalog or consult authorized dealers․ Genuine Hayward parts are designed to meet specific safety and performance standards, ensuring reliable operation of the pump․ Always verify compatibility before installing any accessory or replacement part․

Technical Specifications

The Hayward PowerFlo LX pump is designed for above-ground and on-ground pools, offering high-performance capabilities with a durable, corrosion-resistant construction․ It features a self-priming design and a high-efficiency motor for reliable operation․ The pump delivers a maximum flow rate of 40 gallons per minute, with a horsepower range to suit various pool sizes․ Its insulated motor housing ensures quiet operation, while the twist-lock cord provides easy connectivity․ Compatible with sand filters and other pool systems, the PowerFlo LX pump is built for durability and efficiency, making it a versatile choice for pool owners seeking consistent performance․

Compliance with Local Codes

The Hayward PowerFlo LX pump is designed to meet local and national safety standards, ensuring compliance with regulatory requirements․ Installation must adhere to local electrical and plumbing codes, with all wiring performed by qualified personnel․ The pump’s design and operation align with industry standards for safety and efficiency․ Proper installation, including placement below the pool water line for non-self-priming models, ensures compliance with safety regulations․ Always consult local authorities to verify specific requirements for your area before installation․

Hayward Customer Support and Resources

Hayward Pool Products is committed to providing exceptional customer support and resources․ For inquiries about the PowerFlo LX pump, contact Hayward’s corporate headquarters at 620 Division Street, Elizabeth, NJ 07207, or call (908) 355-7995․ Visit their website at www․haywardnet․com for detailed product information, manuals, and troubleshooting guides․ Hayward offers a comprehensive parts guide, warranty details, and online resources to ensure optimal performance and maintenance of your PowerFlo LX pump․ Customers can also access instructional videos and FAQs for additional support․

Storage and Transportation

Proper storage and transportation of the Hayward PowerFlo LX pump are essential to maintain its performance and longevity․ When storing, ensure the pump is dry and protected from freezing temperatures․ Disconnect all electrical connections and drain any water from the system․ Store the pump in a cool, dry place away from direct sunlight․ During transportation, secure the pump to prevent movement and potential damage․ Always follow the manufacturer’s guidelines for handling and storing the Hayward PowerFlo LX pump to ensure safe and effective operation when reinstalling․

Warranty Information

The Hayward PowerFlo LX pump is backed by a limited warranty that covers defects in materials and workmanship․ The warranty period varies depending on the specific model and usage, typically ranging from 1 to 3 years․ To maintain warranty validity, the pump must be installed and maintained according to the manufacturer’s instructions․ Use of genuine Hayward replacement parts is required․ For warranty claims, contact Hayward’s customer support or an authorized dealer․ Proper documentation, including proof of purchase, may be requested․ The warranty does not cover damage caused by improper installation or misuse․

theory and practice of counseling and psychotherapy pdf

Counseling and psychotherapy are essential tools for mental health, blending theory and practice to address human challenges. Key resources like Gerald Corey’s works offer a balanced approach, combining theoretical foundations with practical applications, enabling practitioners to develop effective counseling styles and apply evidence-based interventions in diverse clinical settings.

1.1. Historical Context and Overview

Counseling and psychotherapy have evolved significantly over the past century, rooted in early 20th-century psychological theories. Key figures like Freud and Adler laid the groundwork, while later movements, such as humanistic and cognitive-behavioral approaches, expanded the field. The integration of diverse theories and practices has shaped modern counseling, emphasizing evidence-based interventions and cultural sensitivity. Historical developments highlight the profession’s adaptability, ensuring relevance in addressing contemporary mental health challenges.

1.2. Basic Principles of Counseling and Psychotherapy

Core principles of counseling and psychotherapy include participation, individualization, confidentiality, and effective communication. These foundations ensure a safe, non-judgmental environment, fostering trust between therapist and client. Acceptance, empathy, and unconditional positive regard are vital, promoting self-awareness and personal growth. These principles guide ethical practice, ensuring tailored approaches to meet unique client needs while respecting diversity and promoting autonomy. They form the cornerstone of effective therapeutic relationships, enabling meaningful change and empowerment.

Major Theories in Counseling and Psychotherapy

Major theories include psychoanalytic, Adlerian, existential, person-centered, Gestalt, and cognitive-behavioral approaches. Each provides unique frameworks for understanding human behavior and guiding therapeutic interventions in diverse settings.

2.1. Psychoanalytic, Adlerian, and Existential Approaches

Psychoanalytic theory, developed by Freud, emphasizes unconscious thoughts and childhood experiences. Adlerian therapy focuses on social interests and striving for superiority. Existential approaches highlight personal responsibility and meaning-making. These theories provide distinct lenses for understanding human behavior and emotional struggles, offering therapists diverse tools for addressing client needs in clinical settings.

  • Psychoanalytic: Explores unconscious conflicts and repression.
  • Adlerian: Emphasizes social context and goal-oriented behavior.
  • Existential: Focuses on freedom, choice, and life meaning.

2.2. Person-Centered, Gestalt, and Reality Therapies

Person-centered therapy, developed by Carl Rogers, emphasizes empathy, unconditional positive regard, and client autonomy. Gestalt therapy, founded by Fritz Perls, focuses on awareness of the present moment and holistic processing of experiences. Reality therapy, created by William Glasser, concentrates on personal responsibility and fulfilling basic needs. These approaches prioritize client empowerment, self-awareness, and practical problem-solving, offering therapists versatile frameworks for fostering personal growth and change in diverse clinical settings.

  • Person-Centered: Centers on client self-actualization.
  • Gestalt: Highlights awareness and integration of experiences.
  • Reality: Emphasizes responsibility and need fulfillment.

2.3. Cognitive-Behavioral, Family Systems, and Feminist Theories

Cognitive-behavioral therapy (CBT) focuses on identifying and changing negative thought patterns and behaviors. Family systems theory examines interpersonal dynamics within families, addressing relational patterns and communication. Feminist theories emphasize empowerment, social justice, and the impact of societal gender roles on mental health. These approaches provide diverse frameworks for understanding and addressing client issues, promoting evidence-based interventions and holistic care in clinical practice.

  • CBT:Targets maladaptive thoughts and behaviors.
  • Family Systems:Explores relational dynamics.
  • Feminist:Advocates for social justice and empowerment.

Practical Applications of Counseling and Psychotherapy

Counseling and psychotherapy are applied through case studies, evidence-based practices, and real-world examples. Techniques like role-playing and simulations help practitioners develop skills, ensuring effective client interventions and outcomes.

3.1. Case Studies and Real-World Examples

Case studies and real-world examples are integral to counseling and psychotherapy, offering practical insights into theoretical applications. Resources like Gerald Corey’s works demonstrate how theories are applied to real clients, such as the case of “Stan,” illustrating interventions across diverse approaches. Role-playing and simulations are used to train practitioners, enabling them to understand and apply evidence-based practices effectively. These examples highlight the importance of adaptability and cultural sensitivity in addressing client needs, ensuring interventions are tailored to individual circumstances and promote meaningful outcomes.

3.2. Evidence-Based Practices and Interventions

Evidence-based practices in counseling and psychotherapy integrate research, clinical expertise, and client preferences to ensure effective interventions. Cognitive Behavioral Therapy (CBT), for instance, is widely recognized for its structured approach, often requiring 5 to 20 sessions. Digital platforms and mindfulness-based interventions are increasingly used to enhance accessibility and personalization. These evidence-supported methods are tailored to individual needs, ensuring interventions are both effective and adaptable, thereby promoting improved mental health outcomes.

Cultural and Individual Considerations

Cultural and individual differences play a crucial role in counseling and psychotherapy. Practitioners must embrace diversity, ensuring inclusivity and cultural sensitivity to build trust and effective therapeutic relationships.

4.1. Diversity, Inclusion, and Cultural Sensitivity

Cultural sensitivity is vital in counseling and psychotherapy, ensuring therapists respect and understand clients’ diverse backgrounds. Practitioners must address individual differences, including race, gender, and socioeconomic status, to foster trust and empathy. Inclusivity involves adapting interventions to meet unique needs, while remaining aware of personal biases. Effective therapy requires cultural competence, enabling therapists to navigate complexities and promote equitable care. This approach enhances therapeutic alliances and improves outcomes for clients from all walks of life.

Ethical and Legal Aspects

Ethical standards, including confidentiality and informed consent, are cornerstone principles in counseling and psychotherapy. Adhering to legal requirements ensures accountability and fosters trust in the therapeutic relationship.

5.1. Confidentiality, Informed Consent, and Professional Standards

Confidentiality is a cornerstone of counseling and psychotherapy, ensuring clients’ privacy and trust. Informed consent requires clear communication of treatment goals, risks, and boundaries. Professional standards, such as those outlined in ethical codes, guide practitioners to maintain integrity, avoid harm, and respect client autonomy. These principles are legally binding and essential for fostering a safe and respectful therapeutic relationship.

The Role of Mindfulness and Narrative Therapy

Mindfulness and narrative therapy integrate well in counseling, fostering emotional regulation and self-awareness. Mindfulness practices encourage present-moment focus, while narrative techniques help reframe life stories, promoting personal growth and resilience.

6.1. Mindfulness Practices in Clinical Settings

Mindfulness practices, such as meditation and breathing exercises, are increasingly used in clinical settings to enhance emotional regulation and reduce stress. These techniques, rooted in present-moment awareness, help clients develop self-awareness and manage distressing emotions. Research supports their effectiveness in improving mental health outcomes, particularly for anxiety and depression. Mindfulness-based interventions are often integrated with other therapies, offering a holistic approach to healing and personal growth. Studies highlight their benefits in fostering resilience and improving therapeutic relationships.

Training and Development in Counseling and Psychotherapy

Training involves academic study, supervised practice, and ongoing professional development to ensure effective client support. Educational requirements and certifications are critical for building competence and ethical standards.

7.1. Educational Requirements and Professional Certification

Education in counseling and psychotherapy typically requires a master’s or doctoral degree in counseling, psychology, or a related field. Supervised clinical experience and internships are essential. Professional certifications, such as Licensed Professional Counselor (LPC) or Licensed Marriage and Family Therapist (LMFT), are often required. Certifications like National Certified Counselor (NCC) or Diplomate in Counseling Psychology highlight expertise. Ongoing professional development and cultural competence training are vital for maintaining certifications and providing ethical, effective care to diverse populations.

Future Trends in Counseling and Psychotherapy

Advancements in digital platforms and telehealth are revolutionizing access to therapy, offering innovative ways to deliver mental health services globally and fostering greater client engagement and convenience.

8.1. Digital and Online Therapy Platforms

Digital and online therapy platforms are transforming mental health care, offering convenient access to counseling services. Telehealth tools, video conferencing, and mobile apps enable remote sessions, expanding reach to underserved populations. These platforms incorporate AI-driven assessments and personalized interventions, enhancing treatment efficacy. Studies highlight the importance of trust and ethical considerations in digital therapy, ensuring confidentiality and security. The integration of online platforms with traditional practices is reshaping the future of counseling, making mental health support more accessible and flexible for diverse client needs.

Essential textbooks like Corey’s Theory and Practice of Counseling and Psychotherapy and Sommers-Flanagan’s Counseling and Psychotherapy Theories in Context and Practice provide comprehensive insights. These resources, along with Nelson-Jones’ works, offer practical applications and evidence-based practices, serving as invaluable tools for further study and professional development in the field.

9.1. Recommended Textbooks and Research Materials

Key resources include Gerald Corey’s Theory and Practice of Counseling and Psychotherapy (11th Edition) and John Sommers-Flanagan’s Counseling and Psychotherapy Theories in Context and Practice (3rd Edition). These texts provide in-depth exploration of major theories and practical applications. Additional materials like Nelson-Jones’ Theory and Practice of Counseling and Psychotherapy offer comprehensive insights. These works, published by reputable presses like Wiley and Sage, are essential for students and practitioners seeking evidence-based practices and clinical techniques to enhance their skills and understanding of the field.

bible recap reading plan 2023 pdf

The Bible Recap Reading Plan 2023 offers a structured, chronological approach to reading the entire Bible in one year, providing daily summaries and flexible scheduling for deeper spiritual growth and understanding.

Overview of the Plan

The Bible Recap Reading Plan 2023 is a well-structured, one-year program designed to help readers explore the entire Bible in chronological order. Divided into four quarterly sections, each lasting 13 weeks, the plan provides a clear roadmap for daily readings. It includes five days of reading per week, with built-in flexibility to accommodate busy schedules and catch-up days. This format ensures consistency while allowing for pauses or missed days. The plan emphasizes understanding the Bible in context, with daily recaps and summaries available to enhance comprehension. Accessible as a free PDF download, it offers a user-friendly layout with weekly readings and corresponding dates, making it easy to stay organized and engaged throughout the year.

Structure of the Bible Recap Reading Plan

The plan is divided into four quarters, each lasting 13 weeks, with five days of reading per week, ensuring a balanced and manageable approach to completing the Bible in a year.

Four Quarters and 13-Week Divisions

The Bible Recap Reading Plan 2023 is thoughtfully organized into four quarters, each spanning 13 weeks. This structure ensures a steady pace, allowing readers to cover the entire Bible systematically. Each quarter focuses on specific sections of Scripture, maintaining a chronological flow. The 13-week divisions provide manageable chunks, helping readers stay on track without feeling overwhelmed. This format also accommodates flexibility, with built-in catch-up days to handle missed readings. By dividing the year into four equal parts, the plan offers a clear roadmap, making the journey through the Bible both organized and achievable. This approach ensures readers can deepen their understanding while maintaining consistency in their reading habits throughout the year.

Five Days of Reading Per Week

The Bible Recap Reading Plan 2023 is designed with a manageable five-day reading schedule. This allows for two days of flexibility each week, accommodating busy lifestyles and unforeseen circumstances. Readers can easily catch up on missed readings within the same week, ensuring consistency. The five-day structure breaks down the Bible into daily portions, maintaining a balanced and achievable pace. This approach helps prevent burnout and keeps the reading experience enjoyable. By dedicating five days to reading, participants can systematically progress through the Bible while having weekends or other days off for reflection or personal time. This flexible yet structured plan supports long-term commitment and spiritual growth throughout the year. The two additional days also serve as a buffer, making it easier to stay on track with the reading schedule. This balance between structure and flexibility ensures that readers can maintain their commitment without feeling overwhelmed, fostering a sustainable and meaningful reading habit.

Key Features of the Bible Recap Reading Plan

The plan offers chronological reading, daily recaps, flexible scheduling, and online support, enhancing understanding and engagement with Scripture throughout the year.

Chronological Order of Readings

The Bible Recap Reading Plan 2023 is structured around a chronological order, allowing readers to experience the Bible’s events as they occurred historically; This approach helps readers understand the context and connections between different stories, themes, and characters. The plan divides the Bible into four quarters, each lasting 13 weeks, with five days of reading per week. This format ensures a steady pace while maintaining the flow of the biblical narrative. By reading in chronological order, readers gain a deeper appreciation of how God’s story unfolds, from creation to redemption. The plan also incorporates Psalms throughout the year, providing spiritual reflection alongside the historical accounts, and includes catch-up days for flexibility, ensuring no one falls behind in their reading journey.

Daily Recaps and Summaries

The Bible Recap Reading Plan 2023 includes daily recaps and summaries to enhance understanding and engagement. These summaries, often provided by Tara-Leigh Cobble, offer insights into the day’s readings, highlighting key themes and connections. The recaps are available online and through a podcast, making them accessible for everyone. They help readers grasp the context and significance of each passage, fostering a deeper appreciation of Scripture. The summaries are concise yet meaningful, enabling readers to reflect on the daily readings and apply the teachings to their lives. This feature is particularly useful for those seeking to connect the dots between different parts of the Bible and understand the overarching narrative. The daily recaps serve as a valuable companion, ensuring a more enriching and impactful reading experience throughout the year.

Flexibility and Catch-Up Days

The Bible Recap Reading Plan 2023 is designed with flexibility in mind, offering catch-up days to accommodate busy schedules or unexpected interruptions. The plan operates on a five-day-per-week reading schedule, allowing two days for rest, reflection, or catching up on missed readings. This structure ensures that readers can stay on track without feeling overwhelmed, even if life circumstances prevent them from reading daily. The built-in flexibility makes the plan accessible to individuals with varying commitments, enabling them to complete the entire Bible in a year without stress. Additionally, the plan’s online availability as a free PDF download further enhances its convenience, providing readers with the freedom to adjust their pace as needed. This adaptable approach fosters consistency and makes the reading experience enjoyable and sustainable.

Benefits of the Bible Recap Reading Plan

The plan enhances biblical understanding through daily recaps, fostering deeper connections to Scripture. It promotes consistency with flexible scheduling and provides a supportive online community for encouragement.

Deeper Understanding of Scripture

The Bible Recap Reading Plan 2023 is designed to enhance your comprehension of Scripture by reading the Bible chronologically. This approach allows readers to understand the historical and thematic connections between different books, making the narrative flow more coherent. By following the timeline of events, readers can see how stories and teachings build upon each other, providing a clearer picture of God’s character and redemptive plan. The chronological order helps in grasping the context of each passage, enabling a more meaningful engagement with the text. This structured method ensures that readers gain a holistic understanding of the Bible, fostering a deeper appreciation for its unified message and spiritual significance.

Daily Summaries for Clarity

The Bible Recap Reading Plan 2023 includes daily summaries to enhance clarity and understanding. These summaries, provided by Tara-Leigh Cobble, are concise and written in everyday language, making complex biblical concepts accessible. Each day’s reading is accompanied by a brief recap, highlighting key themes, events, and connections between passages. This feature helps readers grasp the context and significance of what they’ve read, even if they’re new to studying the Bible. The summaries also emphasize how different parts of Scripture relate to one another, fostering a clearer understanding of the overall narrative. By breaking down the material into digestible portions, the daily summaries make the Bible more approachable and engaging, ensuring readers stay on track and gain meaningful insights throughout their journey.

Online Community and Support

The Bible Recap Reading Plan 2023 fosters a strong online community, providing support and encouragement for readers. Through social media groups, forums, and the podcast, participants can connect with others following the same plan. Tara-Leigh Cobble, the creator, engages with the community, offering insights and motivation. This collective journey creates accountability and camaraderie, helping readers stay committed to their spiritual growth. The online platform also hosts discussions, allowing participants to share thoughts and reflections, deepening their understanding of Scripture. With access to a supportive network, readers can overcome challenges and celebrate milestones together, making the experience more enriching and enjoyable. The community aspect is a vital part of the plan, ensuring no one feels isolated in their year-long Bible reading endeavor.

Accessibility of the Bible Recap Reading Plan

The Bible Recap Reading Plan 2023 is easily accessible as a free PDF download online, ensuring everyone can participate without cost or hassle, anytime and anywhere.

Free PDF Download

The Bible Recap Reading Plan 2023 is conveniently available as a free PDF download, ensuring accessibility for everyone. This downloadable format allows users to easily access the plan from any device, whether on a tablet, smartphone, or computer. The PDF can also be printed, offering flexibility for those who prefer a physical copy. By eliminating costs and logistical barriers, the free download makes it simple for anyone to embark on this spiritual journey. The plan’s availability in PDF ensures that readers can stay organized and focused throughout the year, with all readings and summaries neatly outlined in one place. This feature underscores the plan’s commitment to making Bible study accessible, convenient, and enjoyable for all participants. The free PDF download is a key component of the plan’s user-friendly design.

Online Availability

The Bible Recap Reading Plan 2023 is readily available online, making it accessible to anyone with an internet connection. Users can easily access the plan through the official website or via the YouVersion Bible App, ensuring convenience and portability. The online format allows readers to follow the plan on their preferred device, whether at home, on the go, or during daily commutes. Additionally, the online platform provides access to supplementary resources, such as daily recaps, summaries, and commentary from Tara-Leigh Cobble. This digital accessibility fosters a sense of community, as readers can connect with others following the same plan and share insights. The online availability ensures that the Bible Recap Reading Plan 2023 remains a practical and engaging tool for spiritual growth.

The Bible Recap Reading Plan 2023 is a valuable tool for anyone seeking to deepen their understanding of Scripture. With its chronological structure, daily summaries, and flexible scheduling, it offers a practical and engaging way to read the entire Bible in one year. The plan’s online availability and free PDF download make it accessible to everyone, while its focus on community and accountability provides motivation and support. By following this plan, readers can gain a deeper appreciation of the Bible’s narrative and its timeless message of love and redemption. Whether you’re a seasoned believer or just beginning your spiritual journey, the Bible Recap Reading Plan 2023 is an excellent resource to guide you in your walk with God.

m92 suervo motor instruction manual

The M92 servo motor is a high-torque‚ energy-efficient AC servomotor designed for precision and reliability. Ideal for industrial applications‚ it supports programmable inputs and offers advanced control features.

1.1 Overview of the M92 Servo Motor

The M92 servo motor is a high-torque AC servomotor designed for industrial and apparel production applications. With a 450W output‚ it delivers precision and reliability‚ making it ideal for systems requiring accurate control. The motor features programmable input options‚ energy-saving technologies‚ and a compact design for efficient integration into various systems. Its robust construction ensures durability‚ while advanced control capabilities allow for seamless operation in demanding environments. The M92 is engineered to maximize productivity and performance‚ offering a user-friendly solution for modern industrial needs.

1.2 Importance of the Instruction Manual

The instruction manual for the M92 servo motor is essential for safe and effective operation. It provides detailed guidelines for installation‚ programming‚ and maintenance‚ ensuring optimal performance and longevity. The manual includes critical safety precautions‚ technical specifications‚ and troubleshooting tips‚ helping users avoid potential hazards and resolve issues efficiently. By following the manual‚ users can maximize the motor’s efficiency and productivity while adhering to safety standards. It serves as a comprehensive resource for both novice and experienced operators‚ ensuring the M92 servo motor operates at its full potential.

Safety Precautions

Always read the manual before installation or operation. Ensure proper understanding of safety guidelines to avoid accidents. Do not operate the motor until all precautions are understood.

2.1 General Safety Guidelines

Always read the instruction manual thoroughly before installing or operating the M92 servo motor. Ensure proper understanding of safety information and guidelines to prevent accidents. Do not attempt installation or operation without full knowledge of the equipment. Be aware of voltage fluctuations‚ noise‚ and vibration resistance. Avoid unauthorized modifications and ensure all connections are secure. Proper grounding and insulation are essential. Keep the motor away from flammable materials and ensure proper ventilation. Never operate the motor without the required operation panel installed. Adhere to all safety protocols to ensure safe and efficient operation.

2.2 Specific Safety Instructions for the M92 Servo Motor

The M92 servo motor requires careful handling to ensure safe operation. Always disconnect the power supply before performing maintenance or repairs. Avoid exposing the motor to extreme temperatures or humidity. Ensure proper grounding to prevent electrical hazards. Use only approved cables and connectors to maintain insulation integrity. Never operate the motor near flammable materials or in hazardous environments. Regularly inspect for wear or damage‚ and replace worn parts promptly. Follow the recommended torque and speed limits to prevent overheating. Always use the supplied operation panel for control‚ as the motor will not function without it. Adhere to these guidelines to ensure safe and reliable performance.

Installation and Setup

Install the M92 servo motor according to the manual‚ ensuring proper alignment and secure mounting. Use the correct operational panel (CP-18A or CP-180A) for functionality and control.

3.1 Pre-Installation Checks

Before installing the M92 servo motor‚ perform essential checks. Verify the power supply matches the motor’s specifications‚ and ensure all components are undamaged. Check compatibility with the control system. Ensure the operational panel (CP-18A or CP-180A) is selected and installed correctly. Review the instruction manual for specific requirements. Confirm the motor’s mounting bracket aligns properly. Ensure all safety precautions are followed to prevent damage or operational issues. Proper preparation ensures smooth installation and optimal performance of the M92 servo motor.

3.2 Wiring and Connection Methods

Connect the M92 servo motor according to the wiring diagram in the manual. Ensure the power supply matches the motor’s specifications and use shielded cables to minimize noise. Connect the motor to the control box‚ ensuring all terminals are securely fastened. Use the appropriate operational panel (CP-18A or CP-180A) and verify its compatibility. Double-check all connections before powering on to prevent damage or malfunction. Proper wiring ensures safe and efficient operation of the M92 servo motor in industrial or production environments.

Operating Instructions

Power on the M92 servo motor and initialize the system. Use the operational panel to program settings and control operations efficiently. Ensure smooth startup and optimal performance always.

4.1 Powering On and Off

To power on the M92 servo motor‚ ensure all connections are secure and the system is ready for operation. Use the operational panel to initiate power-up‚ following the sequence outlined in the manual. Monitor the control box for any signs of voltage fluctuations or noise. Once powered on‚ allow the system to initialize fully before starting operations. For powering off‚ follow the reverse sequence to avoid sudden stops or damage. Always refer to the manual for specific instructions to ensure safe and efficient operation.

4.2 Programming and Control

Programming the M92 servo motor is facilitated through its intuitive interface‚ allowing precise control over motor settings. Utilize the operational panel (CP-18A or CP-180A) to input parameters and customize performance. The motor supports programmable inputs‚ enabling tailored configurations for specific applications. Advanced features like energy-saving technologies optimize power usage while maintaining operational efficiency. Ensure all settings align with the instruction manual to avoid errors. Regularly update firmware and refer to the manual for detailed programming guidelines to maximize the motor’s capabilities and ensure seamless integration with compatible systems.

Maintenance and Troubleshooting

Regularly inspect and clean the motor to ensure optimal performance. Refer to the manual for troubleshooting common issues like overload or connection faults. Address error codes promptly to prevent downtime and ensure smooth operation.

5.1 Routine Maintenance Procedures

Regular maintenance ensures optimal performance and longevity of the M92 servo motor. Clean the motor and its surroundings to prevent dust buildup. Inspect power and signal connections for wear or damage. Check for loose screws or bolts and tighten as needed. Lubricate moving parts if specified in the manual. Monitor temperature levels and ensure proper cooling. Perform firmware updates to maintain functionality. Refer to the instruction manual for detailed procedures and schedules to prevent unexpected downtime and ensure reliable operation.

5.2 Common Issues and Solutions

Common issues with the M92 servo motor include error codes like 1001 (servo alarm) and 1008 (motor overload). These often result from incorrect settings or excessive load. To resolve‚ restart the motor‚ check the load‚ and ensure proper step settings using the M92 command. Connectivity issues may arise from loose wires; inspect and secure all connections. Overheating can occur due to poor ventilation; ensure adequate cooling. For firmware-related problems‚ download and install the latest updates from the manufacturer. Always refer to the instruction manual for troubleshooting guides and solutions to restore optimal performance.

Technical Specifications

The M92 servo motor features a high-torque AC design with 450W output‚ suitable for industrial and apparel production. It supports programmable inputs and advanced energy-saving technologies for optimal efficiency.

6.1 Performance Characteristics

The M92 servo motor delivers exceptional performance with high torque and precision control. Its 450W output ensures robust operation in demanding applications. The motor’s advanced design incorporates energy-saving technologies‚ reducing power consumption while maintaining productivity. It supports programmable inputs through an operational panel‚ allowing customization for specific tasks. The M92 is resistant to voltage fluctuations‚ noise‚ and vibration‚ ensuring stable performance in various industrial environments. Its compact size and high efficiency make it ideal for apparel production and other applications requiring reliable‚ high-torque servo operation.

6.2 Compatibility with Other Systems

The M92 servo motor is designed for seamless integration with various industrial systems. It is compatible with control boxes resistant to voltage fluctuations and noise‚ ensuring stable operation. The motor works efficiently with operation panels like the CP-18A and CP-180A‚ enabling programmable inputs. Its compact design allows easy integration with systems such as the SC-920‚ making it suitable for apparel production and other industrial applications. Supplementary setup instructions are provided for proper installation and connectivity‚ ensuring compatibility with existing machinery and maximizing operational efficiency across different platforms.

Advanced Features

The M92 servo motor offers advanced features like energy-saving technologies and programmable input options‚ enhancing efficiency and productivity while ensuring environmental friendliness.

7.1 Energy-Saving Technologies

The M92 servo motor incorporates cutting-edge energy-saving technologies to minimize power consumption while maintaining high performance. These features include optimized power management and reduced standby power‚ enhancing overall efficiency and environmental sustainability. By integrating advanced control algorithms‚ the motor ensures energy is used only when necessary‚ lowering operational costs. Additionally‚ its compact design contributes to reduced energy waste‚ making it an eco-friendly choice for industrial applications. These technologies not only benefit the environment but also improve productivity by maintaining consistent performance levels.

7.2 Programmable Input Options

The M92 servo motor offers programmable input options‚ allowing users to customize its operation for specific tasks. Through an operational panel‚ users can set parameters such as torque‚ speed‚ and position. This feature enhances flexibility‚ enabling tailored performance for diverse applications like apparel production. The motor supports programmable inputs via external controllers‚ ensuring precise control and adaptability. These options simplify integration with other systems‚ making the M92 a versatile choice for industrial automation. By leveraging programmable inputs‚ users can optimize the motor’s functionality to meet their unique operational requirements efficiently.

The M92 servo motor is a high-performance‚ energy-efficient solution designed for industrial applications. Its programmable input options and advanced features make it versatile for diverse tasks. By following the instruction manual‚ users can optimize its functionality‚ ensuring safe and efficient operation. The M92’s reliability and precision make it a valuable asset for modern automation systems. Always consult the manual for proper installation‚ maintenance‚ and troubleshooting to maximize its potential and extend its lifespan. This motor is a testament to innovative engineering‚ providing consistent performance and adaptability in demanding environments.

troy bilt pony tiller manual

Welcome to the Troy-Bilt Pony Tiller Manual. This guide provides essential information for safe and effective operation. Read carefully to ensure optimal performance and longevity.

Overview of the Troy-Bilt Pony Tiller

The Troy-Bilt Pony Tiller is a versatile gardening tool designed for efficient soil preparation. It features adjustable tilling depth and width, making it suitable for various garden sizes. Built for durability, it handles tough soil conditions with ease. The tiller is ideal for both home gardeners and professionals, offering consistent performance. Its compact design allows for easy maneuverability, while its powerful engine ensures thorough soil turnover. Whether preparing new beds or maintaining existing ones, the Pony Tiller delivers reliable results. This manual will guide you through its safe and effective use.

The Pony Tiller is equipped with user-friendly controls and safety features to enhance your gardening experience. It supports attachments for additional functionality, making it a valuable asset for yard care. Regular maintenance, as outlined in this manual, ensures optimal performance and longevity. With proper care, the Troy-Bilt Pony Tiller remains a trusted companion for all your gardening needs.

Importance of Reading the Manual

Importance of Reading the Manual

Reading the Troy-Bilt Pony Tiller Manual is crucial for safe and effective operation. It provides essential safety guidelines, operating instructions, and maintenance tips to ensure optimal performance. Understanding the manual helps prevent accidents and prolongs the tiller’s lifespan;

The manual also includes troubleshooting steps and warranty details. By following the guidelines, you can avoid costly repairs and ensure your tiller functions properly. It’s a vital resource for maximizing efficiency and safety while gardening.

Key Features of the Troy-Bilt Pony Tiller

The Troy-Bilt Pony Tiller is designed for efficient gardening with a powerful engine and durable tines. It features adjustable tilling depth and width, allowing versatility for various soil types. The tiller also includes an ergonomic handle for comfortable operation, enhancing user control and reducing fatigue during extended use.

Additional features include a robust transmission system and a reliable starting mechanism. These elements ensure smooth performance, making it ideal for both small and large gardening projects. The tiller’s compact design also facilitates easy maneuverability, while its high-quality construction guarantees long-term durability and reliability.

Safety Precautions and Guidelines

Always follow safety guidelines when operating the Troy-Bilt Pony Tiller. Wear protective gear, avoid loose clothing, and ensure the area is clear of obstacles. Read warning labels carefully and adhere to operational instructions to prevent accidents and ensure safe usage. Regular maintenance and proper storage are also critical for optimal performance and user safety.

General Safety Tips for Operating the Tiller

Always wear protective gear, including gloves, safety glasses, and sturdy footwear. Ensure loose clothing or jewelry does not come into contact with moving parts. Keep children and pets away while operating. Before starting, inspect the area for debris or obstacles. Never operate the tiller while under the influence of alcohol or drugs. Familiarize yourself with warning labels and symbols in the manual. Ensure the tiller is properly assembled and maintained. Check the clutch function before use and follow all operational guidelines to prevent accidents.

Warning Labels and Symbols in the Manual

Warning labels and symbols are crucial for safe operation. They highlight potential hazards, such as moving parts, hot surfaces, and electrical components. The manual includes specific icons indicating risks like entanglement or crushing. Always pay attention to these symbols and read accompanying text for detailed precautions. Failure to comply with warnings can result in personal injury or equipment damage. Ensure all users understand these cautions before operating the tiller to maintain a safe working environment and prevent accidents.

Protective Gear and Clothing Recommendations

Protective gear is essential when operating the Troy-Bilt Pony Tiller. Wear long pants, sturdy gloves, and closed-toe shoes to prevent injury from debris. Safety glasses protect eyes from flying particles. A dust mask is recommended to avoid inhaling dust. Avoid loose clothing that could catch on moving parts. Keep long hair tied back for safety. Wearing proper protective gear ensures a safer working environment and minimizes risks associated with operating the tiller. Always prioritize personal safety to enjoy a secure gardening experience.

Assembly and Initial Setup

Begin by unpacking and inventorying all parts. Follow the manual’s step-by-step assembly instructions carefully. Complete initial testing to ensure proper function before first use.

Unpacking and Inventory of Parts

Begin by carefully opening the packaging and inspecting all components. Compare the contents with the parts list provided in the manual to ensure everything is included. Check for any visible damage or missing items. This step is crucial to prevent assembly issues later. If any parts are damaged or missing, contact Troy-Bilt customer support immediately for assistance. Proper inventory ensures a smooth assembly process and helps maintain the tiller’s performance. Keep all packaging materials until assembly is complete.

Step-by-Step Assembly Instructions

Start by attaching the handlebars using the provided bolts. Tighten securely to ensure stability. Next, align the tine assembly with the tiller frame and fasten with the included hardware. Ensure all connections are snug to prevent vibration. Install the belt according to the diagram, making sure it is properly aligned. Double-check all fasteners for tightness. Finally, perform a visual inspection to confirm all parts are correctly assembled. Refer to the manual for specific torque values and assembly diagrams to ensure accuracy.

Initial Testing and Adjustments

Before first use, test the tiller in an open area to ensure proper function. Check all controls and cables for smooth operation. Start the engine and let it run for a few minutes to warm up. Observe the tines for consistent rotation and adjust the depth lever as needed. If vibrations occur, tighten any loose bolts. Ensure the belt is properly aligned and tensioned. After testing, inspect for any damage or wear. Make necessary adjustments following the manual’s guidelines to ensure optimal performance and safety.

Operating the Tiller

Adjust handlebars for comfort and maintain balance while walking. Ensure consistent tilling depth and speed for optimal results. Always keep the area clear of debris.

Starting and Stopping the Engine

Ensure the area is clear before starting. Prime the engine and set the choke to “start” position. Pull the recoil handle firmly until the engine starts. For stopping, reduce speed and let the engine run for a few minutes to cool. Turn off the ignition and engage the clutch to prevent accidental start-ups. Always refer to the manual for specific instructions or consult an authorized dealer if issues arise.

Basic Tilling Techniques and Tips

Start by preparing the soil to ensure it’s clear of debris. Adjust the tiller’s depth settings based on soil type and desired tilling depth. Maintain a steady pace, working in straight lines and slightly overlapping each pass to ensure thorough coverage. Keep the tiller upright and apply consistent pressure for even results. Regularly check and maintain the tines to prevent clogging and ensure optimal performance. For especially hard soil, make multiple passes to gradually break it up without overtaxing the machine.

Handling Different Soil Types and Conditions

The Troy-Bilt Pony Tiller excels in various soil conditions, from dry to wet and hard to soft. For hard soil, start at a shallow depth and gradually increase as needed. In soft or sandy soil, maintain steady pressure to avoid over-tilling. For clay-heavy soil, work in smaller sections to prevent clogging the tines. Always adjust the tiller’s depth and speed according to soil type to ensure efficient tilling without damaging the machine or the soil structure.

Maintenance and Troubleshooting

Regular maintenance ensures your Troy-Bilt Pony Tiller runs smoothly. Check and replace worn parts, lubricate moving components, and address issues promptly to prevent costly repairs.

Regular Maintenance Schedule

Establish a routine maintenance schedule for your Troy-Bilt Pony Tiller to ensure optimal performance. Check the oil level before each use and change it every 25 hours of operation. Inspect and clean the air filter monthly, replacing it as needed. Sharpen the tines quarterly and lubricate all moving parts regularly. After each use, clean the tiller to remove dirt and debris. Store the tiller properly during winter by draining the fuel and disconnecting the battery.

Common Issues and Solutions

Common issues with the Troy-Bilt Pony Tiller include engine failure to start, jammed tines, and uneven tilling. For engine issues, check fuel levels and ensure the choke is properly adjusted. If tines jam, stop the tiller and clear debris. For uneven tilling, adjust the tine depth and ensure the soil is free of large objects. Regular maintenance, such as sharpening tines and checking belts, can prevent these issues; Refer to the manual for detailed troubleshooting steps and solutions.

Storage and Winterization Tips

Proper storage and winterization of your Troy-Bilt Pony Tiller ensure longevity and optimal performance. Clean the tiller thoroughly, removing dirt and debris from tines and shields. Apply a rust-inhibiting coating to metal parts and store in a dry, protected area. For winter, drain the fuel tank or stabilize the fuel, and disconnect the battery. Lubricate moving parts and follow the manual’s storage section for detailed instructions. This prevents corrosion and ensures the tiller is ready for the next season.

Warranty and Customer Support

Your Troy-Bilt Pony Tiller is backed by a comprehensive warranty. Visit the official website or contact authorized dealers for detailed warranty terms and dedicated customer assistance.

Understanding the Warranty Coverage

Troy-Bilt offers a Lifetime Limited Warranty for their Pony Tiller, covering defects in materials and workmanship. The warranty applies to original purchasers and is non-transferable. It does not cover wear and tear or misuse. For detailed terms, review the warranty section in the manual or visit the official Troy-Bilt website. Keep your proof of purchase for warranty validation. Authorized service centers can assist with any warranty-related inquiries or repairs, ensuring your tiller remains in optimal condition.

Contacting Troy-Bilt Customer Service

For assistance with your Troy-Bilt Pony Tiller, contact customer service through their official website or by phone. Visit the support section for troubleshooting guides, FAQs, and warranty information. Representatives are available to address questions, repair needs, and provide guidance. Ensure to have your model number and proof of purchase ready for efficient service. Troy-Bilt’s customer support team is committed to helping you maintain your tiller’s performance and resolve any issues promptly.

Authorized Service Centers and Dealers

For genuine parts and expert repairs, visit authorized Troy-Bilt service centers or dealers. These locations are certified to handle your Pony Tiller’s maintenance and repairs. Use the dealer locator tool on Troy-Bilt’s official website to find a service center near you. Authorized dealers ensure compliance with warranty terms and provide reliable support. Contact them for any service needs to maintain your tiller’s performance and longevity, ensuring all repairs meet Troy-Bilt’s quality standards.

Final Tips for Optimal Performance

For the best results with your Troy-Bilt Pony Tiller, ensure regular maintenance, proper storage, and adherence to safety guidelines. Always check and replace worn tines, lubricate moving parts, and store the tiller in a dry, protected area during off-seasons. Adjust tine depth based on soil conditions and keep the area clear of debris. Following these tips will maximize efficiency, extend the tiller’s lifespan, and ensure years of reliable service for your gardening needs.

Encouragement to Follow Manual Guidelines

Adhering to the Troy-Bilt Pony Tiller Manual ensures safe, efficient, and effective use of your equipment. The manual provides detailed instructions, safety precautions, and maintenance tips to maximize performance. By following the guidelines, you can avoid potential hazards, extend the lifespan of your tiller, and achieve optimal results in your gardening tasks. Refer to this manual regularly for troubleshooting and proper operation. Remember, your safety and the longevity of the tiller depend on following these recommendations.

the sermon on the mount pdf

The Sermon on the Mount, found in Matthew 5-7, is a foundational Christian text offering moral and spiritual guidance․ PDF resources like Mark A․ Copeland’s study provide detailed analysis and practical insights, making it accessible for deeper study and reflection․

1․1 Historical Context and Setting

The Sermon on the Mount occurred around 30-33 AD, near Capernaum, on a hill overlooking the Sea of Galilee․ Jesus delivered it after his baptism, temptation, and the start of his ministry․ The setting was informal, with Jesus teaching his disciples and a gathered crowd․ This sermon is considered Jesus’ inaugural address, outlining the principles of the Kingdom of God․ The historical context emphasizes its significance as a foundational teaching for followers of Christ, shaping Christian ethics and spirituality for centuries․

1․2 The Significance of the Sermon in the New Testament

The Sermon on the Mount holds profound significance as a cornerstone of Christian theology․ It encapsulates Jesus’ teachings on the Kingdom of God, offering moral and ethical guidance․ The sermon emphasizes love, forgiveness, and humility, providing a blueprint for Christian living․ Its influence extends beyond religious circles, shaping cultural and philosophical thought․ As a central text in the New Testament, it underscores Jesus’ role as a teacher and spiritual leader, leaving an enduring legacy in Christian practice and thought․

The Beatitudes: Core Teachings of the Sermon

The Beatitudes, found in Matthew 5:3-12, are eight blessings that outline virtues for living a Christ-centered life․ They emphasize qualities like meekness, mercy, and peacemaking, offering spiritual fulfillment and heavenly rewards to those who embody them․ These teachings form the heart of Jesus’ message, guiding believers toward a life of humility, compassion, and righteousness․ The Beatitudes are not just moral guidelines but a pathway to a deeper relationship with God and a transformed life․

2․1 The Eight Beatitudes and Their Meaning

The Beatitudes, recorded in Matthew 5:3-12, are eight blessings that reveal the qualities of a Christ-centered life․ They include being poor in spirit, mourning, meekness, hungering for righteousness, mercy, purity of heart, peacemaking, and enduring persecution․ Each Beatitude offers a promise, such as inheriting the earth or seeing God, and challenges believers to embrace humility, compassion, and righteousness․ These teachings form the moral foundation of the Sermon on the Mount, guiding followers to live in harmony with God’s kingdom values․

2․2 The Role of the Beatitudes in Christian Ethics

The Beatitudes shape Christian ethics by emphasizing qualities like humility, compassion, and peacemaking․ They redefine success as spiritual richness, not material wealth, and call believers to live counter-culturally․ By prioritizing kingdom values, the Beatitudes inspire followers to act with mercy and integrity, fostering a community of love and justice․ This ethical framework remains central to Christian living, guiding individuals to reflect God’s character in their actions and attitudes, as outlined in PDF resources like Mark A․ Copeland’s studies on the Sermon on the Mount․

The Kingdom of God: A Central Theme

The Kingdom of God, a central theme in the Sermon on the Mount, represents God’s rule and redemption․ Jesus’ teachings emphasize its universal impact and call believers to live according to its principles, as explored in-depth in various PDF resources․

3․1 Jesus’ Vision of the Kingdom

Jesus’ vision of the Kingdom of God, as outlined in the Sermon on the Mount, emphasizes a life lived under God’s rule and righteousness․ He taught that the Kingdom is not just a future reality but is already present in the lives of believers․ The Kingdom values love, mercy, humility, and forgiveness, calling followers to live counterculturally in a world often dominated by selfishness and strife․ Jesus’ teachings in Matthew 5-7 provide a blueprint for kingdom living, challenging believers to embody these principles in their daily lives․ PDF resources like Mark A․ Copeland’s study offer deeper insights into this vision․

3․2 Living Out Kingdom Values in Daily Life

Living out Kingdom values involves embodying Christ’s teachings in everyday life, such as loving enemies, forgiving others, and prioritizing humility․ Jesus emphasized non-retaliation and mercy, urging believers to reflect God’s character in their actions․ Practical steps include prayer, fasting with the right heart, and managing material possessions wisely․ These values transform relationships and communities, demonstrating the Kingdom’s presence․ Resources like Mark A․ Copeland’s study provide guidance, helping believers apply these principles authentically and effectively in modern contexts․

Salt and Light: The Influence of Believers

Believers are called to be salt and light, preserving morality and illuminating truth․ Jesus emphasized their vital role in transforming society through righteous living and genuine faith․

4․1 The Metaphor of Salt and Light Explained

Jesus used the metaphors of salt and light to illustrate the transformative influence believers should have in the world․ Salt preserves and enhances flavor, symbolizing how Christians should preserve morality and enhance their surroundings through righteous living․ Light represents truth and guidance, emphasizing the need for believers to shine God’s truth through their actions․ These metaphors highlight the responsibility of believers to embody and share God’s values, ensuring their impact is both visible and meaningful in society․

4․2 The Responsibility of Christians in Society

Christians are called to be active influencers, fulfilling their divine purpose in society․ As salt and light, they must preserve moral integrity and illuminate spiritual truth․ Their role extends beyond personal faith to societal transformation, advocating justice, mercy, and compassion․ By living out kingdom values, believers demonstrate God’s love, fostering a-countercultural impact that challenges and redeems societal norms, ensuring their presence brings tangible change and reflects Christ’s teachings in practical ways․

Jesus and the Law: Fulfillment and Interpretation

Jesus affirmed the Law, emphasizing its fulfillment through His teachings․ He interpreted it with a deeper focus on the heart and intent, surpassing mere external compliance․

5․1 Jesus’ Relationship with the Old Testament Law

Jesus’ relationship with the Old Testament Law is central to the Sermon on the Mount․ He affirmed the Law, stating He did not come to abolish it but to fulfill it․ This fulfillment involved interpreting the Law in a way that emphasized its spiritual intent over mere external observance․ Jesus taught that adherence to the Law should reflect a heart of love and mercy, rather than just legalistic compliance․ His teachings expanded the scope of the Law, addressing inward attitudes and motivations, thus deepening its application in daily life․ This approach highlighted His authority as the ultimate interpreter of God’s will, bridging the old covenant with the new․ Through this, Jesus provided a framework for understanding the Law’s purpose in the context of the Kingdom of God, ensuring its relevance and transformative power for believers․ By focusing on the heart, Jesus redefined righteousness, making it more than just outward actions but a matter of inner purity and alignment with God’s character․ This reinterpretation not only honored the Law but also elevated its significance in the lives of His followers, offering a higher standard of living that reflected God’s holiness and love․ As a result, the Law became a guide for spiritual growth and a means to experience God’s kingdom on earth․ This teaching remains foundational for Christian ethics and understanding of God’s will today․

5․2 The Higher Righteousness Taught by Jesus

Jesus taught a higher righteousness that transcended external actions, emphasizing inner purity and heartfelt obedience․ He expanded traditional interpretations of the Law, focusing on motivations and attitudes․ For example, He equated anger with murder and lust with adultery, highlighting the importance of spiritual integrity․ This higher standard called believers to love enemies, forgive freely, and live humbly, reflecting God’s character․ Jesus’ teachings challenged listeners to pursue holiness that honored God, moving beyond legalism to a deeper, Spirit-led life․ This righteousness remains a cornerstone of Christian living, guiding believers to embody God’s love and mercy in all aspects of life․

Practical Teachings for Life

Jesus provided practical teachings on love for enemies, non-retaliation, prayer, fasting, and handling material possessions, offering moral guidance for a life centered on God’s will and purpose․

6․1 Love for Enemies and Non-Retaliation

Jesus taught radical love, instructing followers to love enemies and pray for persecutors (Matthew 5:44)․ He emphasized non-retaliation, urging believers to turn the other cheek (Matthew 5:39)․ This challenges natural human responses, promoting forgiveness and compassion․ Such teachings redefine strength as self-control and humility, aligning with God’s Kingdom values․ These principles transform relationships, fostering peace and reconciliation, and call believers to reflect God’s love in all interactions, even with adversaries․

6․2 Prayer, Fasting, and Material Possessions

Jesus taught about prayer, fasting, and material possessions in the Sermon on the Mount, emphasizing sincerity and humility․ He instructed believers to pray privately (Matthew 6:6) and not store up treasures on earth but in heaven (Matthew 6:19-21)․ Fasting should be done without show (Matthew 6:16-18); These practices are meant to foster a personal, genuine relationship with God, free from hypocrisy and worldly distractions, aligning one’s heart with eternal values rather than fleeting earthly concerns․

The Sermon on the Mount as a Moral Guide

The Sermon on the Mount serves as a timeless moral guide, offering teachings on love, forgiveness, and humility that remain universally relevant today․

7․1 The Sermon’s Relevance Today

The Sermon on the Mount remains profoundly relevant in modern times, offering timeless ethical and spiritual guidance․ Its teachings on love, forgiveness, and humility provide a moral compass for addressing contemporary issues like inequality and conflict․ The emphasis on non-retaliation and compassion resonates in today’s global challenges, encouraging personal transformation and societal change․ As a universal guide, it continues to inspire individuals and communities to embody kingdom values in everyday life, fostering peace and justice․

7․2 Applying the Teachings in Modern Contexts

The Sermon on the Mount’s principles are applicable in today’s diverse contexts, from personal relationships to global issues․ Teachings like loving enemies and non-retaliation can transform modern conflicts, promoting understanding and peace․ The emphasis on humility and mercy encourages ethical leadership and social justice․ By integrating these values into daily life, individuals can address contemporary challenges with compassion and integrity, reflecting the kingdom’s ideals in a changing world while maintaining the timeless essence of Jesus’ message․

The Legacy and Impact of the Sermon

The Sermon on the Mount remains the most powerful sermon ever preached, shaping Christian thought and practice across cultures․ Its timeless principles continue to inspire moral and ethical standards globally․

8․1 Influence on Christian Thought and Practice

The Sermon on the Mount has profoundly shaped Christian theology and ethics, offering teachings on love, forgiveness, and humility․ It has inspired countless believers to live according to Kingdom values, influencing practices like prayer, charity, and peacemaking․ The Beatitudes and Jesus’ teachings on the law continue to guide Christian behavior, fostering compassion and moral integrity․ Its principles are reflected in various denominations and remain central to Christian living, emphasizing a life transformed by faith and love․

8․2 The Sermon’s Enduring Appeal Across Cultures

The Sermon on the Mount transcends cultural boundaries, resonating with diverse audiences globally․ Its universal themes of peace, love, and righteousness have inspired leaders like Gandhi, shaping movements for justice and compassion․ The sermon’s timeless message adapts to various contexts, making it a unifying force across cultures․ Its teachings on humility, forgiveness, and mercy continue to inspire people from all walks of life, proving its enduring relevance and appeal in modern and diverse societies worldwide․

The Sermon on the Mount remains a timeless guide, offering moral and spiritual wisdom․ Its enduring message continues to inspire and transform lives across generations and cultures․

9․1 Summary of Key Points

The Sermon on the Mount, recorded in Matthew 5-7, is a cornerstone of Christian teaching․ It includes the Beatitudes, emphasizing humility and compassion, and the metaphors of salt and light, highlighting believers’ influence․ Jesus reinterpret

9․2 The Timeless Message of the Sermon on the Mount

The Sermon on the Mount offers timeless wisdom, transcending generations and cultures․ Its core teachings on love, forgiveness, and humility provide a universal moral framework․ Jesus’ message challenges followers to live according to God’s rule, emphasizing values like justice and mercy․ As a Counterculture, it calls for a life contrary to worldly standards․ The sermon’s enduring relevance lies in its ability to inspire personal transformation and societal change, fostering compassion and peace․ This makes it a vital guide for Christian living and a beacon of hope in modern contexts․

vevor ice machine manual pdf

Understanding the Vevor Ice Machine Manual PDF

The Vevor Ice Machine Manual PDF serves as a comprehensive guide, detailing installation, maintenance, and troubleshooting steps․ It ensures optimal performance and longevity, providing clear safety precautions and operational insights․ Regularly updated, it remains a vital resource for users seeking to maximize their machine’s efficiency and functionality․

Welcome to the Vevor Ice Machine Manual PDF, your essential guide to understanding and operating your ice maker effectively․ This manual is designed to provide a comprehensive overview of the machine’s features, setup, and maintenance, ensuring you get the most out of your investment․ Whether you’re using the Vevor Ice Machine for home, commercial, or industrial purposes, this document will walk you through every step, from initial installation to daily operation and troubleshooting․

Within this manual, you’ll find detailed instructions on safety precautions, installation requirements, and operating procedures․ It also covers maintenance tips to prolong the machine’s lifespan and troubleshooting common issues to minimize downtime․ The Vevor Ice Machine Manual PDF is structured to be user-friendly, with clear sections and diagrams for easy reference; By following the guidelines outlined in this manual, you can ensure optimal performance, energy efficiency, and consistent ice production․

Reading this manual carefully before operating the machine is highly recommended to avoid potential hazards and ensure proper functionality․ With this guide, you’ll be well-equipped to manage your Vevor Ice Machine and enjoy its reliable service for years to come․ Let’s dive into the key features and operational details of your Vevor Ice Machine in the following sections․

Key Features of the Vevor Ice Machine

The Vevor Ice Machine is renowned for its high ice production capacity, ranging from 80-90LBS/24H to 120-130LBS/24H, making it suitable for both home and commercial use․ It features automatic operation, a self-cleaning function, and a stainless steel construction for durability and easy maintenance․ The machine comes with a large storage bin, ensuring ample ice supply for extended periods․ Its energy-efficient design minimizes power consumption while maintaining consistent ice production․ Additionally, the Vevor Ice Machine includes advanced safety features, such as an ice-full indicator and automatic shut-off, to prevent overflow and ensure safe operation․ The user-friendly control panel allows for easy adjustment of settings, and the compact design makes it ideal for various spaces․ With its robust performance, long lifespan, and easy usability, the Vevor Ice Machine stands out as a reliable choice for meeting ice demands efficiently․ These features, as outlined in the manual, ensure the machine delivers exceptional value and performance for its users․

Safety Precautions and Guidelines

The Vevor Ice Machine Manual PDF emphasizes critical safety precautions to ensure safe and efficient operation․ Users are advised to carefully read and follow all guidelines before initial use․ One key precaution is avoiding the storage of ice in the ice bin overnight, as it is not a refrigerator, and the ice may melt and leak․ Additionally, the manual cautions against using alcohol for cleaning, as it may damage the machine’s plastic components․ Proper installation and regular maintenance are also stressed to prevent mechanical issues․ The manual highlights the importance of checking the water filter and tank regularly to ensure clean water supply and optimal performance․ Furthermore, it warns against potential faults, such as the ice-full indicator malfunction, which may cause overflow․ Users are instructed to monitor fault codes, like E-01, and address them promptly․ The manual also advises keeping the machine away from flammable materials and ensuring proper ventilation․ By adhering to these safety guidelines, users can minimize risks and ensure the machine operates safely and efficiently․ These precautions are essential for maintaining the machine’s longevity and user safety․

Installation and Setup Instructions

The Vevor Ice Machine Manual PDF provides detailed installation and setup instructions to ensure proper functionality․ Before starting, users are advised to carefully unpack the machine and its accessories, including the water supply pipe and connectors․ The manual recommends placing the machine on a flat, stable surface, ensuring proper ventilation and proximity to a water supply․ Connecting the water supply involves attaching the double-ended connectors to the water supply valve and faucet, as outlined in the guide․ Leveling the machine is crucial to prevent uneven ice production and potential mechanical issues․ Once installed, users should power on the machine and allow it to run through an initial cycle to ensure all components are functioning correctly․ The manual also emphasizes the importance of following specific model instructions, such as those for the LB360TA or LB100T models, which may have unique setup requirements․ By adhering to these steps, users can ensure a smooth and efficient installation process, leading to optimal performance and longevity of the ice machine․

Operating the Vevor Ice Machine

Operating the Vevor Ice Machine is straightforward, but it requires careful attention to the manual’s guidelines to ensure efficiency and safety․ Begin by powering on the machine and selecting the desired ice-making mode, typically found on the control panel․ The machine automatically detects the ambient temperature and adjusts the ice-making time accordingly․ Monitor the ice production process, ensuring the water tank is filled and the ice bin is properly aligned․ Once the ice is made, the machine will automatically stop, and the ice will be ejected into the bin․ For models like the LB360TA, the manual highlights the importance of regular monitoring to prevent overflow or mechanical issues․ Always refer to the specific model’s instructions, as some features, such as self-cleaning modes or advanced sensors, may vary․ Additionally, the manual advises against storing ice in the bin overnight, as it may melt and cause water to flow out of the machine․ By following these operational guidelines, users can maximize the machine’s performance and enjoy a consistent supply of high-quality ice․ Regular use in accordance with the manual ensures optimal functionality and longevity of the Vevor Ice Machine․

Maintenance and Cleaning Procedures

Regular maintenance and cleaning are essential to ensure the longevity and efficiency of your Vevor Ice Machine․ The manual emphasizes the importance of cleaning the water filter, water tank, and condenser to prevent contamination and optimize performance․ For models like the LB360TA, the condenser should be cleaned periodically to remove dust and debris, which can impede cooling efficiency․ Additionally, the ice bin and surrounding areas should be wiped down with a mild detergent to maintain hygiene․ It is crucial to avoid using harsh chemicals or abrasive cleaners, as they may damage the machine’s components; The manual also advises against using alcohol to clean the ice machine, as it can cause plastic parts to crack․ Regularly checking and replacing worn-out parts, such as the water filter, ensures consistent ice quality․ The Vevor Ice Machine Manual provides detailed step-by-step instructions for disassembling and reassembling parts during cleaning․ By following these maintenance procedures, users can extend the machine’s lifespan and ensure it operates at peak performance․ Proper upkeep also prevents common issues, such as clogged water lines or reduced ice production, making maintenance a critical part of owning a Vevor Ice Machine․

Troubleshooting Common Issues

The Vevor Ice Machine Manual PDF provides detailed troubleshooting guidance to address common issues efficiently․ One prevalent problem is the ice full indicator not functioning correctly, often caused by a faulty proximity switch or the skateboard mechanism not resetting properly․ This issue, indicated by fault code E-01, results in continuous ice production and overflow․ To resolve this, users should inspect and clean the sensors, ensuring they are free from debris․ Another common issue is the machine not turning off due to a malfunctioning ice full button or misaligned components․ Additionally, poor ice quality or reduced production may stem from clogged water filters or incorrect water supply connections․ The manual advises checking the water filter regularly and ensuring proper installation of the water supply pipe․ For models like the LB360TA, users are cautioned against storing ice in the bin overnight, as it may melt and cause leaks․ The manual also recommends verifying electrical connections and ensuring the machine is placed on a level surface to prevent operational issues․ By following these troubleshooting steps, users can diagnose and resolve problems effectively, ensuring optimal performance and longevity of their Vevor Ice Machine․

The Vevor Ice Machine Manual PDF is an invaluable resource for ensuring optimal performance and longevity of your ice maker․ By adhering to the guidelines outlined in the manual, users can avoid common issues and maintain their machine efficiently․ Regular cleaning of the water filter and condenser is essential to prevent reduced ice production and ensure quality․ Additionally, proper storage of ice in a separate refrigerator is recommended, as the ice bin is not designed for overnight storage․ Always refer to the troubleshooting section for quick solutions to common problems like fault codes or overflow issues․ For the best experience, follow the safety precautions and operational instructions carefully․ Finally, for any unresolved issues, contacting Vevor customer support is highly recommended․ By following these final tips and maintaining your ice machine diligently, you can enjoy consistent, high-quality ice production for years to come․ Remember, a well-maintained machine is not only more efficient but also ensures a better user experience․

mn driver’s manual 2023

The 2023 Minnesota Drivers Manual is an essential guide for new and experienced drivers, covering traffic laws, road signs, and safe driving practices. It includes key updates such as fee increases, the Drivers License for All law, and is available in physical, digital, and audio formats for convenience. This manual is a vital resource for preparing for written and road tests, ensuring drivers are well-informed and ready to navigate Minnesota’s roads safely and legally.

Overview of the 2023 Minnesota Drivers Manual

The 2023 Minnesota Drivers Manual is a comprehensive guide designed to help drivers understand traffic laws, road signs, and safe driving practices in Minnesota. It covers essential topics such as road safety, vehicle regulations, and driver responsibilities. The manual is structured to address the needs of both new and experienced drivers, providing clear and concise information. It is available in physical, digital, and audio formats to accommodate different learning preferences and accessibility needs. The manual also includes recent updates, such as fee increases for licenses and IDs, and the implementation of the Drivers License for All law. Whether you’re preparing for a written permit test or seeking to refresh your knowledge of Minnesota driving rules, the manual serves as an indispensable resource. Its detailed content ensures drivers are well-equipped to navigate Minnesota’s roads safely and legally.

Importance of the Manual for Safe and Legal Driving

The 2023 Minnesota Drivers Manual is crucial for ensuring safe and legal driving practices across the state. It serves as the primary reference for understanding traffic laws, road signs, and driver responsibilities, helping to reduce accidents and violations. By detailing safe driving techniques and legal requirements, the manual empowers drivers to navigate Minnesota’s roads confidently. It also highlights the importance of adhering to updated laws and regulations, such as fee changes and the Drivers License for All law. For new drivers, the manual provides foundational knowledge necessary for obtaining a license, while experienced drivers can use it to refresh their understanding of traffic rules. Ultimately, the manual promotes a culture of safety and compliance, ensuring that all drivers contribute to a secure and orderly transportation system in Minnesota.

Key Updates in the 2023 Minnesota Drivers Manual

The 2023 Minnesota Drivers Manual features key updates, including fee increases effective July 1st and October 1st, 2023, and the Drivers License for All law starting October 1st, 2023.

Fee Increases for Licenses and IDs in 2023

The 2023 Minnesota Drivers Manual outlines fee increases for licenses and IDs, effective July 1st and October 1st, 2023. These adjustments reflect rising operational costs and the need to maintain efficient service delivery. The total increase for drivers license fees was $6.75, with filing fees for new applications rising to $16 and renewal fees also increasing. Specific increases varied by license type and application status. The Minnesota Department of Public Safety (DPS) detailed these changes in the updated manual, ensuring transparency for applicants. It is crucial for individuals to review the current fee schedule before applying for or renewing their credentials. Understanding these updates is essential for a smooth and informed application process. The manual provides a comprehensive breakdown of all fees, helping applicants prepare accordingly.

Implementation of the Drivers License for All Law

The Drivers License for All law, effective October 1st, 2023, marks a significant change in Minnesota’s licensing system. This law ensures that all Minnesota residents, regardless of immigration status, can obtain a standard Minnesota driver’s license, identification card, or permit. Previously, access to these essential documents was limited for certain individuals. The new law removes these barriers, promoting inclusivity and equal access to vital services and opportunities. It enables residents to drive legally, access employment, and fully participate in community life. The Minnesota Drivers Manual has been updated to reflect this change, providing clear guidelines and application details. This legislation is a major step toward ensuring all residents have the necessary identification for daily activities, fostering a more inclusive and equitable society. The updated manual details the application process and required documentation, ensuring a straightforward experience for all applicants. This change underscores Minnesota’s commitment to supporting all community members, regardless of background, in achieving mobility and independence.

Availability of the 2023 Minnesota Drivers Manual

The 2023 Minnesota Drivers Manual is available in physical, digital, and audio formats, offering convenient access for all learners.

Physical Copies of the Manual

Physical copies of the 2023 Minnesota Drivers Manual are available for purchase at Anoka County License Centers for Class D, motorcycle, and commercial licenses. These centers provide immediate access to a tangible study resource. Additionally, third-party vendors or online retailers may offer the manual, though prices and availability vary. Local bookstores or libraries might also carry copies, but it’s advisable to confirm availability beforehand; The cost of a physical copy may differ depending on the source, and it’s essential to ensure the manual is up-to-date, reflecting the latest legal changes and regulations.

While the Minnesota Department of Public Safety no longer distributes free printed manuals, purchasing a physical copy remains a reliable option for those who prefer traditional study methods. Ensure to check for updates before purchasing to guarantee you have the most current version.

Digital and Audio Versions of the Manual

The 2023 Minnesota Drivers Manual is also available in digital and audio formats, offering flexibility for diverse learning preferences. The digital version can be downloaded as a PDF from the official Minnesota Department of Public Safety website, ensuring easy access and portability. This format allows for offline study and can be printed for convenience. Additionally, an audio version of the manual is provided, catering to individuals with visual impairments or those who prefer auditory learning. The audio version enables hands-free study, making it ideal for commuting or multitasking. Both formats complement the physical copy, providing a comprehensive and accessible study experience. The digital and audio versions are regularly updated to reflect the latest changes in driving laws and regulations, ensuring users have the most accurate information. Visit the official Minnesota DMV website for links to download or stream these resources.

Preparing for the Minnesota Written Permit Test

The 2023 Minnesota Drivers Manual is crucial for written permit test preparation. It covers traffic laws, road signs, and safe driving practices. Use online practice tests to assess readiness and identify areas for improvement.

Using the Official Manual for Written Exam Preparation

The 2023 Minnesota Drivers Manual is the primary resource for preparing for the written permit test. It provides comprehensive information on traffic laws, road signs, and safe driving practices. By thoroughly studying the manual, applicants can gain a deep understanding of the rules of the road, including right-of-way procedures, speed limits, and special driving situations. The manual also covers essential topics like vehicle safety, emergency procedures, and the risks of driving under the influence. To make the most of the manual, consider taking notes, highlighting key sections, and quizzing yourself on the material. This active approach ensures retention and helps identify areas needing further review. Regular practice with sample questions from the manual or online resources can also reinforce learning and build confidence for the exam.

Online Practice Tests and Study Resources

Supplement your study of the 2023 Minnesota Drivers Manual with online practice tests and resources. These tools offer realistic simulations of the written permit test, helping you identify weak areas and build confidence. Many websites provide free Minnesota-specific practice tests, featuring questions similar to those on the official exam. These tests often include detailed explanations to help you understand the correct answers. Additionally, mobile apps dedicated to driver’s education offer convenient study options, including practice questions, flashcards, and progress tracking. Utilizing these resources alongside the official manual ensures a well-rounded preparation strategy. Regular practice with online tests can significantly improve your readiness for the exam, while apps provide flexibility to study on the go. Combining these tools with active learning from the manual will enhance your understanding and retention of key driving concepts.

Preparing for the Minnesota Road Test

Mastering the road test requires practical experience and structured study guides. Practice essential maneuvers like parallel parking and safe merging, and seek professional instruction for personalized feedback to build confidence and skills behind the wheel.

Structured Road Test Study Guides

Structured road test study guides provide a detailed breakdown of the skills and maneuvers required for the Minnesota road test. These guides outline the specific procedures examiners follow, ensuring candidates understand expectations. Key areas include parallel parking, three-point turns, and safe merging. Many resources offer checklists of essential skills to practice, such as maintaining proper lane position and navigating intersections safely. These guides also emphasize the importance of vehicle control and situational awareness. Additionally, they often include tips for handling challenging scenarios, like driving on highways or in heavy traffic. By using a structured study guide, candidates can systematically address each aspect of the road test, building confidence and competence. Regular practice with a supervising driver or professional instructor is recommended to refine skills and address weaknesses identified through the guide. Familiarizing oneself with the test vehicle’s controls and practicing in various conditions further enhances readiness.

Practical Driving Experience and Professional Instruction

Practical driving experience is crucial for mastering the skills needed to pass the Minnesota road test. While study guides and manuals provide theoretical knowledge, actual behind-the-wheel practice builds muscle memory and confidence. Working with a professional driving instructor offers personalized feedback and tailored instruction, addressing specific weaknesses and improving overall driving proficiency. Instructors can simulate road test scenarios, helping learners understand examiner expectations and refine their techniques. Additionally, supervised driving practice with a licensed driver allows for real-world application of skills in diverse conditions, such as city streets, highways, and low-visibility environments. A structured driving log can track progress and identify areas for further improvement. Combining professional instruction with consistent practice ensures a comprehensive understanding of safe and legal driving practices, ultimately leading to success on the road test and beyond.

The 2023 Minnesota Drivers Manual is a comprehensive guide for safe and legal driving. It includes updates on fees, new laws, and study resources. Mastery of this manual ensures confident and responsible driving.

Final Tips for Success with the Minnesota Drivers Manual

To succeed with the 2023 Minnesota Drivers Manual, thoroughly study the updated content, focusing on new laws like fee increases and the Drivers License for All policy. Use the manual to prepare for both the written and road tests by reviewing traffic signs, safe driving practices, and legal requirements. Engage actively with the material—highlight key points, take notes, and quiz yourself regularly. Supplement your study with online practice tests to build confidence and identify areas for improvement. For the road test, practice essential driving skills like parallel parking and merging, and consider professional instruction for personalized feedback. Familiarize yourself with the vehicle you’ll use for the test and practice in various conditions. Finally, stay calm and focused during your exams, ensuring you’re well-prepared to drive safely and responsibly in Minnesota.