mn driver’s manual 2023

The 2023 Minnesota Drivers Manual is an essential guide for new and experienced drivers, covering traffic laws, road signs, and safe driving practices. It includes key updates such as fee increases, the Drivers License for All law, and is available in physical, digital, and audio formats for convenience. This manual is a vital resource for preparing for written and road tests, ensuring drivers are well-informed and ready to navigate Minnesota’s roads safely and legally.

Overview of the 2023 Minnesota Drivers Manual

The 2023 Minnesota Drivers Manual is a comprehensive guide designed to help drivers understand traffic laws, road signs, and safe driving practices in Minnesota. It covers essential topics such as road safety, vehicle regulations, and driver responsibilities. The manual is structured to address the needs of both new and experienced drivers, providing clear and concise information. It is available in physical, digital, and audio formats to accommodate different learning preferences and accessibility needs. The manual also includes recent updates, such as fee increases for licenses and IDs, and the implementation of the Drivers License for All law. Whether you’re preparing for a written permit test or seeking to refresh your knowledge of Minnesota driving rules, the manual serves as an indispensable resource. Its detailed content ensures drivers are well-equipped to navigate Minnesota’s roads safely and legally.

Importance of the Manual for Safe and Legal Driving

The 2023 Minnesota Drivers Manual is crucial for ensuring safe and legal driving practices across the state. It serves as the primary reference for understanding traffic laws, road signs, and driver responsibilities, helping to reduce accidents and violations. By detailing safe driving techniques and legal requirements, the manual empowers drivers to navigate Minnesota’s roads confidently. It also highlights the importance of adhering to updated laws and regulations, such as fee changes and the Drivers License for All law. For new drivers, the manual provides foundational knowledge necessary for obtaining a license, while experienced drivers can use it to refresh their understanding of traffic rules. Ultimately, the manual promotes a culture of safety and compliance, ensuring that all drivers contribute to a secure and orderly transportation system in Minnesota.

Key Updates in the 2023 Minnesota Drivers Manual

The 2023 Minnesota Drivers Manual features key updates, including fee increases effective July 1st and October 1st, 2023, and the Drivers License for All law starting October 1st, 2023.

Fee Increases for Licenses and IDs in 2023

The 2023 Minnesota Drivers Manual outlines fee increases for licenses and IDs, effective July 1st and October 1st, 2023. These adjustments reflect rising operational costs and the need to maintain efficient service delivery. The total increase for drivers license fees was $6.75, with filing fees for new applications rising to $16 and renewal fees also increasing. Specific increases varied by license type and application status. The Minnesota Department of Public Safety (DPS) detailed these changes in the updated manual, ensuring transparency for applicants. It is crucial for individuals to review the current fee schedule before applying for or renewing their credentials. Understanding these updates is essential for a smooth and informed application process. The manual provides a comprehensive breakdown of all fees, helping applicants prepare accordingly.

Implementation of the Drivers License for All Law

The Drivers License for All law, effective October 1st, 2023, marks a significant change in Minnesota’s licensing system. This law ensures that all Minnesota residents, regardless of immigration status, can obtain a standard Minnesota driver’s license, identification card, or permit. Previously, access to these essential documents was limited for certain individuals. The new law removes these barriers, promoting inclusivity and equal access to vital services and opportunities. It enables residents to drive legally, access employment, and fully participate in community life. The Minnesota Drivers Manual has been updated to reflect this change, providing clear guidelines and application details. This legislation is a major step toward ensuring all residents have the necessary identification for daily activities, fostering a more inclusive and equitable society. The updated manual details the application process and required documentation, ensuring a straightforward experience for all applicants. This change underscores Minnesota’s commitment to supporting all community members, regardless of background, in achieving mobility and independence.

Availability of the 2023 Minnesota Drivers Manual

The 2023 Minnesota Drivers Manual is available in physical, digital, and audio formats, offering convenient access for all learners.

Physical Copies of the Manual

Physical copies of the 2023 Minnesota Drivers Manual are available for purchase at Anoka County License Centers for Class D, motorcycle, and commercial licenses. These centers provide immediate access to a tangible study resource. Additionally, third-party vendors or online retailers may offer the manual, though prices and availability vary. Local bookstores or libraries might also carry copies, but it’s advisable to confirm availability beforehand; The cost of a physical copy may differ depending on the source, and it’s essential to ensure the manual is up-to-date, reflecting the latest legal changes and regulations.

While the Minnesota Department of Public Safety no longer distributes free printed manuals, purchasing a physical copy remains a reliable option for those who prefer traditional study methods. Ensure to check for updates before purchasing to guarantee you have the most current version.

Digital and Audio Versions of the Manual

The 2023 Minnesota Drivers Manual is also available in digital and audio formats, offering flexibility for diverse learning preferences. The digital version can be downloaded as a PDF from the official Minnesota Department of Public Safety website, ensuring easy access and portability. This format allows for offline study and can be printed for convenience. Additionally, an audio version of the manual is provided, catering to individuals with visual impairments or those who prefer auditory learning. The audio version enables hands-free study, making it ideal for commuting or multitasking. Both formats complement the physical copy, providing a comprehensive and accessible study experience. The digital and audio versions are regularly updated to reflect the latest changes in driving laws and regulations, ensuring users have the most accurate information. Visit the official Minnesota DMV website for links to download or stream these resources.

Preparing for the Minnesota Written Permit Test

The 2023 Minnesota Drivers Manual is crucial for written permit test preparation. It covers traffic laws, road signs, and safe driving practices. Use online practice tests to assess readiness and identify areas for improvement.

Using the Official Manual for Written Exam Preparation

The 2023 Minnesota Drivers Manual is the primary resource for preparing for the written permit test. It provides comprehensive information on traffic laws, road signs, and safe driving practices. By thoroughly studying the manual, applicants can gain a deep understanding of the rules of the road, including right-of-way procedures, speed limits, and special driving situations. The manual also covers essential topics like vehicle safety, emergency procedures, and the risks of driving under the influence. To make the most of the manual, consider taking notes, highlighting key sections, and quizzing yourself on the material. This active approach ensures retention and helps identify areas needing further review. Regular practice with sample questions from the manual or online resources can also reinforce learning and build confidence for the exam.

Online Practice Tests and Study Resources

Supplement your study of the 2023 Minnesota Drivers Manual with online practice tests and resources. These tools offer realistic simulations of the written permit test, helping you identify weak areas and build confidence. Many websites provide free Minnesota-specific practice tests, featuring questions similar to those on the official exam. These tests often include detailed explanations to help you understand the correct answers. Additionally, mobile apps dedicated to driver’s education offer convenient study options, including practice questions, flashcards, and progress tracking. Utilizing these resources alongside the official manual ensures a well-rounded preparation strategy. Regular practice with online tests can significantly improve your readiness for the exam, while apps provide flexibility to study on the go. Combining these tools with active learning from the manual will enhance your understanding and retention of key driving concepts.

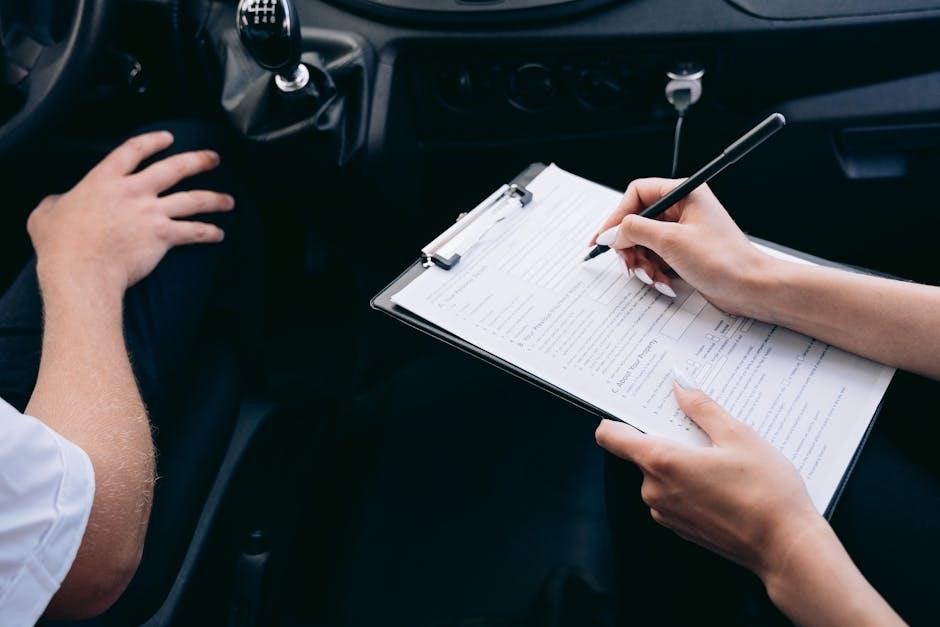
Preparing for the Minnesota Road Test

Mastering the road test requires practical experience and structured study guides. Practice essential maneuvers like parallel parking and safe merging, and seek professional instruction for personalized feedback to build confidence and skills behind the wheel.

Structured Road Test Study Guides

Structured road test study guides provide a detailed breakdown of the skills and maneuvers required for the Minnesota road test. These guides outline the specific procedures examiners follow, ensuring candidates understand expectations. Key areas include parallel parking, three-point turns, and safe merging. Many resources offer checklists of essential skills to practice, such as maintaining proper lane position and navigating intersections safely. These guides also emphasize the importance of vehicle control and situational awareness. Additionally, they often include tips for handling challenging scenarios, like driving on highways or in heavy traffic. By using a structured study guide, candidates can systematically address each aspect of the road test, building confidence and competence. Regular practice with a supervising driver or professional instructor is recommended to refine skills and address weaknesses identified through the guide. Familiarizing oneself with the test vehicle’s controls and practicing in various conditions further enhances readiness.

Practical Driving Experience and Professional Instruction

Practical driving experience is crucial for mastering the skills needed to pass the Minnesota road test. While study guides and manuals provide theoretical knowledge, actual behind-the-wheel practice builds muscle memory and confidence. Working with a professional driving instructor offers personalized feedback and tailored instruction, addressing specific weaknesses and improving overall driving proficiency. Instructors can simulate road test scenarios, helping learners understand examiner expectations and refine their techniques. Additionally, supervised driving practice with a licensed driver allows for real-world application of skills in diverse conditions, such as city streets, highways, and low-visibility environments. A structured driving log can track progress and identify areas for further improvement. Combining professional instruction with consistent practice ensures a comprehensive understanding of safe and legal driving practices, ultimately leading to success on the road test and beyond.

The 2023 Minnesota Drivers Manual is a comprehensive guide for safe and legal driving. It includes updates on fees, new laws, and study resources. Mastery of this manual ensures confident and responsible driving.

Final Tips for Success with the Minnesota Drivers Manual

To succeed with the 2023 Minnesota Drivers Manual, thoroughly study the updated content, focusing on new laws like fee increases and the Drivers License for All policy. Use the manual to prepare for both the written and road tests by reviewing traffic signs, safe driving practices, and legal requirements. Engage actively with the material—highlight key points, take notes, and quiz yourself regularly. Supplement your study with online practice tests to build confidence and identify areas for improvement. For the road test, practice essential driving skills like parallel parking and merging, and consider professional instruction for personalized feedback. Familiarize yourself with the vehicle you’ll use for the test and practice in various conditions. Finally, stay calm and focused during your exams, ensuring you’re well-prepared to drive safely and responsibly in Minnesota.

240sx auto to manual swap

Welcome to the comprehensive guide on converting your Nissan 240SX from automatic to manual transmission․ This swap enhances driving engagement, performance, and control, making it a popular modification․ With proper planning and execution, you can achieve a successful conversion, typically costing between $400-$500 for a DIY approach․ This guide provides detailed steps, tips, and essential information to help you through the process․

1․1 Overview of the Swap

The 240SX auto-to-manual swap involves replacing the automatic transmission with a manual setup, including a transmission, clutch, and pedal assembly․ This modification enhances driver engagement and performance, requiring careful planning and specific parts․ It’s a popular upgrade for enthusiasts seeking better control and driving dynamics․

1․2 Benefits of Converting to Manual Transmission

Converting to a manual transmission enhances driving engagement, precision, and control․ It improves acceleration, fuel efficiency, and overall performance․ Additionally, manual transmissions are more durable and cost-effective in the long run, making them a desirable upgrade for enthusiasts seeking a more immersive driving experience․

Planning and Preparation

Planning is crucial for a smooth 240SX auto-to-manual swap․ Gather essential tools, establish a budget, and source all necessary parts․ Proper preparation ensures a successful conversion․

2․1 Essential Tools and Equipment Needed

A transmission jack, socket set, wrenches, and torque wrench are essential․ Specialized tools like a clutch alignment tool and hydraulic bleeding kit are also required․ Ensure you have a well-equipped workspace and proper safety gear for the conversion process․

2․2 Budgeting for the Conversion

Budgeting for a 240SX auto-to-manual swap can range from $400 to $500 for used parts and fluids․ New parts may increase costs to $1,000 or more․ Professional labor adds $2,000 to $4,000, depending on location and expertise․ Plan accordingly, considering tools and potential unforeseen expenses․

Key components for the swap include a compatible manual transmission, clutch kit, flywheel, driveshaft, and transmission mount․ Stainless steel clutch lines and a manual pedal assembly are essential․ Ensure all parts are compatible with your vehicle’s engine and model year for a seamless installation process and optimal performance․

Parts Selection for a Successful Swap

2․3 Gathering Necessary Parts and Components

Acquire a manual transmission, clutch kit, flywheel, driveshaft, and transmission mount․ Ensure compatibility with your engine and model․ Source parts from reputable suppliers or salvage yards․ Verify condition and fitment to avoid installation issues․

3․1 Choosing the Right Manual Transmission

Choosing the right manual transmission is crucial for a successful swap․ Opt for a transmission from a manual-equipped 240SX to ensure compatibility․ Inspect for low mileage, signs of damage, or leaks to guarantee reliability and smooth performance․

3․2 Clutch Assembly and Flywheel

The clutch assembly and flywheel are vital for smooth manual operation․ Select a compatible clutch kit, including a pressure plate, disc, and throw-out bearing․ Ensure the flywheel is resurfaced or replaced for proper engagement․ A pilot bushing is also necessary for transmission alignment․ Use a high-quality clutch kit for durability and precise shifting, adhering to torque specifications for all bolts․

3․3 Driveshaft and Transmission Mount

The driveshaft and transmission mount are crucial for a smooth swap․ A manual-specific driveshaft is required, as the automatic version may not fit․ Ensure proper alignment and length to avoid vibrations․ The transmission mount secures the manual gearbox, providing stability and preventing movement during shifting․

3․4 Additional Components (Pedal Assembly, Clutch Line, etc․)

Beyond the transmission, essential components include a manual pedal assembly, stainless steel clutch line, and pilot bushing․ The pedal assembly replaces the automatic setup, while the clutch line ensures reliable hydraulic connection․ These parts are vital for smooth operation and must be carefully selected for compatibility and durability․

Step-by-Step Installation Process

Remove the automatic transmission, then install the manual one, ensuring proper alignment․ Use a transmission jack and clutch alignment tool for precise execution․ This step-by-step process requires careful attention to detail to ensure a smooth and successful swap․

4․1 Removing the Automatic Transmission

Begin by draining the transmission fluid and disconnecting electrical connectors․ Use a transmission jack to support the unit․ Remove the driveshaft and mounting brackets, then carefully lift the automatic transmission out of the chassis․ Ensure proper alignment and take safety precautions to avoid damage or injury․

4․2 Installing the Manual Transmission

Position the manual transmission into the chassis, ensuring proper alignment with the engine․ Secure it using the correct bellhousing and bolts․ Double-check compatibility and fitment, then tighten all connections firmly․ Proper alignment is crucial to prevent damage and ensure smooth operation․

4․3 Connecting the Driveshaft

Remove the automatic driveshaft and install the manual-specific driveshaft, ensuring correct length and alignment․ Secure it to the transmission and differential flanges with appropriate hardware․ Proper alignment prevents vibrations and ensures smooth power delivery․ A driveshaft shop can help measure and balance it for optimal performance․

4․4 Bleeding the Clutch System

Bleeding the clutch system removes air bubbles, ensuring proper hydraulic pressure․ Use a bleed kit, starting at the slave cylinder․ Pump the clutch pedal repeatedly, then hold it down while bleeding․ Repeat until fluid flows cleanly without bubbles․ Use GL-4 rated fluid for compatibility and system protection․

Wiring and Electrical Adjustments

Replace the automatic wiring harness with a manual transmission harness․ Repin the ECU for manual operation and ensure proper connections for clutch and gear sensors․ This step is crucial for smooth transmission functionality and accurate engine control․ Consult wiring diagrams for precise modifications․

5․1 Understanding the Wiring Harness

The wiring harness must be modified to accommodate manual transmission sensors․ Replace the automatic harness with a manual-specific one, ensuring compatibility with your 240SX’s ECU․ This involves splicing wires for clutch and gear position sensors, crucial for accurate engine control and smooth shifting․ Proper installation prevents electrical issues and enhances performance․

5․2 ECU Adjustments for Manual Transmission

Repinning or replacing the ECU is essential for manual transmission compatibility․ A manual-specific ECU ensures proper fuel and ignition mapping, enhancing performance․ Incorrect settings can lead to faulty gear shifts and engine issues․ Consulting online forums or professionals is recommended for accurate ECU configuration and optimal drivetrain operation․

5․3 Solving Common Electrical Issues

Common electrical issues during the swap include faulty wiring connections and sensor malfunctions․ Ensure the wiring harness is correctly modified for manual transmission sensors․ Consult detailed diagrams and forums for troubleshooting․ Professional assistance may be needed for complex electrical problems to avoid damaging components or causing system failures․

Clutch System Installation and Adjustment

Install the flywheel, clutch disc, and pressure plate, ensuring proper alignment․ Mount the throw-out bearing and connect the clutch pedal․ Bleed the hydraulic system for optimal engagement and adjust the pedal for smooth operation․

6․1 Installing the Flywheel and Clutch Disc

Begin by installing the flywheel, ensuring it’s properly aligned with the engine’s crankshaft․ Next, place the clutch disc onto the flywheel splines, aligning it correctly․ Finally, bolt the pressure plate over the disc, tightening according to manufacturer specifications for secure and even pressure․

6․2 Setting Up the Throw-Out Bearing

Position the throw-out bearing in the clutch fork, ensuring it aligns with the clutch disc․ Secure it firmly, checking for proper engagement with the pressure plate․ Use a clutch alignment tool for accuracy and test the operation to ensure smooth, noise-free functionality․

6․3 Adjusting the Clutch Pedal

Adjusting the clutch pedal ensures proper engagement and disengagement․ Begin by installing the manual pedal assembly, then set the free play according to specifications․ Fine-tune the clutch cable or hydraulic system for smooth operation․ Test the pedal feel and adjust as needed for optimal performance․

Pedal Assembly Replacement

Replacing the pedal assembly is essential for manual conversion, requiring a three-pedal system․ The automatic setup must be removed and replaced with a manual-compatible assembly for proper function․

7․1 Removing the Automatic Pedal Assembly

Begin by removing the cotter pin from the brake pedal using a pick or pliers․ Rotate the pin downward and pull it out․ Next, undo the four bolts on the firewall and the single bolt at the top of the brake pedal bracket․ Carefully remove the automatic pedal assembly, taking note of the brake lines and electrical connections to avoid damage․ Consider documenting the process with pictures for reinstallation reference and consult a repair manual or guide for additional clarity and safety․

7․2 Installing the Manual Pedal Assembly

Install the manual pedal assembly by reversing the removal process․ Ensure correct alignment and secure mounting using the provided hardware․ Connect the clutch pedal to the master cylinder and adjust for smooth operation․ Inspect for proper linkage and functionality, ensuring no interference between pedals․ Test thoroughly after installation․

7․3 Adjusting the Brake and Clutch Pedals

Loosen the pedal assembly bolts to adjust the brake and clutch pedals․ Align the clutch pedal assembly correctly and tighten the bolts․ Ensure proper free play by adjusting the pedal rod and checking functionality․ Verify smooth operation and proper alignment to prevent interference or uneven pedal feel․

Transmission and Driveshaft Setup

Securing the manual transmission involves precise alignment with the engine․ Aligning and installing the driveshaft ensures proper power transfer․ Proper transmission mounting and driveshaft clearance are crucial for optimal performance and longevity․

8․1 Securing the Manual Transmission

Securing the manual transmission involves properly aligning it with the engine and bellhousing․ Use the correct bolts and torque specifications to ensure a tight, vibration-free fit․ Proper alignment prevents damage to the transmission and engine, while correct torque ensures long-term reliability and performance․

8․2 Aligning and Installing the Driveshaft

Aligning the driveshaft requires precise measurement and installation to ensure proper fitment․ Select a driveshaft compatible with the manual transmission, often requiring a different length than the automatic․ Use a torque wrench to secure the universal joints and check for proper alignment between the transmission and differential flanges; Ensure no clearance issues with chassis components․

8․3 Ensuring Proper Transmission Mounting

Proper transmission mounting is vital for stability and performance․ Use compatible transmission mounts and bolts, ensuring they are tightly secured․ Align the transmission with the engine and chassis, and torque the bolts to specifications․ Double-check for any movement or noise, as improper mounting can lead to vibration and damage over time․

ECU Configuration and Tuning

ECU configuration is critical for optimal performance after the swap․ Repinning or replacing the ECU ensures proper communication with the manual transmission, enhancing fuel injection and ignition timing accuracy․

9․1 Repinning the ECU for Manual Transmission

Repinning the ECU is essential for manual transmission compatibility․ This process involves rewiring the ECU to recognize manual-specific sensors and signals, ensuring proper engine operation․ Professional tools and expertise are often required to avoid damaging the ECU or its components during the repinning process․

9․2 Tuning the ECU for Optimal Performance

Tuning the ECU is critical for optimizing performance after the swap․ Adjustments include refining fuel and ignition maps to match manual transmission dynamics․ Proper tuning enhances throttle response, ensures smooth gear shifts, and improves overall drivability, making it essential for maximizing the benefits of your manual conversion․

9․3Troubleshooting ECU-Related Issues

9․3 Troubleshooting ECU-Related Issues

Common ECU-related issues after a manual swap include error codes, erratic shifting, or poor engine performance․ Check wiring connections, ensure proper ECU configuration, and verify compatibility․Consult wiring diagrams and forums for solutions․ Re-pinning or reflashing the ECU may be necessary for optimal functionality and to resolve persistent problems effectively․

Final Testing and Troubleshooting

After completing the swap, perform a thorough test drive to ensure proper functionality․ Check for leaks, smooth shifting, and clutch engagement․ Address any issues promptly to guarantee reliability and optimal performance․

10․1 Initial Start-Up and Clutch Testing

Start the engine and check for proper clutch pedal feel․ Test clutch engagement by shifting through gears, ensuring smooth transitions․ Listen for unusual noises․ Verify proper acceleration and shifting functionality․ This step confirms the clutch system operates correctly after the swap․

10․2 Checking for Leaks and Proper Functionality

Inspect the clutch line, driveshaft, and transmission seals for leaks․ Verify smooth gear engagement and proper clutch operation․ Ensure no unusual noises or vibrations occur during operation․ Test all functions thoroughly to confirm the swap’s success and identify any potential issues early․

10․3 Addressing Common Post-Swap Issues

Common issues post-swap include clutch misalignment, leaks, or improper gear engagement․ Inspect the clutch system for alignment and bleed if necessary․ Check for fluid leaks around the transmission and driveshaft․ Address any unusual noises or vibrations promptly․ Consult expert resources or forums for troubleshooting specific problems and ensuring long-term reliability․

alesis nitro mesh kit assembly manual

The Alesis Nitro Mesh Kit is a high-quality, 8-piece electronic drum set featuring mesh drum heads for realistic feel and versatile performance. Designed for drummers of all levels, it combines professional-grade components with intuitive controls, making it an excellent choice for practice, recording, or live performances. Its compact design and robust construction ensure durability, while the mesh technology delivers expressive playability. This kit is tailored for musicians seeking a balance between affordability and premium features, offering a seamless drumming experience.

1.1 Overview of the Alesis Nitro Mesh Kit

The Alesis Nitro Mesh Kit is an 8-piece electronic drum set featuring mesh drum heads for a realistic feel and expressive playability. It includes a professional drum module, mesh snare, toms, and crash cymbal pads, offering versatility for drummers of all skill levels. Designed for quiet operation and durability, the kit is ideal for home practice, recording, or live performances. Its compact design and intuitive controls make it a versatile choice for modern drummers seeking a high-quality experience.

1.2 Importance of Proper Assembly

Proper assembly of the Alesis Nitro Mesh Kit is crucial for ensuring optimal performance and longevity. Incorrect assembly can lead to poor sensitivity, unstable components, or even damage to the kit. Following the provided assembly manual ensures all parts are securely connected, allowing for precise triggering and a professional drumming experience. Proper setup also prevents wear and tear, maintaining the kit’s durability and responsiveness over time. Always refer to the guide to avoid common mistakes and enjoy uninterrupted playability.

Unboxing and Inventory

Unboxing the Alesis Nitro Mesh Kit reveals a comprehensive set of components, including the drum rack, mesh drum heads, cymbal pads, drum module, and cable snake. Ensure all items are present and undamaged before proceeding with assembly.

2.1 What’s Included in the Box

The Alesis Nitro Mesh Kit box contains essential components for setup, including the drum rack, mesh drum heads, cymbal pads, drum module, cable snake, drum key, and assembly guide. Additional items like mounting clamps, bolts, and connectors are also provided. Ensure all parts are included and free from damage before starting assembly. The kit is thoughtfully packaged to streamline the assembly process and ensure everything needed is readily available.

2.2 Checking for Damages or Missing Parts

Before assembling the Alesis Nitro Mesh Kit, thoroughly inspect all components for any visible damage or defects. Cross-reference the items with the provided packing list to ensure no parts are missing. Check for dents, scratches, or loose connections, especially on the drum module and mesh heads. If any damage or discrepancies are found, contact Alesis support immediately to resolve the issue before proceeding with assembly. This step ensures a smooth setup process.

Understanding the Hardware Components

The Alesis Nitro Mesh Kit includes a drum module, mesh drum heads, cymbal pads, and a cable snake. These components work together to deliver a responsive drumming experience.

3.1 Drum Rack and Clamps

The drum rack is a sturdy, adjustable frame that holds the entire kit together. It features clamps that securely attach drum and cymbal pads, ensuring stability during performance. Made of durable metal, the clamps provide a tight grip, preventing movement. Use the drum key to tighten or loosen the clamps, ensuring a firm hold. Properly assembled, the rack and clamps create a solid foundation for your Alesis Nitro Mesh Kit, enhancing playability and reliability.

3.2 Mesh Drum Heads and Cymbal Pads

The Alesis Nitro Mesh Kit features responsive mesh drum heads, designed for a natural drumming experience. These heads are made of durable, triple-layer mesh, offering excellent sensitivity and rebound. The cymbal pads are chokeable, providing realistic cymbal playability. Both drum heads and cymbal pads are pre-assembled on pads but may require tension adjustment using the drum key. Properly calibrated, they deliver accurate triggering and expressive performance, enhancing the overall drumming experience.

3.3 Drum Module and Cable Snake

The Alesis Nitro Mesh Kit’s drum module is the central control unit, housing sounds, settings, and connectivity options. The cable snake is a multi-channel cable connecting drum and cymbal pads to the module, simplifying setup and reducing clutter. Proper connections ensure accurate triggering and performance. The module has multiple inputs for various pads, while the cable snake organizes cables neatly, preventing tangles and ensuring reliable operation during use.

Step-by-Step Assembly Process

This section provides a detailed, methodical guide to assembling the Alesis Nitro Mesh Kit, ensuring a smooth and error-free setup experience for drummers of all skill levels;

4.1 Assembling the Drum Rack

Begin by unboxing and organizing the drum rack components. Use the provided drum key to loosen or tighten bolts as needed. Attach the clamps to the rack using the included hardware, ensuring a secure fit. Mount the drum and cymbal pads according to the marked positions on the rack. Tighten all connections firmly but avoid over-tightening. Double-check the rack’s stability and alignment before proceeding to mount the pads. Refer to the assembly guide for precise configuration details.

4.2 Mounting Drum and Cymbal Pads

Securely attach the drum pads and cymbal pads to the rack using the provided clamps and drum key. Position each pad according to the marked locations on the rack for optimal playability. Ensure the pads are tightly fastened but avoid over-tightening, which may damage the hardware. Align the pads evenly and test their stability before connecting them to the drum module. Refer to the assembly guide for correct pad placement and cable connections to ensure proper functionality.

4.3 Connecting the Drum Module

Connect the drum module to the pads and cymbals using the cable snake provided. Ensure each pad is securely linked to the corresponding input on the module. Tighten all connections firmly to prevent signal loss. Power on the module and perform a quick test to confirm all pads and cymbals are responsive. Refer to the connection diagram in the manual for correct input assignments and cable routing to ensure proper functionality and avoid interference.

Installing the Mesh Drum Heads

Attach the mesh drum heads to the drums using the provided hardware. Tighten the pads evenly with the drum key for optimal tension and performance. Ensure proper fitment and alignment to avoid damage and maintain responsiveness. This step is crucial for achieving the best sound quality and durability of the mesh heads.

5.1 Attaching Mesh Heads to Drums

Align the mesh head with the drum shell, ensuring proper fitment. Secure it using the provided hardware, starting from the center and working outward. Use the drum key to tighten evenly, avoiding over-tension. Check for uniform tightness and responsiveness. Proper attachment ensures optimal sound quality and durability. Follow the assembly guide for precise instructions to achieve the best results.

5.2 Adjusting Tension and Sensitivity

Use the drum key to adjust the mesh head tension for optimal responsiveness. Tighten evenly around the drum to maintain uniformity. Adjust the sensitivity settings on the drum module to customize how the pads respond to strikes. Refer to the module’s user guide for specific sensitivity calibration steps. Proper tension and sensitivity ensure accurate triggering and a natural playing feel. Test the pads after adjustments to confirm the desired performance.

Connecting the Cymbal Pads

Connect the cymbal pads to the module using the cable snake. Identify the correct ports on both the pads and the module, ensuring secure connections. Test responsiveness after linking to confirm proper functionality and accurate triggering.

6.1 Mounting Cymbals on the Rack

Mounting cymbals on the rack begins with loosening the clamp bolts using the drum key. Position the cymbal pad on the rack, ensuring alignment with the drum setup. Tighten the bolts firmly but avoid overtightening, which could damage the clamp or rack. Ensure the cymbal is stable and evenly balanced for optimal playability. Double-check the placement and stability to prevent movement during performance. Proper mounting ensures reliable triggering and consistent sound quality.

6.2 Connecting Cymbal Pads to the Module

Connect the cymbal pads to the drum module by locating the designated ports on the module’s rear panel. Plug in the cymbal pad cables, ensuring they are securely seated. Match each cymbal pad to its corresponding input, as labeled on the module. Tighten any loose connections to prevent signal loss. Power on the kit and test each cymbal pad to confirm proper triggering. Adjust sensitivity settings if needed for optimal performance. Ensure all cables are tightly secured for stability.

Final Adjustments and Testing

Perform final checks, verify all connections, and test each pad and cymbal for responsiveness. Adjust settings as needed to ensure optimal performance and readiness for use.

7.1 Tightening All Bolts and Clamps

Using the drum key, ensure all bolts and clamps are securely tightened to maintain stability. Double-check the drum rack, pad mounts, and cymbal arms for a firm connection. Do not overtighten, as this may damage the hardware. Verify that all components are evenly balanced and the setup feels sturdy. Re-tighten any loose parts and confirm that all connections are secure before proceeding to testing.

7.2 Testing Each Pad and Cymbal

After assembly, test each drum pad and cymbal to ensure proper function. Strike each pad to verify sensitivity and response. Check cymbals for accurate triggering and dynamic range. Use the drum module to monitor sounds and adjust settings if necessary. Ensure no pad or cymbal produces unintended sounds or delays. This step guarantees optimal performance and confirms a successful setup. Make adjustments as needed for consistent playability and precise sound reproduction.

Tips for a Smooth Assembly

Ensure a smooth assembly by following these essential tips. Use the drum key effectively for secure connections. Reference the assembly guide video for visual clarity and step-by-step instructions. Proper preparation and careful planning will lead to a stress-free setup and optimal performance. Stay organized and take your time to avoid mistakes.

8.1 Using the Drum Key Effectively

The drum key is essential for assembling and adjusting your Alesis Nitro Mesh Kit. Use it to tighten or loosen bolts on clamps and pads securely. Ensure all connections are snug but avoid over-tightening, which could damage components. Regularly check the tension of mesh heads to maintain optimal playability and responsiveness. Proper use of the drum key ensures a stable setup and enhances your drumming experience. Always keep the key handy for quick adjustments during assembly and practice. Stay organized and methodical for the best results.

8.2 Referencing the Assembly Guide Video

Referencing the official Alesis Nitro Mesh Kit assembly guide video is highly recommended for a smooth setup. This video provides a step-by-step walkthrough, covering drum rack assembly, pad mounting, and module connections. It highlights key details to avoid common mistakes and ensures proper functionality; Available on platforms like YouTube and the Alesis website, the guide is an invaluable resource for both new and experienced users, helping you achieve professional results efficiently. Use it to complement the manual for a hassle-free experience. Additionally, the video includes tips for optimal performance and troubleshooting, making it a comprehensive tool for your setup journey.

Troubleshooting Common Issues

  • Connection Problems: Ensure all cables are securely connected to the module and pads. Check for loose or damaged cables.
  • Mesh Head Calibration: Adjust sensitivity settings in the module if the mesh heads are not responding accurately.
  • Unexpected Glitches: Restart the module or reset factory settings if issues persist.

9.1 Resolving Connection Problems

Connection issues can often be resolved by ensuring all cables are securely plugged into the correct ports. Verify the cable snake is properly connected to both the drum module and pads. If a pad or cymbal isn’t responding, check for loose connections or damage to the cables. Restarting the module can also resolve electronic glitches. Refer to the assembly guide or video for proper connection diagrams and troubleshooting steps to ensure everything is set up correctly.

9.2 Addressing Mesh Head Calibration

Mesh heads may require calibration for optimal performance. If the response feels uneven, adjust the tension using the drum key. Ensure the mesh is tightly secured but not over-tightened, as this can damage the head. Test each pad to confirm sensitivity settings are accurate. Refer to the user manual for specific calibration instructions, and make fine adjustments as needed to achieve the desired feel and response from the mesh heads.

Thank you for following the Alesis Nitro Mesh Kit assembly guide. Proper assembly ensures optimal performance. Double-check all connections and adjustments before your first session. Enjoy your new drum kit!

10.1 Final Check Before First Use

Before your first use, ensure all components are securely connected and tightened. Verify that mesh heads are properly seated and adjusted for sensitivity. Check that all pads and cymbals are mounted correctly and the drum module is powered on. Test each pad and cymbal to confirm they trigger sounds accurately. Finally, plug in your headphones or connect to an amplifier to ensure sound output is clear. A quick play test will confirm everything is ready for use.

10.2 Enjoying Your New Drum Kit

Congratulations! Your Alesis Nitro Mesh Kit is now ready for play. With its responsive mesh heads and versatile drum module, you can explore a wide range of sounds and rhythms. Whether practicing, recording, or performing, the kit delivers dynamic performance. Connect to headphones or an amplifier for clear audio. Take advantage of built-in lessons and MIDI compatibility to enhance your skills. Enjoy the freedom to create and express yourself musically with your new professional-grade drum kit.

elite gourmet egg cooker manual

Welcome to the Elite Gourmet Egg Cooker Manual! This guide provides comprehensive instructions for using your egg cooker‚ ensuring optimal performance and safety. Explore its features‚ operation‚ and troubleshooting tips to enhance your cooking experience.

Overview of the Elite Gourmet Egg Cooker

The Elite Gourmet Egg Cooker is a versatile kitchen appliance designed for boiling‚ steaming‚ and poaching eggs to perfection. With a 7-egg capacity‚ it offers efficient cooking for multiple eggs at once. Its automatic shut-off and alarm system ensure eggs are cooked to your desired doneness without constant monitoring. The BPA-free‚ durable design prioritizes safety and longevity. Available in models like EGC648‚ EGC007‚ and EGC322‚ it caters to various preferences‚ making it a convenient addition to any kitchen.

Importance of Reading the Manual

Reading the Elite Gourmet Egg Cooker manual is crucial for safe and effective use. It provides essential guidelines‚ safety precautions‚ and operating instructions to ensure optimal performance. Understanding the manual helps prevent accidents and prolongs the appliance’s lifespan. Familiarize yourself with features‚ troubleshooting tips‚ and maintenance procedures to get the most out of your egg cooker. By following the manual‚ you can achieve perfectly cooked eggs every time while maintaining your kitchen’s safety and efficiency.

Key Features and Benefits of the Elite Gourmet Egg Cooker

The Elite Gourmet Egg Cooker offers multi-functionality‚ allowing you to boil‚ steam‚ or poach eggs effortlessly. Its 7-egg capacity ensures efficient cooking‚ while the automatic shut-off and alarm system provide perfect results every time. Designed with BPA-free materials‚ it prioritizes durability and safety‚ making it a versatile and reliable kitchen essential for home cooks.

Multi-Functionality: Boiling‚ Steaming‚ and Poaching

The Elite Gourmet Egg Cooker excels in versatility‚ offering three cooking methods: boiling‚ steaming‚ and poaching. Boiling allows for soft‚ medium‚ or hard-boiled eggs‚ while steaming ensures a healthier option with minimal water. Poaching is made effortless with the included tray‚ delivering perfectly cooked eggs. The automatic shut-off and thermal sensor ensure precise cooking‚ preventing overcooking. This multi-functionality makes it ideal for various egg preferences‚ providing consistent results every time. Its design simplifies cooking while maintaining flavor and texture‚ making it a must-have for egg lovers.

7-Egg Capacity for Efficient Cooking

The Elite Gourmet Egg Cooker boasts a 7-egg capacity‚ making it ideal for families or meal prep. This feature allows you to cook multiple eggs simultaneously‚ saving time and effort. Whether you prefer soft‚ medium‚ or hard-boiled eggs‚ the cooker ensures consistent results. The compact design accommodates up to seven eggs‚ while the automatic shut-off and thermal sensor prevent overcooking. This efficient capacity is perfect for quick breakfasts or snacks‚ offering convenience without compromising on quality. The 7-egg tray is durable‚ BPA-free‚ and easy to clean‚ ensuring long-lasting performance.

Automatic Shut-Off and Alarm System

The Elite Gourmet Egg Cooker features an automatic shut-off and alarm system‚ ensuring your eggs are cooked to perfection without constant monitoring. The alarm sounds when the cooking process is complete‚ preventing overcooking. This feature is designed for convenience‚ allowing you to multitask while cooking. The automatic shut-off enhances safety by turning off the device once eggs are ready. The alarm may be loud for some users‚ but it provides clear feedback. This system ensures consistent results and adds ease to your cooking routine‚ making it a standout feature for everyday use.

BPA-Free and Durable Design

The Elite Gourmet Egg Cooker is crafted with a BPA-free and durable design‚ ensuring safety and longevity. Its high-quality materials resist wear and tear‚ while the BPA-free construction guarantees safe food preparation. The cooker’s sleek and sturdy build makes it a reliable addition to your kitchen. This design not only enhances performance but also provides peace of mind‚ knowing your appliance is built to last and prioritizes health and safety standards for all your egg-cooking needs.

Understanding the Elite Gourmet Egg Cooker Models

Welcome to the section dedicated to understanding the Elite Gourmet Egg Cooker models. Here‚ you’ll learn about the different models‚ such as the EGC648‚ EGC007‚ and EGC322‚ each designed with unique features to cater to various cooking preferences and needs‚ ensuring a tailored experience for every user.

Differences Between EGC648‚ EGC007‚ and EGC322 Models

The Elite Gourmet Egg Cooker models EGC648‚ EGC007‚ and EGC322 vary in design and features. The EGC648 is a 7-egg stainless steel cooker with a modern look‚ while the EGC007 features a compact design and coral color option. The EGC322 offers a classic white finish and similar functionality to the EGC007. All models include automatic shut-off‚ alarms‚ and BPA-free components‚ ensuring safe and efficient cooking. Each model caters to different aesthetic preferences while maintaining core functionalities like boiling‚ steaming‚ and poaching eggs effortlessly.

Specialized Features of Each Model

Each Elite Gourmet Egg Cooker model offers unique features. The EGC648 boasts a stainless steel finish and advanced thermal sensor for precise cooking. The EGC007 includes a rapid cooking function and 16-recipe booklet‚ while the EGC322 features a classic design with a focus on easy-to-peel eggs. All models have automatic shut-off and alarms‚ ensuring perfect doneness every time. These specialized features cater to different cooking needs‚ making each model versatile for various egg preparation methods and user preferences.

Safety Precautions and Important Safeguards

Always read the manual before use. Keep the cooker out of children’s reach and avoid contact with water or hot surfaces. Follow guidelines to prevent accidents.

General Safety Guidelines

Always read the manual before first use and follow all instructions carefully. Keep children away from the appliance and avoid touching hot surfaces. Do not submerge the cooker in water or expose it to excessive moisture. Ensure the unit is placed on a stable‚ heat-resistant surface. Never leave the cooker unattended while in operation. Unplug the device when not in use or before cleaning. Avoid modifying the appliance‚ as this may cause malfunctions. Refer to the manual for detailed safety measures to ensure safe and efficient use.

Electrical Safety Tips

Always use the Elite Gourmet Egg Cooker on a stable‚ heat-resistant surface. Keep the appliance away from water to avoid electrical hazards. Never submerge the cooker in water or expose it to excessive moisture. Use only the original power cord provided‚ as replacements may not meet safety standards. Avoid overloading electrical circuits‚ and ensure the cord is kept away from hot surfaces; Do not operate the cooker near flammable materials or in areas with high humidity; Ensure the unit is properly grounded to prevent electrical shocks. Follow these guidelines to ensure safe and reliable operation.

Cleaning and Maintenance Instructions

Regularly clean the Elite Gourmet Egg Cooker with a damp cloth and mild detergent. Avoid abrasive cleaners or scrubbers. Wash detachable parts like the egg tray and lid with soap and warm water. Dry thoroughly to prevent rust or water spots. For tough stains‚ soak parts in warm soapy water before cleaning. Always unplug the unit before cleaning to ensure safety.

Step-by-Step Cleaning Process

Unplug the Elite Gourmet Egg Cooker and allow it to cool completely.

Wipe the exterior with a damp cloth and mild detergent‚ avoiding harsh chemicals.

Remove and wash the egg tray‚ lid‚ and measuring cup with warm soapy water.

For stubborn stains‚ soak parts in warm water before scrubbing gently.

Dry all components thoroughly to prevent water spots or rust.

Regularly clean the cooking plate and poaching tray to maintain hygiene.

Avoid using abrasive cleaners or scrubbers to protect the surfaces.

Reassemble the cooker only when all parts are completely dry for optimal performance.

Recommended Cleaning Tools and Supplies

For effective cleaning‚ use a soft sponge or cloth‚ mild dish soap‚ and warm water.

A small‚ soft-bristled brush can help remove stubborn food residues.

Microfiber cloths are ideal for drying to prevent water spots.

White vinegar can be used to remove mineral deposits or scaling.

Avoid abrasive cleaners‚ scrubbers‚ or bleach to protect the surfaces.

A clean‚ dry towel is essential for drying all parts after washing.

Regularly cleaning with these tools ensures the cooker remains hygienic and functional.

How to Use the Elite Gourmet Egg Cooker

Add eggs‚ water‚ and press the power button. Wait for the alarm to signal completion. Follow the manual’s step-by-step guide for precise cooking results every time.

Step-by-Step Guide to Cooking Eggs

Start by adding water to the measuring cup based on desired doneness. Place eggs in the cooking tray and set your preferred hardness level. Close the lid‚ press the power button‚ and wait for the alarm to signal completion. For poached eggs‚ use the poaching tray and follow the same steps. Ensure eggs are cooled before handling. Refer to the manual for specific timing and additional recipes to enhance your cooking experience with the Elite Gourmet Egg Cooker.

Using the Measuring Cup for Water Levels

The measuring cup is essential for accurate water levels‚ ensuring perfectly cooked eggs. Fill the cup to the marked line corresponding to your desired doneness: soft‚ medium‚ or hard-boiled. Pour the water into the cooking plate‚ then add eggs. This step ensures optimal cooking results. Always use the provided measuring cup to maintain the correct water level for consistent outcomes. Proper measurement is key to achieving your preferred egg texture with the Elite Gourmet Egg Cooker.

Cooking Times and Settings

Cooking times vary based on egg doneness: soft-boiled (10-12 min)‚ medium (13-15 min)‚ and hard-boiled (16-18 min). Adjust settings according to your preference for perfect results.

Soft‚ Medium‚ and Hard-Boiled Egg Settings

The Elite Gourmet Egg Cooker offers precise settings for soft‚ medium‚ and hard-boiled eggs. For soft-boiled‚ cook for 10-12 minutes with a lower water level. Medium-boiled eggs require 13-15 minutes‚ while hard-boiled eggs need 16-18 minutes with a full water level. Adjust the water in the measuring cup accordingly for consistent results. The automatic shut-off ensures eggs are cooked to your desired doneness without overcooking. This feature allows for easy peeling and perfect texture every time‚ making it ideal for various recipes and preferences.

Poaching and Steaming Guidelines

The Elite Gourmet Egg Cooker simplifies poaching and steaming with its specialized trays. For poaching‚ fill the measuring cup with water‚ place eggs in the poaching tray‚ and set the timer. Steam vegetables or eggs by adding water to the base and using the steaming rack. The cooker’s thermal sensor ensures precise temperature control‚ while the automatic shut-off prevents overcooking. These features make it easy to achieve perfectly cooked eggs and healthy steamed dishes with minimal effort and cleanup.

Troubleshooting Common Issues

Resolve issues like a loud alarm or malfunctioning power button by restarting the device. For cooking problems‚ ensure proper water levels and egg placement. Refer to the manual for detailed solutions.

Resolving Issues with the Alarm or Power Button

If the alarm is too loud or malfunctioning‚ check the volume settings or mute it if possible. For the power button‚ ensure it’s clean and free from obstructions. If the button doesn’t respond‚ unplug the cooker‚ wait 5 minutes‚ and plug it back in. This resets the device. If issues persist‚ consult the manual or contact customer support for further assistance.

Fixing Common Cooking Problems

Common issues include eggs not cooking evenly or sticking to the tray. Ensure proper water levels using the measuring cup‚ as insufficient water can affect cooking. For stuck eggs‚ lightly spray the tray with cooking oil before use. If eggs are overcooked‚ adjust the water level or cooking time. Clean the cooker regularly to prevent residue buildup. If the thermal sensor malfunctions‚ unplug‚ wait 5 minutes‚ and restart. Always refer to the manual for specific troubleshooting guidance or contact customer support for unresolved issues.

Final Tips for Optimal Performance

  • Always clean the cooker after use to prevent residue buildup.
  • Use the measuring cup accurately for consistent results.
  • Avoid overcrowding the egg tray for even cooking.
  • Regularly check and replace worn-out parts if necessary.
  • Store the cooker in a dry place to maintain electrical safety.
  • Refer to the manual for specific model updates or new features.

By following these tips‚ your Elite Gourmet Egg Cooker will provide years of reliable service and delicious results.

Referencing the Manual for Future Use

Keep the Elite Gourmet Egg Cooker manual handy for future reference to ensure optimal use and troubleshooting. It contains model-specific instructions‚ warranty details‚ and maintenance tips. Regularly reviewing the manual helps familiarize yourself with new features or updates. Store it in a safe‚ accessible location to maintain your cooker’s performance and safety standards over time. Referencing the manual ensures you can address any issues promptly and continue enjoying perfectly cooked eggs.

2016 subaru outback user manual

Welcome to the 2016 Subaru Outback User Manual, your comprehensive guide to understanding and maintaining your vehicle. This manual provides detailed information on operation, maintenance, and troubleshooting, ensuring optimal performance and safety. Available for free download in PDF format, it offers a thorough understanding of your Subaru Outback’s features and systems.

Overview of the 2016 Subaru Outback

The 2016 Subaru Outback is a versatile midsize crossover SUV, blending the ruggedness of an SUV with the comfort of a station wagon. Known for its all-wheel-drive capability, the Outback excels in both on-road performance and off-road adventures. It features a spacious interior, advanced safety systems, and a reputation for reliability. The vehicle is available in multiple trim levels, including 2.5i, 2.5i Premium, 3.6R, and 3.6R Limited, offering options for various budgets and preferences. With its robust design and refined features, the Outback is designed to meet the needs of drivers seeking a balance between practicality and adventure.

Importance of the User Manual for Proper Vehicle Operation

The 2016 Subaru Outback User Manual is essential for safe and efficient vehicle operation. It provides detailed instructions on starting the vehicle, operating advanced features like the infotainment system, and understanding safety technologies such as EyeSight. The manual also outlines scheduled maintenance requirements and troubleshooting tips, ensuring optimal performance and longevity. By following the guidelines, drivers can avoid potential issues and maintain compliance with emissions standards. Whether you’re a new owner or familiar with the Outback, the manual serves as a vital resource for maximizing your driving experience and preserving your vehicle’s condition.

Features and Specifications of the 2016 Subaru Outback

The 2016 Subaru Outback blends SUV ruggedness with wagon refinement, offering all-weather capability, generous cargo space, and advanced safety features like EyeSight technology.

Key Components and Vehicle Capabilities

The 2016 Subaru Outback is equipped with a Symmetrical All-Wheel Drive system, ensuring superior traction and control on various terrains. It features a 2.5L 4-cylinder or 3.6L 6-cylinder boxer engine, offering a balance of power and efficiency. The Lineartronic CVT optimizes performance and fuel economy. With an 8.7-inch ground clearance, the Outback excels in off-road scenarios while maintaining smooth on-road handling. Its 3,000-pound towing capacity and generous cargo space make it versatile for both adventures and daily use.

The Outback’s robust design and advanced engineering ensure reliability and durability, making it a reliable choice for drivers seeking a blend of capability and comfort.

Trim Levels and Optional Features

The 2016 Subaru Outback is available in multiple trim levels, including the 2.5i, 2.5i Premium, 3.6R Limited, and 3.6R Touring. Each trim offers unique features, such as a moonroof, heated seats, and premium audio systems. The 2.5i Premium adds 17-inch alloy wheels and Bluetooth connectivity. Higher trims include navigation, leather-trimmed upholstery, and a 12-speaker Harman Kardon sound system. Optional features like EyeSight Driver Assist Technology and Blind Spot Detection enhance safety and convenience. Customization options allow owners to tailor their Outback to their preferences, ensuring a blend of comfort, functionality, and advanced technology.

Safety Features and Advanced Systems

The 2016 Subaru Outback features advanced safety systems, including EyeSight Driver Assist Technology with adaptive cruise control and lane departure warning. It also includes a comprehensive airbag system for enhanced protection.

EyeSight Driver Assist Technology

The EyeSight Driver Assist Technology in the 2016 Subaru Outback is a cutting-edge safety system designed to enhance driver awareness and reduce collision risks. This innovative technology uses a pair of cameras mounted on the windshield to monitor the road ahead. Key features include Adaptive Cruise Control, which maintains a safe distance from the vehicle ahead, and Lane Departure Warning, which alerts the driver if the vehicle drifts out of its lane without signaling. Additionally, Pre-Collision Braking automatically applies the brakes if a potential collision is detected, further enhancing safety. These advanced systems work together to provide a safer and more confident driving experience.

Subaru Safety Sense and Airbag Systems

The 2016 Subaru Outback is equipped with a robust suite of safety features, including the Subaru Safety Sense system and an advanced airbag network. The vehicle features a total of seven airbags, including front, side, and curtain airbags, designed to protect occupants in the event of a collision. Additionally, the front seatbelts are equipped with pretensioners that tighten automatically to reduce slack and enhance restraint during sudden stops or impacts. These systems work in tandem with the EyeSight Driver Assist Technology to provide comprehensive protection. The manual details proper use and maintenance of these safety features to ensure optimal functionality and driver confidence. Always refer to the manual for guidance on these critical systems.

Operating the Vehicle

The 2016 Subaru Outback user manual provides essential guidance on starting procedures, operating key systems, and adhering to proper driving techniques for optimal performance and safety.

Starting and Operating the Vehicle

Starting and operating the 2016 Subaru Outback involves a few essential steps to ensure safe and efficient driving. First, use the remote keyless entry system to unlock the vehicle and access the ignition. Insert the key into the ignition slot and turn it clockwise to start the engine. Familiarize yourself with the instrument panel, which displays vital information such as speed, fuel level, and warning lights. Adjust the steering wheel and mirrors for optimal comfort and visibility. Before driving, ensure all occupants are properly restrained using seatbelts. For smooth operation, use the transmission modes (Park, Reverse, Neutral, and Drive) appropriately. Always refer to the manual for detailed instructions on advanced systems like EyeSight Driver Assist Technology. Regularly check fluid levels and tire pressure to maintain performance and safety.

Multimedia and Infotainment Systems

The 2016 Subaru Outback features a sophisticated multimedia system designed to enhance your driving experience. The system includes a high-resolution touchscreen display, allowing easy access to navigation, audio controls, and smartphone integration via Bluetooth or USB. Compatibility with popular platforms like Apple CarPlay and Android Auto enables seamless connectivity for music, apps, and hands-free calling. The premium audio system, such as the Harman Kardon amplifier, delivers high-quality sound for an immersive listening experience. Additional features include voice command functionality, SiriusXM satellite radio, and customizable settings to tailor your infotainment preferences. This system ensures convenience, entertainment, and safety while on the road.

Maintenance and Troubleshooting

This section covers essential maintenance routines, troubleshooting tips, and guidelines to ensure your 2016 Subaru Outback performs optimally and maintains its longevity.

Scheduled Maintenance and Service Intervals

Regular maintenance is crucial for the longevity and performance of your 2016 Subaru Outback. The user manual outlines specific service intervals, such as oil changes every 7,500 miles for synthetic oil and tire rotations every 5,000 miles. It also recommends inspections of brakes, belts, and fluids at designated intervals. Adhering to these schedules ensures optimal vehicle performance, prevents wear and tear, and maintains warranty coverage. Detailed charts and guidelines are provided to help owners track and perform necessary maintenance. Always refer to the manual for specific instructions tailored to your vehicle’s needs and driving conditions.

Common Issues and DIY Fixes

The 2016 Subaru Outback user manual highlights common issues and provides DIY solutions to help owners address minor problems. Oil leaks, faulty sensors, and all-wheel-drive system malfunctions are among the frequently reported issues. The manual offers step-by-step guides for inspecting and replacing air filters, checking fluid levels, and troubleshooting battery-related problems. For instance, resetting the maintenance reminder or addressing dashboard warning lights can often be done without professional assistance. Regular inspections and routine checks, as outlined in the manual, can prevent many of these issues from escalating. By following the manual’s instructions, owners can save time and money while ensuring their vehicle runs smoothly.

The 2016 Subaru Outback User Manual serves as a key resource for optimal vehicle performance and longevity. Refer to this guide for essential tips, maintenance schedules, and troubleshooting advice to enhance your driving experience. Ensure your Subaru operates at its best by following the recommendations outlined in this manual. Happy driving!

Final Tips for Maximizing Your Subaru Outback Experience

To maximize your experience with the 2016 Subaru Outback, always refer to the user manual for guidance on features, maintenance, and troubleshooting. Regularly check and maintain fluid levels, tires, and brakes to ensure optimal performance. Familiarize yourself with advanced systems like EyeSight Driver Assist Technology for enhanced safety. Utilize the multimedia system for navigation and entertainment, and keep the manual handy for quick reference. By following the recommended maintenance schedule and understanding your vehicle’s capabilities, you can enjoy a safe, comfortable, and adventurous driving experience. Stay informed about updates and recalls through Subaru’s official resources.

reliabilt electronic deadbolt manual

The Reliabilt Electronic Deadbolt offers keyless entry convenience and enhanced security for homes. Designed for easy installation‚ it features a keypad‚ multiple user codes‚ and robust construction. Its affordable price‚ durability‚ and smart home integration options make it a top choice for modern security needs.

Key Features and Benefits

The Reliabilt Electronic Deadbolt is designed to provide convenience‚ security‚ and durability. It offers keyless entry via a 4-8 digit PIN code‚ eliminating the need for physical keys. The lock supports up to 10 user codes‚ allowing homeowners to grant access to family members or guests. Additionally‚ it includes 2 backup keys for emergencies. The deadbolt features a single-cylinder design‚ enabling locking and unlocking from both the outside keypad and the interior turn button. Its weather-resistant construction ensures reliability in extreme temperatures and outdoor conditions. The lock is powered by 4 AA batteries‚ providing up to 2 years of battery life under normal usage. A low-battery indicator ensures timely replacements. The Reliabilt Electronic Deadbolt also includes advanced security features like tamper resistance and alarm functionality. Its solid metal construction and adjustable latch ensure a secure fit on various door types. With its easy installation process and customizable settings‚ this deadbolt offers a perfect blend of affordability‚ functionality‚ and enhanced home security.

  • Keyless entry with 4-8 digit PIN codes
  • Supports up to 10 user codes
  • Weather-resistant design
  • Long-lasting battery life
  • Low-battery indicator
  • Tamper-resistant and alarm features
  • Adjustable latch for secure fit

Installation Guide

The Reliabilt Electronic Deadbolt is designed for easy DIY installation. It requires basic tools like a screwdriver‚ tape measure‚ and drill. The lock fits standard doors and pre-drilled holes‚ ensuring a quick setup. Follow the included manual for precise steps.

Step-by-Step Installation Process

Installing the Reliabilt Electronic Deadbolt is straightforward and requires minimal tools. Begin by removing the existing lock and hardware from your door. Next‚ attach the new deadbolt assembly‚ ensuring the keypad is securely fastened to the exterior side. Mount the interior turn piece‚ aligning it with the deadbolt. Use the screws provided to secure both components firmly. For doors without existing holes‚ mark the area for drilling and create pilot holes for accurate screw placement. Insert the latch into the door edge‚ making sure it aligns with the strike plate on the door frame. Attach the strike plate and test the locking mechanism to ensure smooth operation. Follow the manual’s detailed instructions for precise alignment and tightening. Once installed‚ program the lock using the factory default code and customize user codes as needed. This process ensures a secure and functional setup for your home’s enhanced security.

Programming the Electronic Deadbolt

Programming the Reliabilt Electronic Deadbolt allows you to add‚ delete‚ or modify user codes for keyless entry. Enter the programming code‚ then use the keypad to customize access settings. Follow the manual for detailed steps to ensure secure and personalized access.

How to Add New User Codes

To add new user codes to your Reliabilt Electronic Deadbolt‚ start by entering your current Programming Code. This code is required to access the programming mode. Once entered‚ press the button featuring the unlock and lock icons. Next‚ input a new 4-10 digit user code and press the same button to save it. Repeat this process for additional codes‚ up to six unique codes. Ensure the Programming Code is secure‚ as it grants access to all settings. For detailed steps‚ refer to your manual or online guides. This feature allows customizable access for family‚ guests‚ or service providers‚ enhancing convenience and security.

How to Delete Existing User Codes

To delete existing user codes on your Reliabilt Electronic Deadbolt‚ begin by entering your Programming Code to access the programming mode. Once in programming mode‚ locate the option to delete user codes. You can delete individual codes or reset all codes to the factory default‚ which removes all user codes except the default code. After selecting the deletion option‚ confirm the action‚ and the system will remove the specified codes. This feature allows you to maintain security by revoking access for users who no longer need it. Ensure the Programming Code is kept secure to prevent unauthorized changes. For step-by-step guidance‚ refer to your manual or online resources. This process is quick and efficient‚ ensuring your lock remains secure with only authorized users having access.

Security Features

The Reliabilt Electronic Deadbolt is designed with advanced security features to protect your home. It offers keyless entry through unique user codes‚ eliminating the risk of lost or stolen keys. The lock features tamper-resistant construction and secure encryption for code transmission‚ ensuring unauthorized access is prevented. Additionally‚ it includes an alarm system that sounds if forced entry is attempted. The deadbolt also uses solid metal components and a robust locking mechanism to withstand physical breaches. Multiple user codes can be programmed‚ allowing temporary access for visitors‚ which can be easily revoked. Weatherproofing features like silicone seals protect the lock from environmental damage. With these features‚ the Reliabilt Electronic Deadbolt provides reliable security‚ giving homeowners peace of mind. Its combination of durability‚ smart technology‚ and user-friendly customization makes it an excellent choice for enhancing home security. The lock’s design ensures both convenience and safety‚ making it a top option for modern households.

Battery Life and Maintenance

The Reliabilt Electronic Deadbolt is powered by 4 AA batteries‚ providing up to 2 years of battery life under normal conditions. Battery performance may vary based on usage‚ extreme weather‚ and daily lock/unlock cycles. The lock features a low-battery indicator to alert you when replacements are needed. For optimal performance‚ use high-quality batteries like Duracell or Energizer. To maintain the lock‚ ensure the keypad is clean and free from debris. Replace batteries promptly when the low-battery warning appears to avoid lockout. Some models include a 9V battery backup option for emergency power. Regularly inspect and replace worn-out weather seals to protect against moisture and temperature fluctuations. Proper maintenance ensures reliable operation and extends the lock’s lifespan. By following these guidelines‚ you can enjoy consistent performance and security from your Reliabilt Electronic Deadbolt. Always refer to the user manual for specific maintenance recommendations tailored to your model.

Troubleshooting Common Issues

Like any electronic device‚ the Reliabilt Electronic Deadbolt may occasionally encounter issues. If the keypad is unresponsive‚ check for debris under the buttons or low battery levels. Clean the keypad with a soft cloth and replace batteries if necessary. If the pin code doesn’t work‚ ensure it is entered correctly and reset it if needed. For door binding issues‚ adjust the latch and strike plate alignment. If the latch doesn’t auto-lock‚ disable silent access mode and verify battery health. Fingerprint sensors may require re-enrollment if not registering properly. Connectivity issues with smart models can often be resolved by rebooting the Wi-Fi network and re-pairing the lock. If problems persist‚ perform a factory reset following the manual’s instructions. Regular maintenance‚ such as cleaning and updating settings‚ helps prevent issues. Always refer to the user manual for specific troubleshooting steps tailored to your model.

comfee countertop dishwasher manual

Safety Instructions

Always keep children away from the dishwasher while it is operating. Avoid touching hot surfaces and ensure the appliance is installed on a stable, level surface. Use only recommended dishwasher detergents to prevent damage. Never overload the dishwasher, as this can cause imbalance and safety hazards. Regularly inspect and maintain the appliance to ensure optimal performance and safety.

  • Keep the dishwasher out of reach of children.
  • Avoid hot surfaces during operation.
  • Use only approved detergents.
  • Ensure proper installation.

1.1 Essential Safety Precautions

Before using your Comfee countertop dishwasher, carefully read and follow all safety guidelines to ensure safe operation. Always keep children away from the appliance while it is in use. Ensure the dishwasher is placed on a stable, level surface to prevent tipping. Avoid touching hot surfaces during or after operation, as they may cause burns. Never use abrasive cleaners or sharp objects to clean the appliance, as this could damage the finish or internal components. Always use the recommended dishwasher detergent to avoid damage to the machine or potential hazards. Regularly inspect and maintain the dishwasher’s hoses, filters, and seals to prevent leaks or malfunction. Do not operate the dishwasher if it is damaged or malfunctioning. For electrical safety, ensure the power cord is kept away from water and avoid using extension cords.

  • Keep children away during operation.
  • Place on a stable, level surface.
  • Avoid hot surfaces and sharp objects.
  • Use only recommended detergents.
  • Inspect hoses, filters, and seals regularly.
  • Do not use damaged appliances.

1.2 Installation Guidelines

Proper installation is crucial for the safe and efficient operation of your Comfee countertop dishwasher. Place the appliance on a sturdy, level surface to ensure stability and prevent vibration. Ensure the dishwasher is positioned near a water supply and a drainage point for easy connection. Connect the water inlet hose to a cold water supply line, and securely attach the drain hose to a nearby sink drain or a suitable drainage system. Avoid using extension cords; instead, plug the dishwasher directly into a grounded electrical outlet rated for 120VAC, 60Hz, 10Amp. Leave at least 4 inches of space around the appliance for proper ventilation. Follow the manufacturer’s instructions for any additional installation requirements, and ensure all connections are secure before first use. If unsure, consult a professional for assistance.

  • Place on a stable, level surface.
  • Position near water supply and drainage.
  • Connect to a cold water supply line.
  • Secure the drain hose properly.
  • Use a grounded electrical outlet.
  • Ensure proper ventilation.

Operating Instructions

Start by selecting the desired program using the control panel. Add detergent to the designated dispenser. Load dishes securely, ensuring proper arrangement for water flow. Close the door firmly and press Start.

  • Select the appropriate wash program.
  • Add recommended detergent.
  • Load dishes correctly.
  • Close the door and start the cycle.

2.1 How to Start the Dishwasher

To start the Comfee countertop dishwasher, first ensure the water tank is filled to the recommended level. Plug in the appliance and press the power button. Select the desired wash program using the control panel. Add the appropriate amount of dishwasher detergent to the dispenser. Load the dishes securely, making sure they are properly arranged for optimal water flow. Close the door firmly to ensure a tight seal. Press the Start/Cancel button to begin the cycle. The dishwasher will automatically start the selected program. If needed, you can pause or cancel the cycle by pressing the Start/Cancel button again. Always refer to the control panel indicators for cycle progress. For more detailed instructions, consult the user manual provided with your Comfee countertop dishwasher.

  1. Fill the water tank if necessary.
  2. Plug in the dishwasher and press the power button.
  3. Select the desired wash program.
  4. Add detergent to the dispenser.
  5. Load dishes properly and close the door.
  6. Press Start/Cancel to begin the cycle.

2.2 Loading the Dishwasher

When loading the Comfee countertop dishwasher, ensure dishes are placed facing the center to allow proper water flow. Separate utensils and place them in the designated tray. Glasses and bowls should be positioned on the upper rack, while plates, pots, and pans go on the lower rack. Avoid overloading the dishwasher, as this can reduce cleaning efficiency. Do not block the spray arms or detergent dispenser. For best results, scrape off large food particles before loading. Place smaller items securely to prevent them from shifting during the cycle. Always refer to the user manual for specific loading recommendations tailored to your model. Proper loading ensures effective cleaning and prevents damage to both the dishwasher and your dishes.

  • Face dirty dishes toward the center.
  • Separate utensils in the designated tray.
  • Place glasses and bowls on the upper rack.
  • Avoid overloading and blocking spray arms.
  • Scrape off large food particles before loading.

2.3 Understanding the Control Panel

The Comfee countertop dishwasher features a user-friendly control panel with intuitive buttons and an LED display. The panel allows you to select from multiple wash cycles, including heavy-duty, normal, and eco modes. Additional options like delayed start and steam cleaning can be activated for customized washing. The LED display shows the selected cycle, remaining time, and error codes if issues arise. Use the start/stop button to initiate or pause the cycle. The child lock function ensures settings remain unchanged during operation. Refer to the manual for detailed descriptions of each button and cycle. Proper use of the control panel ensures efficient and tailored cleaning for your dishes.

  • Select from multiple wash cycles.
  • Activate delayed start or steam cleaning.
  • Monitor progress via the LED display.
  • Use the start/stop button to control operation.
  • Enable child lock for safety.

Maintenance Tips

Regularly clean the dishwasher’s filter and interior to maintain performance. Check and clean the spray arms for blockages; Inspect and replace worn seals to prevent leaks. Run a cleaning cycle monthly to remove grease and odors. Ensure proper drying after each use to avoid mold growth. Refer to the manual for detailed maintenance procedures.

Regular cleaning is essential to maintain your Comfee countertop dishwasher’s performance and hygiene. Start by running a cleaning cycle with a dishwasher cleaner or vinegar to remove grease and odors. Clean the filter monthly by rinsing it under warm water and replacing it securely. Check the spray arms for blockages and soak them in warm water if necessary. Wipe the exterior with a soft cloth and mild detergent to prevent stains. For tougher odors, run a baking soda cycle or leave the door open after a cycle to dry thoroughly. Clean the door seals regularly to prevent mold buildup. Refer to the manual for specific cleaning recommendations to ensure optimal functionality and longevity of your dishwasher.

3.2 Regular Maintenance

3.1 Cleaning the Dishwasher

Regular cleaning is essential to maintain your Comfee countertop dishwasher’s performance and hygiene. Start by running a cleaning cycle with a dishwasher cleaner or vinegar to remove grease and odors. Clean the filter monthly by rinsing it under warm water and replacing it securely. Check the spray arms for blockages and soak them in warm water if necessary. Wipe the exterior with a soft cloth and mild detergent to prevent stains. For tougher odors, run a baking soda cycle or leave the door open after a cycle to dry thoroughly. Clean the door seals regularly to prevent mold buildup. Refer to the manual for specific cleaning recommendations to ensure optimal functionality and longevity of your dishwasher.

Troubleshooting

Identify common issues like the dishwasher not starting or water not draining. Check error codes in the manual for specific solutions. Ensure the power supply is stable and the drain hose is clear. Refer to the troubleshooting guide for resetting or resolving operational issues effectively.

  • Check error codes for specific solutions;
  • Ensure proper power supply and drainage.
  • Consult the manual for detailed troubleshooting.

4.1 Common Issues and Solutions

address common issues with your Comfee countertop dishwasher, such as the machine not starting, poor cleaning performance, or water not draining; If the dishwasher fails to start, check the power connection and ensure the child lock is not activated. For poor cleaning results, verify detergent usage and ensure filters are clean. Water drainage issues may be due to a clogged drain hose or improper installation. Strange noises could indicate faulty spray arms or debris in the dishwasher. Regular maintenance, such as cleaning filters and checking for blockages, can prevent many issues. Refer to the troubleshooting guide in the manual for step-by-step solutions to these common problems.

  • Dishwasher not starting: Check power supply and child lock.
  • Poor cleaning: Ensure proper detergent use and clean filters.
  • Water not draining: Inspect drain hose for blockages.
  • Strange noises: Check for debris or faulty parts.

4.2 Error Codes and Their Meanings

Your Comfee countertop dishwasher may display error codes to indicate specific issues. Understanding these codes helps in resolving problems quickly. For example, E1 typically indicates a water supply issue, such as low water pressure or a blocked water inlet. E2 often relates to drainage problems, like a clogged drain hose or improper installation. E3 may signify a heating element malfunction or temperature sensor issue. Always refer to the manual for a full list of error codes and their meanings. If an error occurs, switch off the dishwasher, unplug it, and address the issue before restarting. Regular maintenance, such as cleaning filters and checking connections, can prevent many of these errors.

  • E1: Water supply issue – check inlet and pressure.
  • E2: Drainage problem – inspect drain hose.
  • E3: Heating element or sensor malfunction.

Additional Information

This Comfee countertop dishwasher is Energy Star certified, ensuring energy efficiency. Its compact design suits small spaces. For inquiries, contact customer support via the provided website or phone number.

  • Energy Star certified for energy efficiency.
  • Compact design ideal for small spaces.
  • Customer support available for assistance.
  • 5.1 Product Specifications

    The Comfee countertop dishwasher models, such as CDC17P0AWW and CDC22P1BWB, feature a 5L or 6L built-in water tank, accommodating up to 5 or 6 place settings. Dimensions vary slightly between models, with a typical size of 21.6 x 19.7 x 17.7 inches and a weight of approximately 46.3 lbs. The dishwasher operates on 120VAC, 60Hz, requiring a 10Amp circuit. It offers multiple programs, including Heavy Duty, Normal, and Fast modes, with advanced features like 360 Dual Spray and Steam & Air-Dry functions. Energy Star certification ensures energy efficiency, while the compact design suits small spaces like apartments or RVs. The noise level is minimal, and the appliance is designed for portability without the need for permanent installation. These specifications make it a versatile and convenient option for modern households.

    • Capacity: Up to 6 place settings.
    • Built-in water tank: 5L or 6L.
    • Dimensions: Approx. 21.6 x 19.7 x 17.7 inches.
    • Weight: Around 46.3 lbs.
    • Power: 120VAC, 60Hz, 10Amp circuit.
    • Programs: Heavy Duty, Normal, Fast modes.
    • Special features: 360 Dual Spray, Steam & Air-Dry.
    • Certifications: Energy Star.
    • Design: Compact, portable, ideal for small spaces.
    • Noise level: Minimal for quiet operation.
    • Installation: No permanent hookup required.

    These specifications ensure optimal performance, energy efficiency, and convenience, making the Comfee countertop dishwasher a practical choice for various living situations.

    5.2 Warranty and Customer Support

    Comfee offers a comprehensive warranty program for their countertop dishwashers, ensuring customer satisfaction. The standard warranty period typically covers parts and labor for one year from the date of purchase, while the compressor may be covered for up to five years. Extended warranty options are available for additional peace of mind. Customers can access dedicated support through various channels, including toll-free phone service, email assistance, and live chat. The official Comfee website provides a detailed support section with FAQs, troubleshooting guides, and downloadable manuals. Customers can also register their products online to activate warranties and receive updates on promotions and maintenance tips. For any issues, users are encouraged to contact the support team directly for prompt resolution.

    • Standard warranty: 1 year (parts and labor), 5 years (compressor).
    • Extended warranty options available.
    • Support channels: Phone, email, live chat.
    • Online resources: FAQs, troubleshooting guides, manuals.
    • Product registration for warranty activation.
    • Regular updates and maintenance tips.

    Comfee’s commitment to customer support ensures that users receive reliable assistance, enhancing their overall product experience.

nikon d810 manual

Welcome to the Nikon D810 manual guide, your comprehensive resource for mastering this exceptional DSLR camera․ Designed for professionals and enthusiasts, the D810 delivers outstanding image quality, durability, and versatility․

With its 36․3 MP full-frame sensor, weather-sealed design, and advanced video capabilities, the D810 is a powerhouse for photography and filmmaking․ This manual will help you unlock its full potential and achieve stunning results․

Overview of the Nikon D810

The Nikon D810 is a high-performance DSLR camera designed for professional photographers and enthusiasts․ It features a 36․3 MP full-frame FX-format CMOS sensor, delivering exceptional image quality with detailed resolution and wide dynamic range․ Built for durability, the camera boasts a robust weather-sealed body, making it suitable for challenging environments․ With advanced autofocus, fast burst shooting, and superior video capabilities, the D810 excels in various photography genres, including landscape, portrait, and wildlife photography․

Importance of Understanding the Manual

Understanding the Nikon D810 manual is essential for unlocking its full potential․ The manual provides detailed insights into the camera’s features, allowing photographers to optimize settings for various shooting conditions․ By familiarizing yourself with the manual, you can master advanced techniques, troubleshoot common issues, and ensure you’re using the camera to its fullest capabilities․ This knowledge empowers you to take control of your photography, achieving professional-grade results consistently․

Key Features of the Nikon D810

The Nikon D810 boasts a 36․3 MP full-frame sensor, robust ergonomic design, and dual memory card slots for enhanced storage flexibility, catering to professional photographers’ needs․

36․3 MP Full-Frame Sensor

The Nikon D810 features a 36․3-megapixel full-frame CMOS sensor, delivering exceptional image detail and wide dynamic range․ This sensor captures sharp, high-resolution images with minimal noise, ideal for landscape, portrait, and commercial photography․ Its large pixel size ensures excellent low-light performance, while the absence of an optical low-pass filter enhances sharpness and clarity, making it a top choice for professionals seeking premium image quality․

Ergonomic Design and Build Quality

The Nikon D810 boasts a robust magnesium alloy body, ensuring durability and weather-sealing for protection against dust and moisture․ Its ergonomic design features a contoured grip for comfortable handling, even during extended shoots․ The camera’s controls are intuitively placed, allowing for quick access to settings․ Built to withstand demanding conditions, the D810 is a reliable tool for professionals, combining rugged construction with a user-friendly interface for seamless operation in any environment․

Memory Card Slots and Storage Options

The Nikon D810 features dual memory card slots, supporting both CF and SD/SDHC/SDXC cards, enabling flexible storage solutions․ Users can configure the camera to store images on one card, use the second as backup, or separate RAW and JPEG files․ This dual-slot system enhances workflow efficiency and provides redundancy, ensuring your data is secure․ The camera’s storage options cater to professionals’ needs, offering ample space for high-resolution images and video files․

Shooting Modes and Settings

The Nikon D810 offers multiple shooting modes, including Manual, Aperture Priority, Shutter Priority, and Program, providing flexibility and control for various photography scenarios and skill levels․

Manual Mode (M)

Manual Mode (M) on the Nikon D810 offers full creative control, allowing photographers to independently adjust aperture, shutter speed, and ISO․ This mode is ideal for experienced shooters who want precise control over exposure settings․ The camera’s intuitive controls make it easy to fine-tune settings for optimal results․ Additionally, manual focus can be enabled for precise subject sharpness, and features like focus peaking and zebra patterns assist in achieving perfect exposures and focus accuracy․

Aperture Priority Mode (A)

Aperture Priority Mode (A) allows photographers to set the desired aperture value, while the camera automatically adjusts the shutter speed to achieve optimal exposure․ This mode is ideal for controlling depth of field, making it perfect for portrait and landscape photography․ The D810’s advanced metering system ensures accurate exposures, while the user retains creative control over aperture and ISO settings․ A convenient exposure compensation dial enables quick adjustments, ensuring flexibility in various lighting conditions․

Shutter Priority Mode (S)

Shutter Priority Mode (S) lets photographers set the shutter speed manually, while the camera adjusts the aperture for proper exposure․ This mode is perfect for capturing motion, such as freezing fast-moving subjects or creating artistic blur․ The D810 offers a wide range of shutter speeds, from 1/8000 to 30 seconds, allowing precise control over motion effects․ Exposure compensation is also available, enabling fine-tuning of brightness to suit creative needs, making it ideal for dynamic and expressive photography․

Program Mode (P)

Program Mode (P) offers a balance between simplicity and control, ideal for everyday shooting․ The camera automatically selects both aperture and shutter speed, but you can adjust these settings to refine the exposure․ This mode is perfect for quick shots or when you want the camera to handle most settings but still allow for creative input․

Program Mode provides flexibility, letting you adjust ISO, exposure compensation, and other settings while the camera manages the basics․ It’s a great starting point for learning photography, offering ease of use while maintaining the option to fine-tune your results, making it versatile for various shooting scenarios and lighting conditions․

Video Recording Capabilities

The Nikon D810 excels in professional-grade video recording with manual exposure control, enabling precise adjustments․ It supports simultaneous HDMI output for external monitoring and recording․

Manual Exposure Control for Video

The Nikon D810 offers advanced manual exposure control for video, allowing precise adjustments to ISO, shutter speed, and aperture․ In M mode, sensitivity can be set from ISO 64 to 51200, while aperture can be adjusted in both A and M modes․ This feature ensures cinematic control over lighting and depth of field, enabling professional-grade video production․ Additionally, simultaneous HDMI output allows for external monitoring and recording, enhancing workflow efficiency․

ISO and Shutter Speed Adjustment in M Mode

In M mode, the Nikon D810 allows manual adjustment of ISO and shutter speed for video recording․ ISO sensitivity ranges from 64 to 51200, providing flexibility in low-light conditions․ Shutter speed can be fine-tuned to control motion blur and create desired visual effects․ These adjustments, combined with manual aperture control, offer precise creative control over video capture, ensuring optimal results in various lighting scenarios․

Simultaneous Video Recording and HDMI Output

The Nikon D810 supports simultaneous video recording to an internal memory card and HDMI output․ This feature allows real-time monitoring on an external display while capturing footage․ The HDMI output provides an uncompressed video signal, ideal for external recording devices․ This dual functionality enhances both monitoring and backup capabilities, ensuring high-quality video production and streamlined workflow for professional applications․

Exposure and Metering

Master exposure control with the Nikon D810’s advanced metering system․ Understand how to manage light and shadow for precise results, ensuring optimal image capture in any setting․

Understanding Metering Modes

The Nikon D810 offers three metering modes: Matrix, Center-Weighted, and Spot․ Matrix metering analyzes the entire scene for balanced exposure․ Center-Weighted prioritizes the central area, ideal for portraits․ Spot metering measures a specific point, perfect for high-contrast situations․ Each mode adapts to lighting conditions, ensuring precise control over exposure․ Experiment with these options to achieve optimal results in various shooting scenarios, enhancing your creative vision and technical accuracy․

Exposure Bracketing and HDR

The Nikon D810 supports exposure bracketing, capturing up to 9 frames at intervals of 1/3 to 1 EV․ This feature is ideal for capturing high-contrast scenes․ For HDR, combine bracketed images using Nikon’s software or third-party tools to create detailed, dynamic-range-rich photos․ The camera also offers in-camera HDR for seamless results, enhancing shadows and highlights for stunning imagery in challenging lighting conditions․

Troubleshooting Common Issues

Resolve issues like bright spots at long shutter speeds and ensure firmware updates are installed․ Regularly check Nikon’s service advisories for solutions to maintain optimal performance․

Bright Spots at Long Shutter Speeds

Nikon has addressed reports of bright spots appearing in images captured with long shutter speeds and in 1․2X crop mode․ These spots are often visible in high-contrast scenes․ To resolve this, Nikon issued a service advisory recommending users update their firmware or contact authorized service centers for repairs․ This issue does not affect all D810 units, but it’s crucial to ensure your camera is serviced if you encounter this problem․ Regular firmware updates and proper maintenance can help prevent such occurrences․

Service Advisory and Firmware Updates

Nikon has issued a service advisory for the D810 regarding bright spots in images taken with long shutter speeds or in 1․2X crop mode․ Users are advised to update their firmware or contact authorized service centers for repairs․ Regular firmware updates ensure optimal performance and address potential issues․ Always check Nikon’s official website for the latest updates and follow their guidelines to maintain your camera’s functionality and image quality․

Additional Resources

Access additional resources, including downloadable guides and support tools, on Nikon’s official website․ Visit their customer support page for assistance or to find authorized service centers nearby․

Downloading the Nikon Manual Viewer 2 App

Download the Nikon Manual Viewer 2 app to access the D810 manual anytime, anywhere․ Available for iOS and Android, this app allows you to view and search the manual conveniently․ Install it from the Apple App Store or Google Play Store․ The app supports offline access, zoom functionality, and bookmarks for easy navigation․ It’s a must-have tool for mastering your Nikon D810․ Visit Nikon’s official website for the download link and additional support resources․

Online Tutorials and User Guides

Explore a wealth of online tutorials and user guides to enhance your Nikon D810 experience․ Platforms like YouTube and Nikon’s official website offer video tutorials covering basic to advanced features․ Additionally, forums and photography communities share tips, tricks, and troubleshooting advice․ These resources are ideal for mastering the camera’s settings, improving your photography skills, and resolving common issues․ Utilize these guides to unlock the D810’s full potential and elevate your creative workflow․

lt1000 craftsman manual

Safety Precautions

Always wear protective gear, including gloves and eyewear, when operating the Craftsman LT1000. Ensure the area is clear of obstacles and keep children away. Never operate the tractor near steep slopes or unstable ground. Follow all safety guidelines outlined in the manual to minimize accidents and ensure safe operation.

  • Read the manual thoroughly before use.
  • Keep loose clothing tied back and avoid jewelry.
  • Never leave the tractor unattended while running.
  • Be cautious on wet or uneven terrain;

Regularly inspect the tractor for damage or wear to maintain safety and performance. Always follow recommended maintenance procedures to ensure optimal functionality and user safety.

General Safety Rules

Always read and understand the owner’s manual before operating the Craftsman LT1000. Wear protective gear, such as gloves and eyewear, to minimize injury risks. Ensure the mowing area is free of obstacles, toys, and pets. Never allow children to operate the tractor or ride as passengers. Avoid mowing near steep slopes, unstable ground, or bodies of water. Use extreme caution on wet or uneven surfaces to prevent loss of control. Keep loose clothing and long hair tied back, and avoid wearing jewelry that could catch on controls. Never leave the tractor unattended while it is running. Familiarize yourself with all controls and their functions before starting the engine. Regularly inspect the tractor for damage or wear, and address issues promptly to ensure safe operation. Always follow the manufacturer’s maintenance and safety guidelines to prevent accidents and ensure optimal performance. By adhering to these rules, you can enjoy a safe and efficient mowing experience with your Craftsman LT1000.

Operating Tips

Start the engine only when seated and ensure all controls are within easy reach. For optimal mowing, maintain a steady speed and avoid sudden turns. Use the correct deck height setting for your lawn type, and engage the mower before lowering the deck. When turning, reduce speed to maintain stability. Always use the proper attachments for tasks like hauling, as specified in the manual. Keep the tractor on level ground when starting or stopping. For inclines, mow uphill to prevent loss of control. Regularly clean the mower deck to ensure even cutting and prevent clogging. Refer to the manual for specific guidelines on operating in wet conditions or dense grass. Familiarize yourself with the transmission features for smooth operation in various terrain.

Welcome to the Craftsman LT1000 manual! This guide provides essential information for safe and effective operation, including safety precautions, assembly, maintenance, and troubleshooting tips. Read thoroughly to maximize performance and ensure longevity of your tractor.

Purpose and Content

This manual serves as your comprehensive guide to the Craftsman LT1000 lawn tractor, designed to assist in its safe and efficient operation. It outlines essential safety precautions, assembly instructions, and maintenance routines to ensure optimal performance. The manual also covers troubleshooting tips and warranty details, providing a complete resource for users. By following the guidelines, you can maximize the tractor’s lifespan and functionality. Each section is tailored to address specific aspects of ownership, from initial setup to long-term care. Refer to this manual regularly to maintain your tractor and ensure a satisfying mowing experience. It is your key to understanding and utilizing the LT1000 effectively.

Technical Specifications

The Craftsman LT1000 features a Briggs & Stratton 31H777-0202-E1 engine with 17.5 HP, a 42-inch mower deck, hydrostatic transmission, and a 1-gallon fuel tank capacity for efficient performance.

Engine Overview

The Craftsman LT1000 is powered by a reliable Briggs & Stratton 31H777-0202-E1 engine, delivering 17.5 horsepower. This engine is designed for consistent performance, ensuring efficient mowing and towing capabilities. It features a single-cylinder design with overhead valve technology for improved fuel efficiency and reduced emissions. The engine’s durability is enhanced by a cast-iron sleeve, providing long-term reliability. Regular maintenance, such as oil changes and air filter cleaning, is essential to uphold its performance. The engine’s power output makes it suitable for various lawn care tasks, from cutting grass to hauling gardening supplies, making the LT1000 a versatile tool for homeowners.

Transmission Features

The Craftsman LT1000 features a 6-speed manual transmission, offering six forward gears and one reverse gear for versatile operation. This setup allows for smooth shifting and adaptability to different mowing conditions. The manual transmission provides precise control, especially on uneven or hilly terrain. Additionally, the LT1000 is equipped with an automatic transmission option, which eliminates the need for manual clutch engagement, making operation more convenient. The transmission system is designed to handle the engine’s power efficiently, ensuring consistent performance during mowing and towing tasks. Regular maintenance of the transmission, such as fluid checks, is essential to maintain its longevity and functionality. The combination of manual and automatic options caters to a wide range of user preferences, enhancing the tractor’s versatility for various lawn care needs.

Assembly Instructions

Unpack and inventory all parts carefully. Attach the steering wheel and install the seat. Check tire pressure and connect the mower deck. Follow the manual’s step-by-step guide for proper assembly. Refer to diagrams for clarity and ensure all bolts are securely tightened. Double-check connections before first use.

Unpacking and Inventory

Begin by carefully unpacking the tractor and all accessories from the shipping box. Inspect each component for damage or defects. Check the inventory against the parts list in the manual to ensure all items are included. Organize the parts and tools in a clean, dry workspace. Pay special attention to hardware such as bolts, nuts, and washers. If any parts are missing or damaged, contact the supplier immediately. Properly unpacking and inventorying ensures a smooth assembly process and helps prevent delays or issues during setup.

Step-by-Step Assembly

Follow the manual’s detailed instructions for assembling your Craftsman LT1000. Begin by attaching the steering wheel using the provided hardware. Next, connect the battery terminals, ensuring correct polarity. Install the seat and secure it firmly. Attach the mower deck by aligning the mounting brackets and tightening the bolts. Connect the deck belt according to the diagram in the manual. Ensure all cables and linkages are properly connected. Tighten all bolts and nuts to the specified torque values. Double-check the assembly for any loose parts or misalignments. Finally, test all systems, such as the brakes and transmission, before first use. Refer to the manual for troubleshooting if any issues arise during assembly.

Operating the Tractor

Operate your Craftsman LT1000 safely by following the manual’s guidelines. Familiarize yourself with controls before starting. Start the engine, engage the clutch slowly, and adjust speed as needed. Always maintain control and monitor surroundings for obstacles.

Starting and Stopping

To start the Craftsman LT1000, ensure the transmission is in neutral and the parking brake is engaged. Wear safety gear and check surroundings. Turn the key to the “start” position and allow the engine to warm up briefly before use. For stopping, slow the tractor, disengage the clutch, and apply the brake. Turn the key to “off” and engage the parking brake. Always follow proper shutdown procedures to ensure safety and prevent damage. Refer to the manual for detailed instructions on starting and stopping procedures.

  1. Ensure the area is clear of obstacles.
  2. Check the parking brake is engaged.
  3. Turn the ignition key to start the engine.
  4. Allow the engine to warm up before operation.
  5. Slow down and disengage the clutch to stop.
  6. Engage the parking brake after stopping.

Always follow the manual’s guidelines for safe operation.

Maintenance and Care

Regular maintenance ensures optimal performance and longevity of your Craftsman LT1000. Check oil levels, replace air filters, and sharpen blades as recommended in the manual.

  • Inspect and replace belts periodically.
  • Clean the mower deck regularly.
  • Check tire pressure and adjust as needed.

Follow the maintenance schedule to keep your tractor running smoothly and safely.

Routine Maintenance

Regular maintenance is essential to keep your Craftsman LT1000 running smoothly. Start by checking the engine oil level daily and changing it every 50 hours of use. Clean or replace the air filter monthly to ensure proper airflow. Sharpen the mower blades at the start of each mowing season for a clean cut. Inspect the drive belt for wear and tear, replacing it if cracks or frays appear. Lubricate moving parts like wheel bearings and pivot points to reduce friction. Check tire pressure regularly and adjust to the recommended levels for stability. Finally, clean the mower deck after each use to prevent grass buildup and rust. Following these routine maintenance steps will extend the life of your tractor and maintain its performance. Always refer to the manual for specific guidelines and schedules.

Oil Change Instructions

To perform an oil change on your Craftsman LT1000, start by warming up the engine slightly. Locate the oil drain plug underneath the tractor, near the front of the engine. Use a socket wrench to remove the plug and drain the oil into a drip pan. Once the oil stops dripping, replace the drain plug securely. Next, remove the old oil filter and install a new one, ensuring it’s properly seated. Refill the engine with the recommended oil type, typically SAE 10W-30 or 10W-40, as specified in the manual. Replace the oil filler cap and start the engine to circulate the new oil. Dispose of the used oil and filter responsibly. Refer to the manual for exact specifications and torque values to ensure a proper oil change.

setting the captives free deliverance manual

Pastor Bev Tucker’s manual offers a comprehensive‚ user-friendly guide to deliverance‚ grounded in Scripture‚ emphasizing the Holy Spirit’s leadership and practical steps for lasting freedom;

1.1 Overview of the Manual

Setting the Captives Free: Deliverance Manual by Pastor Bev Tucker is a comprehensive guide designed to simplify the deliverance process. Written in a user-friendly format‚ it balances simplicity with scriptural accuracy‚ ensuring decency and order. The manual emphasizes the Holy Spirit’s leadership‚ providing practical steps and prayers to break legal rights and achieve lasting freedom. It serves as a vital resource for both ministers and individuals seeking liberation‚ maintaining a clear focus on Jesus as the source of all deliverance and healing.

1.2 Importance of Deliverance Ministry

Deliverance ministry is vital for spiritual liberation‚ enabling individuals to break free from bondages and walk in true freedom. It addresses spiritual oppression‚ equipping believers to live victorious lives. By aligning with God’s purpose‚ deliverance ministry empowers people to overcome struggles‚ embracing wholeness and healing. This ministry is essential for fulfilling the Great Commission‚ setting captives free and restoring them to their divine purpose. It highlights the power of Jesus’ name and the Holy Spirit’s role in transforming lives.

The Biblical Foundation of Deliverance

The manual emphasizes deliverance as a biblical mandate‚ rooted in Scripture‚ highlighting the empowering work of the Holy Spirit and Jesus’ authority to set captives free.

2.1 Scriptural Basis for Deliverance

The manual underscores the scriptural basis for deliverance‚ drawing from key biblical texts such as Isaiah 61:1 and Luke 4:18‚ which emphasize liberation and freedom through Jesus Christ. It highlights how deliverance is a divine mandate‚ rooted in God’s desire to free humanity from bondage. By aligning deliverance practices with Scripture‚ the manual ensures a biblically sound approach‚ empowering believers to walk in true freedom and authority.

2.2 The Role of the Holy Spirit in Deliverance

The Holy Spirit plays a pivotal role in deliverance‚ empowering believers to overcome spiritual bondage. Pastor Bev Tucker emphasizes the Spirit’s leadership‚ convicting hearts and revealing truths. Through His power‚ deliverance ministers are equipped to set captives free‚ ensuring a divine and orderly process.

The manual teaches that true deliverance cannot be achieved without the Holy Spirit’s presence‚ guiding prayers and actions to bring lasting freedom and healing in Jesus’ name.

Key Principles of Effective Deliverance

Pastor Bev Tucker’s manual highlights the importance of prayer‚ identifying entry points‚ and breaking legal rights spiritually. It emphasizes scriptural accuracy‚ Holy Spirit leadership‚ and practical steps for lasting freedom and healing.

3.1 The Power of Prayer in Deliverance

Prayer is central to effective deliverance‚ as it enables believers to connect with God and seek His intervention. Pastor Bev Tucker’s manual emphasizes the importance of specific‚ heartfelt prayers to break spiritual strongholds. By relying on the Holy Spirit’s power‚ prayers become a potent tool for liberation. The manual provides guided prayers to help individuals and ministers align their requests with God’s will‚ ensuring deliverance is both authentic and lasting‚ rooted in scriptural authority.

3.2 Practical Steps for Breaking Legal Rights

Pastor Bev Tucker outlines practical steps to break legal rights that spirits may use to oppress individuals. These steps include identifying specific doorways or entry points‚ such as unrepented sin‚ generational curses‚ or ungodly beliefs. The manual emphasizes the importance of prayer‚ repentance‚ and renouncing these rights‚ ensuring they are revoked in Jesus’ name. By addressing these legal grounds‚ individuals can experience true freedom‚ as the Holy Spirit empowers the deliverance process‚ aligning it with scriptural principles and God’s will for liberation.

The Deliverance Process

The deliverance process involves identifying doorways or entry points‚ breaking legal rights‚ and prayer‚ ensuring lasting freedom through the Holy Spirit’s power and Jesus’ authority.

4.1 Identifying Doorways or Entry Points

Identifying doorways or entry points is crucial in deliverance‚ involving prayer and discernment to uncover root issues like generational curses or personal sins. Pastor Bev Tucker’s manual provides practical steps to recognize these entry points‚ emphasizing the role of the Holy Spirit in revealing and breaking them. This process ensures a targeted approach‚ addressing specific strongholds and enabling effective deliverance. The manual guides believers to prayerfully identify and address these areas‚ fostering lasting freedom through Jesus’ authority.

4.2 Ensuring Long-Lasting Freedom

Ensuring long-lasting freedom requires consistent prayer‚ spiritual discipline‚ and a renewed mind. Pastor Bev Tucker emphasizes the importance of maintaining victory through Bible study‚ fellowship‚ and accountability. The manual encourages believers to walk in obedience‚ resist temptation‚ and trust in God’s power. By addressing root issues and relying on the Holy Spirit‚ individuals can prevent re-entry of oppressive forces‚ ensuring a life of sustained freedom and wholeness in Christ.

The Role of Leadership in Deliverance Ministry

Effective leadership in deliverance ministry requires spiritual maturity‚ integrity‚ and compassion. Leaders must guide with wisdom‚ ensuring order and decency‚ while empowering others to walk in freedom through Christ.

5.1 Qualifications for Deliverance Ministers

Deliverance ministers must possess deep faith‚ emotional stability‚ and a strong foundation in Scripture. They should be compassionate‚ spiritually mature‚ and led by the Holy Spirit. Integrity‚ humility‚ and a commitment to prayer are essential. Ministers must also understand the biblical basis of deliverance and maintain order during sessions. Pastor Bev Tucker emphasizes the importance of these qualities to ensure effective and ethical ministry‚ guiding ministers to serve with love and authority‚ ultimately bringing freedom to those seeking liberation.

5.2 Maintaining Order and Decency in Deliverance Sessions

Maintaining order and decency in deliverance sessions is crucial for effectiveness. Pastor Bev Tucker emphasizes the importance of a structured environment‚ ensuring sessions remain respectful and edifying. Ministers should employ clear communication‚ avoid chaos‚ and rely on the Holy Spirit’s guidance. A prayer team or assistants can help manage the process‚ ensuring dignity for all involved. This structured approach fosters an atmosphere of reverence and trust‚ aligning with biblical principles and promoting meaningful spiritual breakthroughs.

Personal Testimonies and Success Stories

Readers share transformative experiences‚ highlighting the manual’s impact. Many testify to newfound freedom and healing‚ crediting its practical guidance and scriptural accuracy for their liberation journey.

6.1 Transformative Experiences from the Manual

Many readers have shared profound testimonies of liberation and healing through the manual. They describe how its practical steps and scriptural insights led to lasting freedom and spiritual renewal‚ transforming lives and ministries. The manual’s clear guidance has empowered individuals to overcome demonic strongholds‚ achieving breakthroughs they never thought possible. These stories highlight the manual’s effectiveness in fostering a deeper connection with God and His deliverance power.

6.2 Feedback from Readers and Users

Readers and users have praised the manual for its clarity and effectiveness. Many have shared how the practical steps and prayers transformed their lives‚ offering hope and empowerment. The straightforward format and scriptural accuracy have made it accessible to both newcomers and experienced ministers. Feedback highlights the manual’s ability to simplify complex deliverance concepts‚ making it a valuable resource for spiritual liberation and growth. Its impact is evident in the positive testimonials and widespread recommendation among those involved in deliverance ministry.

The Structure and Accessibility of the Manual

The manual is structured in a user-friendly format‚ blending simplicity with scriptural depth‚ making it accessible to both newcomers and experienced ministers. Its clear organization ensures practical guidance for all.

7.1 User-Friendly Format for All Readers

The manual is thoughtfully designed to be accessible to all readers‚ blending simplicity with depth. Its clear structure ensures that even those new to deliverance ministry can grasp complex concepts. The straightforward language and organized format make it easy to navigate‚ while the scriptural foundation provides a solid basis for understanding. This approach ensures that the teachings are both practical and profound‚ catering to a wide audience seeking spiritual liberation and guidance.

7.2 Scriptural Accuracy and Clarity

Pastor Bev Tucker’s manual is rooted in precise scriptural teachings‚ ensuring clarity and authenticity. Each principle and practice is meticulously supported by biblical references‚ providing a reliable foundation. The text avoids jargon‚ making it accessible while maintaining theological depth. This balance ensures readers can confidently apply the teachings‚ trusting in their alignment with God’s Word. The clarity and accuracy foster a deeper understanding‚ empowering individuals and ministers alike in deliverance ministry.

The Impact of “Setting the Captives Free”

Pastor Bev Tucker’s manual has profoundly influenced modern deliverance ministry‚ offering a scripturally grounded‚ accessible guide that empowers individuals and ministers worldwide‚ fostering spiritual liberation and transformative freedom.

8.1 Influence on Modern Deliverance Ministry

Setting the Captives Free has become a foundational resource in modern deliverance ministry‚ offering a balanced blend of scriptural accuracy and practical guidance. Its user-friendly format ensures accessibility for both experienced ministers and newcomers‚ while its emphasis on the Holy Spirit’s leadership has set a new standard for orderly and effective deliverance practices. The manual’s clear structure and focus on breaking legal rights have empowered many to approach deliverance with confidence‚ making it a cornerstone in contemporary spiritual liberation efforts worldwide.

8.2 Contribution to Spiritual Liberation Worldwide

Setting the Captives Free has made a profound impact on spiritual liberation globally‚ empowering individuals and ministers to break free from bondage. Its clear‚ scriptural approach has transcended borders‚ offering hope and freedom to diverse cultures. By providing accessible tools and teachings‚ the manual has become a vital resource for those seeking deliverance‚ fostering a movement of spiritual liberation that resonates worldwide‚ transforming lives‚ and advancing the Kingdom of God.

Setting the Captives Free is a transformative resource‚ empowering individuals to walk in freedom. Its scriptural foundation and practical guidance ensure lasting liberation‚ making it a timeless tool for spiritual breakthrough.

9.1 Final Thoughts on the Manual’s Significance

Setting the Captives Free stands as a vital resource for spiritual liberation‚ offering clear‚ scriptural guidance for deliverance. Its user-friendly approach ensures accessibility for all seeking freedom.

By emphasizing the Holy Spirit’s role and providing practical steps‚ Pastor Bev Tucker empowers individuals and ministries worldwide to walk in victory and wholeness‚ making it a foundational tool for deliverance ministry.

9.2 Encouragement for Further Study and Application

Readers are urged to delve deeply into the manual‚ applying its scriptural truths and practical steps to their lives and ministries. The clear‚ user-friendly format makes it accessible to all‚ fostering personal and communal transformation. By embracing the principles outlined‚ individuals can experience lasting freedom and empower others to do the same. This manual serves as a powerful tool for spiritual growth‚ encouraging believers to walk in the fullness of Christ’s liberation.