The Sound Relationship House Theory, developed by Drs․ John and Julie Gottman, provides a framework for understanding the key elements of a healthy relationship․ Based on decades of research, the theory uses a house metaphor to describe the four levels essential for building and maintaining strong partnerships․
1․1 Overview of the Theory
The Sound Relationship House Theory, created by Drs․ John and Julie Gottman, offers a comprehensive framework for understanding the foundation of healthy relationships․ It uses a house metaphor, with four levels representing friendship, turning toward each other, positive perspective, and effective conflict management․ This research-based approach provides practical tools to strengthen emotional connections and build lasting partnerships․
1․2 Creators: John and Julie Gottman
Pioneers in relationship science, Drs․ John and Julie Gottman are renowned for their research on marriage and relationships․ John’s work on marital stability and Julie’s clinical expertise have led to innovative approaches in couples therapy․ They co-founded The Gottman Institute, offering workshops, therapy, and resources to help couples build stronger, more meaningful relationships based on scientific insights․

The Four Levels of the Sound Relationship House
The Sound Relationship House Theory outlines four foundational levels: Friendship, Turning Toward, Positive Perspective, and Managing Conflict, each building on the previous to create a stable partnership․
2․1 Level 1: Friendship and Building Love Maps
Level 1 focuses on fostering a strong foundation of friendship by building “Love Maps,” which involve understanding and exploring each other’s inner worlds, including thoughts, feelings, and desires․ This level emphasizes mutual understanding and connection, creating a sense of closeness and familiarity that strengthens the bond between partners and lays the groundwork for a resilient relationship․
2․2 Level 2: Turning Toward Instead of Away

Level 2 emphasizes the importance of “turning toward” each other during interactions, fostering emotional responsiveness and connection․ By actively engaging with bids for attention, partners build trust and intimacy․ Ignoring or turning away can lead to feelings of isolation and conflict, while turning toward strengthens the relationship’s foundation, promoting a deeper emotional bond and mutual understanding․
2․3 Level 3: The Positive Perspective
Level 3 focuses on fostering a positive perspective in the relationship by cultivating respect, appreciation, and a supportive outlook․ Couples learn to view each other and their interactions through a positive lens, even during challenges; This level strengthens emotional bonds, encourages mutual support, and creates a resilient foundation for navigating conflicts and life’s difficulties together․
2․4 Level 4: Managing Conflict Effectively
Level 4 emphasizes conflict resolution as an opportunity for growth․ Couples learn strategies like self-soothing, de-escalation, and repair to navigate disagreements constructively․ This level fosters mutual respect, understanding, and effective problem-solving, ensuring conflicts strengthen rather than harm the relationship․ By mastering these skills, partners build resilience and deepen their emotional connection․
The Gottman Method and Its Applications
The Gottman Method, based on the Sound Relationship House Theory, offers evidence-based approaches to improve relationships through couples therapy, practical exercises, and tools like Love Maps and Turning Toward Practices․
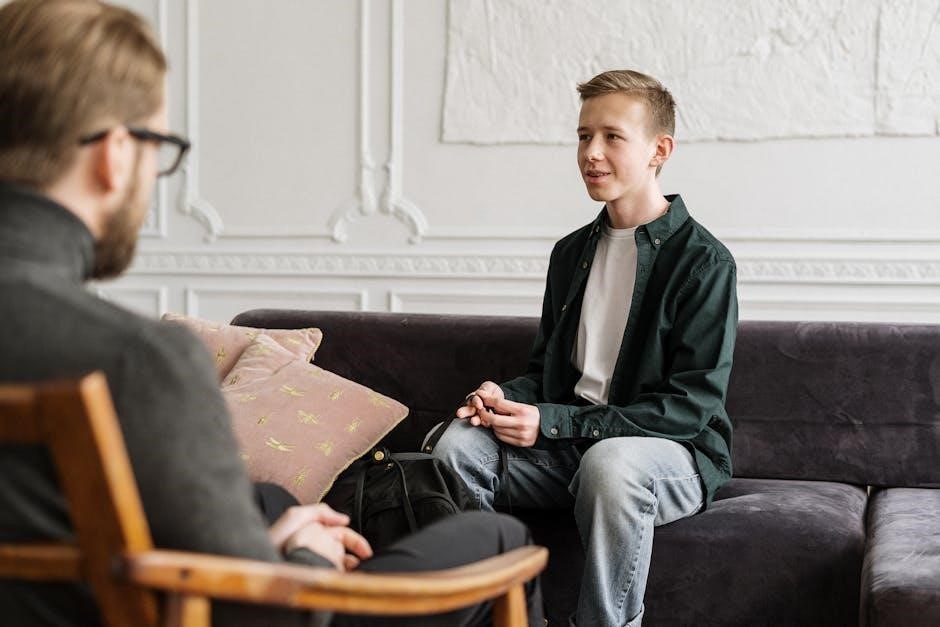
3․1 Gottman Couples Therapy (GCT)
Gottman Couples Therapy (GCT) is an evidence-based approach developed from decades of research on relationship dynamics․ It focuses on identifying patterns in successful relationships, offering practical strategies to enhance communication, intimacy, and conflict resolution․ Techniques like Love Maps and Turning Toward Practices help couples strengthen their connection and build a resilient partnership․ GCT aims to empower couples with tools for lasting relationship satisfaction․
3․2 Practical Exercises and Tools for Couples
Practical exercises like Love Maps and Turning Toward Practices help couples strengthen their emotional connection․ Tools such as the Aftermath of a Fight exercise promote healing and understanding․ These exercises, rooted in Gottman research, provide actionable steps to improve communication, build intimacy, and foster a culture of respect and appreciation in relationships․

Key Components of a Healthy Relationship

A healthy relationship is built on trust, commitment, and emotional intelligence․ These components ensure mutual respect, understanding, and a strong foundation for lasting partnership and growth․
4․1 The Importance of Trust
Trust is the cornerstone of a healthy relationship, fostering emotional safety and reliability․ It is built through consistent actions, transparency, and loyalty, allowing partners to feel secure and supported in their connection․ Without trust, relationships struggle to thrive, making it essential to nurture and maintain this foundation․
4․2 Commitment and Loyalty
Commitment and loyalty are vital for a stable and fulfilling relationship․ They involve dedication to the partnership beyond fleeting emotions, ensuring both partners prioritize mutual growth and well-being․ Loyalty fosters a sense of security, allowing trust to deepen and the relationship to flourish․ The Gottmans emphasize these principles as foundational elements of the Sound Relationship House, essential for long-term connection and satisfaction․
4․3 Emotional Intelligence and Empathy
Emotional intelligence and empathy are crucial for understanding and responding to your partner’s feelings․ These qualities foster deeper connection, effective communication, and compassionate conflict resolution․ By tuning into each other’s emotional needs, partners can build a supportive environment, strengthen trust, and navigate challenges with mutual understanding․ Gottman’s research highlights these traits as essential for nurturing a resilient and fulfilling relationship․
Conflict Resolution Strategies
Conflict resolution involves strategies to address disagreements constructively, fostering understanding and solutions․ Approaches include staying calm, active listening, and collaborative problem-solving to strengthen the relationship․
5․1 Understanding Conflict as an Opportunity for Growth
Conflict isn’t inherently negative; it can strengthen relationships when approached constructively․ Couples can use disagreements to better understand each other, fostering empathy and collaboration․ By addressing issues with openness and respect, partners can deepen emotional intimacy and build a stronger connection, turning challenges into opportunities for mutual growth and understanding․
5․2 Effective Communication Techniques
Effective communication involves active listening, emotional regulation, and expressing needs clearly․ Couples should practice turning toward each other, using “I” statements to avoid blame, and paraphrasing to ensure understanding․ These techniques foster empathy, reduce defensiveness, and promote constructive dialogue, helping partners navigate conflicts with mutual respect and understanding․

Building and Maintaining Intimacy
Intimacy is fostered through fondness, admiration, and affectionate touch․ Couples should regularly express appreciation, share personal thoughts, and maintain emotional closeness to strengthen their bond and connection․
6․1 The Role of Fondness and Admiration
Fondness and admiration are crucial for intimacy․ They involve expressing genuine appreciation, acknowledging each other’s strengths, and fostering a positive emotional connection․ Regularly sharing admiration helps maintain affection and strengthens the relationship, creating a foundation for trust and mutual respect․ This practice encourages partners to see each other in a positive light, nurturing emotional closeness and connection․
6․2 Creating Shared Meaning
Creating shared meaning involves building a sense of purpose and connection by aligning life goals, values, and aspirations․ It fosters unity by understanding each other’s beliefs and supporting mutual dreams․ Shared rituals and traditions strengthen this bond, helping couples navigate life’s challenges together while maintaining emotional closeness and a sense of teamwork, which is vital for a fulfilling relationship․
The Role of Shared Meaning in Relationships
Shared meaning in relationships fosters unity by aligning goals, values, and beliefs․ It strengthens bonds through mutual understanding, creating a sense of purpose and teamwork, enriching the relationship․
7․1 Aligning Life Dreams and Aspirations
Aligning life dreams and aspirations fosters unity and strength in relationships․ By understanding and supporting each other’s goals, partners create shared meaning and a culture of respect․ This alignment helps build a life together, fostering mutual growth and overcoming challenges as a team, which is a cornerstone of the Sound Relationship House Theory․
7․2 Building a Culture of Respect and Appreciation
Building a culture of respect and appreciation involves fostering a relationship where both partners feel valued and admired․ Daily expressions of gratitude, admiration, and fondness strengthen emotional bonds․ This foundation encourages mutual support and understanding, creating an environment where both individuals thrive․ Regular practices, such as sharing appreciation, help maintain this culture, ensuring a resilient and harmonious relationship․
Healing and Repair in Relationships
Healing and repair in relationships involve addressing conflicts and rebuilding trust․ Understanding each other’s perspectives and using tools like the “Aftermath of a Fight” questionnaire can foster growth and strengthen bonds․
8․1 The Process of Healing After Conflict
Healing after conflict involves understanding each other’s perspectives, expressing empathy, and actively working to repair emotional wounds․ Tools like the “Aftermath of a Fight” questionnaire help assess interactions and foster growth․ Open communication and mutual effort are key to mending the relationship and rebuilding trust, ensuring conflicts become opportunities for deeper connection and understanding․
8․2 Seeking Professional Help When Needed
Seeking professional help is crucial when conflicts persist or emotional wounds deepen․ The Gottman Institute offers workshops, therapy sessions, and online resources to guide couples in healing․ Tools like the Gottman Relationship Checkup provide personalized insights, while trained therapists use evidence-based methods to help couples navigate challenges and strengthen their connection․

Practical Applications and Tools

Practical tools like Love Maps and Turning Toward Practices help couples strengthen their relationship by fostering connection and understanding, based on Gottman’s research․
9․1 Love Maps Exercise
The Love Maps Exercise involves creating detailed mental maps of your partner’s life, including their thoughts, feelings, and experiences․ By regularly updating these maps through open conversations, couples foster intimacy and connection, ensuring they remain attuned to each other’s worlds․
9․2 Turning Toward Practices
Turning Toward Practices involve actively engaging with your partner by showing interest, empathy, and support in daily interactions․ These small, consistent efforts foster connection and intimacy, helping couples build a strong foundation of trust and understanding․ Examples include expressing admiration, sharing fond memories, and offering emotional support, which collectively strengthen the relationship over time․

The Role of Commitment in Relationships
Commitment in relationships involves loyalty, dedication, and making sacrifices, ensuring trust and stability grow through consistent choices and actions prioritizing the partner and fostering a secure future․
10․1 Making Sacrifices for the Relationship
Making sacrifices for the relationship demonstrates commitment and prioritizes the partner’s needs, fostering trust and stability․ These acts, big or small, show dedication to the relationship’s well-being and contribute to building a resilient, long-term connection, aligning with the principles of the Sound Relationship House Theory․
10․2 Staying Loyal and Dedicated
Staying loyal and dedicated involves consistent actions that reinforce trust and commitment․ Loyalty fosters a secure environment, allowing partners to rely on each other․ This dedication strengthens the relationship’s foundation, promoting resilience and stability, and aligns with the Gottmans’ emphasis on building a lasting, fulfilling partnership․
The Gottman Institute and Its Resources
The Gottman Institute offers workshops, therapy sessions, and self-help materials to help couples build stronger relationships based on the Sound Relationship House Theory principles․
11․1 Workshops and Therapy Sessions
The Gottman Institute provides workshops and therapy sessions based on the Sound Relationship House Theory; These sessions offer couples evidence-based strategies to strengthen their relationship․ Workshops include practical exercises to enhance communication, intimacy, and conflict resolution․ Trained therapists guide couples through interactive activities designed to foster understanding, empathy, and connection․ These resources empower couples to apply Gottman principles effectively in their daily lives․

11․2 Self-Help Materials and Online Resources
The Gottman Institute offers a variety of self-help materials, including PDF guides, workbooks, and online courses․ These resources provide couples with practical tools to improve communication, build intimacy, and manage conflict․ They include exercises like Love Maps and turning toward practices, helping couples apply Gottman principles independently․ These materials are evidence-based and designed to foster lasting relationship growth and connection․
The Sound Relationship House Theory offers a comprehensive framework for fostering healthy, lasting connections․ By applying Gottman’s principles, couples can build stronger relationships and create meaningful, enduring bonds․
12․1 Recap of Key Points
The Sound Relationship House Theory outlines four foundational levels for a healthy relationship: friendship, turning toward, positive perspective, and conflict management․ Developed by John and Julie Gottman, it emphasizes trust, commitment, and emotional intelligence; Practical tools like love maps and effective communication strategies help couples build resilience․ This framework, backed by decades of research, offers a clear path to fostering enduring connections and resolving conflicts constructively․
12․2 Encouragement to Apply Gottman Principles
Embrace the Gottman Method to foster a deeper, more fulfilling connection․ By prioritizing trust, commitment, and emotional intelligence, you can navigate challenges with resilience․ Regularly practice love maps, turning toward, and effective communication to strengthen your bond․ Seek workshops or resources from the Gottman Institute for guidance, empowering you to build a lasting, joyful relationship․